

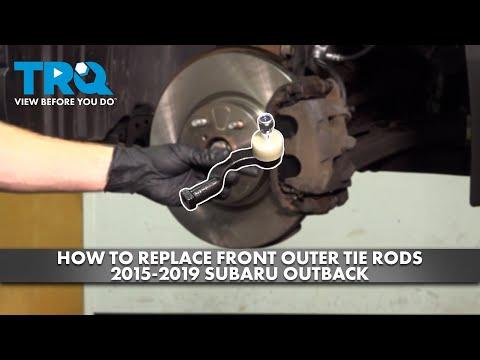







How to Replace a Front Outer Tie Rod End on a 2019-2024 Subaru Ascent
Step-by-step instructions with required tools, torque specs, safety tips, and alignment guidance for 2019, 2020, 2021, 2022, 2023, 2024
How to Replace a Front Outer Tie Rod End on a 2019-2024 Subaru Ascent
Step-by-step instructions with required tools, torque specs, safety tips, and alignment guidance for 2019, 2020, 2021, 2022, 2023, 2024


Assumption: These instructions cover one front outer tie rod end. An inner tie rod replacement is a different, more advanced repair.
🔧 Ascent - Front Outer Tie Rod End Replacement
Replace the outer tie rod end if its joint has looseness, its dust boot is damaged, or a technician has confirmed wear. The job is manageable for a careful beginner, but the steering alignment must be checked immediately afterward.
Difficulty Level: Intermediate | Estimated Time: 1-2 hours per side, plus alignment
⚠️ Safety & Precautions
- ⚠️ A loose or incorrectly installed tie rod can cause loss of steering control.
- ⚠️ Support your Ascent with jack stands. Never work under a vehicle supported only by a jack.
- ⚠️ Do not strike the new joint, threaded stud, or steering-knuckle arm with a hammer.
- ⚠️ Do not drive normally until the steering feels secure and a wheel alignment has been completed.
- ⚠️ Battery disconnection is not required for this repair.
🔧 Required Tools
You'll need the following tools for this repair:
- Wheel chocks
- Floor jack rated 2-ton minimum
- Jack stands rated 2-ton minimum
- 1/2-inch breaker bar
- 1/2-inch drive torque wrench rated to 150 N·m
- 19mm wheel socket
- Metric socket set from 12mm to 22mm
- Metric combination wrench set from 12mm to 24mm
- 3/8-inch drive ratchet
- Needle-nose pliers
- Tie rod end puller (specialty)
- Penetrating oil
- Wire brush
- Paint marker
- Tape measure marked in millimeters
- Safety glasses
- Mechanic gloves
🔩 Required Parts
HowToo sells all the parts you need for this repair:
- Front outer tie rod end matched to the Ascent - Qty: 1 per side
- New retaining nut supplied with the tie rod end - Qty: 1 per side
- New cotter pin if the replacement uses a castle nut - Qty: 1 per side
The parts sidebar also contains inner tie rods. Do not substitute a part labeled Front Inner for this outer-joint procedure.
📋 Before You Begin
- Park your Ascent on firm, level ground. Center the steering wheel, select Park, and apply the parking brake.
- Confirm which side has the worn joint. Check both sides because steering components often wear at similar rates.
- Compare the new and old parts before removing anything. The stud taper, threaded length, bend, and overall dimensions must match.
- Plan for a four-wheel alignment immediately after the repair. Counting turns only keeps the setting close.
- No infotainment, scan-tool, electronic steering, or battery procedures are required.
🔨 Step-by-Step Instructions
Follow these steps in order:
Step 1: Loosen the Wheel Nuts
- Place the wheel chocks behind both rear wheels.
- Use the 19mm wheel socket and 1/2-inch breaker bar to loosen the five front wheel nuts about one-quarter turn.
- Do not remove the wheel nuts while the tire is supporting the vehicle.
Step 2: Raise and Support the Front Corner
- Use the floor jack at the approved front lifting point.
- Position a jack stand beneath the reinforced side support point.
- Lower the vehicle onto the stand, then gently test that it is stable.
- Remove the wheel nuts and wheel using the 19mm wheel socket.
Step 3: Record the Existing Tie Rod Position
- Use the wire brush to clean the outer tie rod threads and lock nut.
- Apply a small amount of penetrating oil to the lock-nut threads.
- Use the paint marker to mark the lock nut and threaded inner rod.
- Use the tape measure to record the distance from a fixed point on the inner rod to the center of the outer joint.
- Count every full and partial turn when the old end is removed. A paint mark is cheap alignment insurance.
Step 4: Loosen the Tie Rod Lock Nut
- Use the correctly fitting wrench from the metric combination wrench set to hold the outer tie rod end.
- Use a second correctly fitting metric combination wrench to loosen the lock nut approximately one-quarter turn.
- Do not move the lock nut farther than necessary. Its position provides a reference for installing the new part.
Step 5: Remove the Stud Retainer
- If the joint uses a castle nut, straighten and remove its cotter pin with the needle-nose pliers. Discard the pin.
- Use the correctly fitting socket from the metric socket set and the 3/8-inch ratchet to loosen the stud nut.
- Leave the nut threaded on by two or three turns while separating the joint. This prevents the joint from releasing suddenly.
Step 6: Separate the Joint from the Knuckle
- Fit the tie rod end puller around the steering-knuckle arm and tie rod stud.
- Tighten the puller slowly with the correctly fitting socket from the metric socket set until the tapered stud releases.
- Remove the puller, then remove the retaining nut and lift the stud out of the knuckle.
- Do not use a pickle fork if the old part may be reused. A pickle fork normally destroys the dust boot.
Step 7: Remove the Old Outer Tie Rod End
- Turn the outer tie rod end counterclockwise by hand while counting the exact number of turns.
- Include partial turns in your count, such as 17½ turns.
- Keep the lock nut near its marked position.
- Compare the removed part with the replacement. Stop if the length, threads, stud, or bend differs.
Step 8: Install the New Outer Tie Rod End
- Thread the new tie rod end onto the inner rod using the same number of turns recorded during removal.
- Check the measurement with the tape measure and align it as closely as possible with the original measurement.
- Point the joint stud toward the steering knuckle without twisting or pinching its dust boot.
Step 9: Connect the New Joint
- Insert the tapered stud fully into the steering-knuckle arm.
- Install the new nut supplied with the replacement part.
- Use the correctly fitting socket from the metric socket set and the torque wrench.
- For an original-style castle nut, torque to 34 N·m (25 ft-lbs), then tighten only enough to align the next cotter-pin opening. Do not loosen the nut to align it. go-parts.com
- Install a new cotter pin with the needle-nose pliers, then bend both legs securely around the nut.
- If the replacement uses a nylon locking nut instead, follow the torque specification supplied by that part manufacturer. Do not drill it or add a cotter pin.
Step 10: Secure the Adjustment Lock Nut
- Hold the new outer end with one correctly fitting metric combination wrench.
- Tighten the adjustment lock nut against it with a second correctly fitting metric combination wrench.
- Torque to 85 N·m (63 ft-lbs) when using the original Subaru-style threaded arrangement. Subaru service information for comparable steering linkage specifies this lock-nut value. scribd.com
- Make certain the joint remains correctly oriented and its boot is not twisted.
Step 11: Reinstall the Wheel
- Install the wheel and hand-thread all five wheel nuts.
- Snug the nuts in a star pattern using the 19mm wheel socket and 3/8-inch ratchet.
- Raise the vehicle slightly with the floor jack, remove the stand, and lower the tire to the ground.
- Use the 19mm wheel socket and torque wrench to tighten the wheel nuts in a star pattern to 120 N·m (89 ft-lbs). go-parts.com
✅ After Repair
- ✅ Start the engine and slowly turn the steering wheel from side to side. Listen for binding, knocking, or rubbing.
- ✅ Verify the new dust boot is seated and the retaining hardware has not moved.
- ✅ Drive only a short distance at low speed if the steering feels normal.
- ✅ Stop immediately if the steering wheel is badly off-center, the vehicle pulls sharply, or you hear clunking.
- ✅ Have a professional four-wheel alignment performed as soon as possible. The technician must set front toe, which is the direction each tire points relative to the vehicle centerline.
- ✅ Recheck the wheel-nut torque after approximately 80-160 km.
💰 DIY vs Shop Cost
Shop Cost: Approximately ₹12,000-₹30,000 including the tie rod end, labor, and alignment
DIY Cost: Approximately ₹3,000-₹10,000 for the part, plus alignment
You Save: Approximately ₹6,000-₹15,000 by doing the mechanical work yourself!
Local labor and imported Subaru parts pricing vary considerably. A workshop normally needs approximately 1-2 hours, plus alignment time.
🎯 Ready to get started?
HowToo makes it easy: same-day/2-day shipping on every part, plus all the tools and specialty tools you need! Check out the parts and tools sections below to add everything to your cart.