

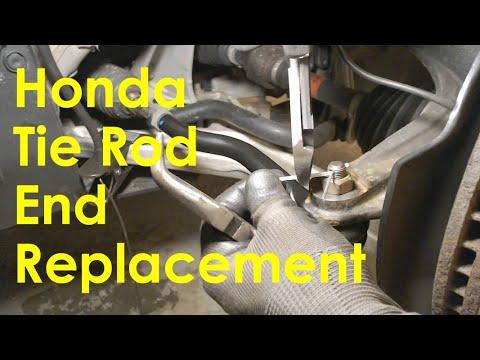







How to Replace a Front Outer Tie Rod End on a 2019-2022 Honda Insight
Step-by-step instructions with required tools, torque specs, safety tips, and alignment guidance for 2019, 2020, 2021, 2022
How to Replace a Front Outer Tie Rod End on a 2019-2022 Honda Insight
Step-by-step instructions with required tools, torque specs, safety tips, and alignment guidance for 2019, 2020, 2021, 2022


🔧 Insight - Outer Tie Rod End Replacement
This is a manageable repair, but steering parts are safety-critical. Replace the worn outer tie rod end, match the old adjustment closely, then have a professional wheel alignment performed immediately.
Assumption: These instructions cover one front outer tie rod end. An inner tie rod requires a different procedure and specialty socket.
Difficulty Level: Intermediate | Estimated Time: 1-2 hours
⚠️ Safety & Precautions
- ⚠️ Support your Insight with jack stands. Never work under a vehicle supported only by a jack.
- ⚠️ Do not drive normally before alignment. Incorrect toe can cause unstable steering and rapid tire wear.
- ⚠️ Do not hammer the threaded stud or strike the aluminum steering knuckle directly.
- ⚠️ Keep tools away from orange cables and connectors. They belong to the high-voltage hybrid system.
- ⚠️ Do not switch the ignition on while working near moving steering components.
- ⚠️ Battery disconnection is not normally required for an outer tie rod end replacement.
🔧 Required Tools
You'll need the following tools for this repair:
- Hydraulic floor jack rated 2-ton minimum
- Jack stands rated 2-ton minimum
- Wheel chocks
- 19mm lug-nut socket
- 17mm deep socket
- 19mm combination wrench
- Adjustable wrench with 30mm capacity
- 3/8-inch drive ratchet
- 1/2-inch drive breaker bar
- 1/2-inch drive torque wrench rated 20-150 ft-lbs
- Tie rod end puller (specialty)
- Needle-nose pliers
- Wire brush
- Paint marker
- Tape measure marked in millimeters
- Penetrating oil
- Mechanic gloves
- Safety glasses
🔩 Required Parts
HowToo sells all the parts you need for this repair:
- Vehicle-specific front outer tie rod end - Qty: 1 per affected side
- New tie rod end retaining nut - Qty: 1
- New cotter pin - Qty: 1
Left and right outer ends are side-specific. Use the matching position shown in the parts list.
📋 Before You Begin
- Park on firm, level ground with the transmission in Park and the parking brake applied.
- Center the steering wheel and keep it from being turned unnecessarily.
- Chock both rear wheels securely.
- Spray penetrating oil on the stud nut, jam nut, and exposed threads. Allow several minutes to soak.
- Photograph the old tie rod and measure from the jam nut to a fixed point on the old end.
- Mark the threads and count every complete turn during removal.
- Book a four-wheel alignment. Counting turns only provides a temporary starting position.
🔨 Step-by-Step Instructions
Follow these steps in order:
Step 1: Loosen the Wheel Nuts
- Use the 19mm lug-nut socket and 1/2-inch breaker bar to loosen each lug nut about one-quarter turn.
- Do not remove the nuts while the tire is still carrying the vehicle's weight.
Step 2: Raise and Support the Front Corner
- Use the hydraulic floor jack at the approved front jacking point.
- Place a jack stand beneath the reinforced side support point.
- Lower the vehicle onto the stand and gently shake the body to verify stability.
- If it moves, reset the stand.
Step 3: Remove the Wheel
- Use the 19mm lug-nut socket and ratchet to remove the loosened lug nuts.
- Remove the wheel and slide it beneath the rocker area as secondary protection.
Step 4: Record the Existing Adjustment
- Use the wire brush to clean the exposed inner tie rod threads.
- Use the paint marker to mark the jam nut and tie rod threads.
- Use the tape measure to record the installed length.
- The jam nut is the nut that locks the outer end against the threaded inner tie rod.
Step 5: Break the Jam Nut Loose
- Use the 19mm combination wrench on the jam nut.
- Hold the outer tie rod end with the adjustable wrench if it tries to rotate.
- Turn the jam nut only enough to break it loose. Do not move it farther along the threads yet.
- The old nut position is your alignment reference.
Step 6: Remove the Stud Retainer
- Use needle-nose pliers to straighten and remove the cotter pin, if fitted.
- Discard the cotter pin. Never straighten and reuse it.
- Use the correctly fitting deep socket, commonly 17mm, to remove the stud nut.
- Confirm the socket fits fully before applying force because replacement hardware can use a different size.
Step 7: Separate the Tie Rod End
- Position the tie rod end puller over the steering-knuckle arm and stud.
- Tighten the puller slowly with the appropriate ratchet until the tapered stud releases.
- Keep hands away from the joint because it can release suddenly.
- Do not use a pickle fork if you intend to preserve the old dust boot.
Step 8: Remove the Old Outer End
- Leave the jam nut in its recorded position.
- Turn the old outer tie rod end counterclockwise by hand.
- Count and record every full and partial turn until it comes off.
- Compare the old and new ends. The thread, stud taper, bend, and overall length must match.
Step 9: Install the New Outer End
- Thread the new end onto the inner tie rod using exactly the recorded number of turns.
- Stop when it reaches the jam nut and closely matches the recorded measurement.
- Do not force the threads. The end should turn smoothly by hand.
- Keep the inner tie rod boot straight. A twisted boot can tear or interfere with steering movement.
Step 10: Attach the Stud to the Knuckle
- Insert the new tapered stud fully into the steering knuckle.
- Install the supplied new nut by hand to avoid cross-threading.
- Use the correctly fitting socket and torque wrench to tighten the outer tie rod end nut to 55 Nm (41 ft-lbs).
- If it uses a castle nut, continue tightening only enough to align the next slot with the cotter-pin hole. Never loosen the nut to align it.
- Install the new cotter pin with needle-nose pliers and bend its ends securely.
Step 11: Tighten the Jam Nut
- Hold the new outer tie rod end with the adjustable wrench so the joint and boot do not twist.
- Use the 19mm combination wrench to tighten the jam nut firmly against the outer end.
- If your replacement instructions provide a torque value, use that supplied specification. A typical service value for this application is approximately 52 Nm (38 ft-lbs).
- Recheck that your paint marks and recorded measurement remain closely aligned.
Step 12: Reinstall the Wheel
- Install the wheel and start all five lug nuts by hand.
- Use the 19mm lug-nut socket to snug them in a crisscross pattern.
- Use the hydraulic floor jack to raise the vehicle, remove the jack stand, and lower the tire to the ground.
- Use the torque wrench and 19mm socket to tighten the lug nuts in a crisscross pattern to 108 Nm (80 ft-lbs).
✅ After Repair
- Turn the steering slowly from side to side and check that the tie rod boot does not twist or contact anything.
- Verify that the cotter pin is installed and the jam nut is seated against the new tie rod end.
- Drive only a short distance at low speed to an alignment facility.
- Stop immediately if the steering wheel is badly off-center, the vehicle darts, or you hear clunking.
- Have the front toe measured and adjusted with a four-wheel alignment.
- Recheck the wheel-lug torque after approximately 80-100 km.
Don't skip the alignment. Eyeballing toe is how a fresh pair of tires becomes an expensive lesson.
💰 DIY vs Shop Cost
Shop Cost: $180-$350 per side, including parts and labor but often excluding alignment
DIY Cost: $20-$55 per side, plus approximately $70-$150 for alignment
You Save: Approximately $90-$180 by doing it yourself!
Local labor rates vary. This repair takes a shop approximately 0.7-1.2 hours per side.
🎯 Ready to get started?
HowToo makes it easy: same-day/2-day shipping on every part, plus all the tools and specialty tools you need! Check out the parts and tools sections below to add everything to your cart.