

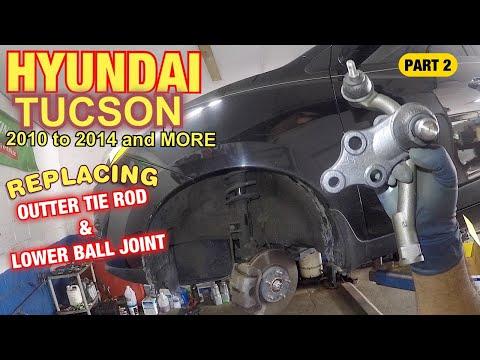





How to Replace a Front Outer Tie Rod End on a 2010-2015 Hyundai Tucson
Step-by-step instructions with required tools, torque specs, safety tips, and alignment advice for 2010, 2011, 2012, 2013, 2014, 2015
How to Replace a Front Outer Tie Rod End on a 2010-2015 Hyundai Tucson
Step-by-step instructions with required tools, torque specs, safety tips, and alignment advice for 2010, 2011, 2012, 2013, 2014, 2015


🔧 Tucson - Outer Tie Rod End Replacement
This procedure replaces one front outer tie rod end, the steering joint connecting the tie rod to the steering knuckle. A worn joint can cause steering looseness, clunking, uneven tire wear, or failed alignment.
Assumption: “Tie rod end” means the front outer tie rod end, not the inner tie rod.
Difficulty Level: Intermediate | Estimated Time: 1-1.5 hours per side
⚠️ Safety & Precautions
- ⚠️ Support your Tucson with a jack stand; never work beneath a vehicle supported only by a jack.
- 🧤 Wear safety glasses and mechanic’s gloves because rust and metal debris may fall during removal.
- 🛞 Do not move the steering wheel after disconnecting the tie rod end.
- 📏 Count the removal turns carefully, but understand that this only preserves an approximate alignment.
- 🔧 Arrange a professional four-wheel alignment immediately after replacement.
- 🔋 Battery disconnection is not required.
- 🚫 Do not apply grease or anti-seize to tapered studs or specified dry fastener threads.
🔧 Required Tools
You'll need the following tools for this repair:
- 21mm deep socket
- 17mm deep socket
- 22mm open-end wrench
- 17mm open-end wrench
- 1/2-inch drive breaker bar
- 3/8-inch drive ratchet
- 10-80 Nm torque wrench
- 40-150 Nm torque wrench
- Outer tie rod end puller (specialty)
- Needle-nose pliers
- Wire brush
- Paint marker
- Tape measure marked in millimeters
- Floor jack rated 2-ton minimum
- Jack stands rated 2-ton minimum
- Wheel chocks
- Safety glasses
- Mechanic’s gloves
🔩 Required Parts
HowToo sells all the parts you need for this repair:
- Front outer tie rod end - Qty: 1 per side
- Outer tie rod end prevailing-torque nut or castle nut - Qty: 1
- Cotter pin - Qty: 1 if the replacement uses a castle nut
- Penetrating oil - Qty: 1 can
Replacing both sides is recommended when both joints have similar mileage or looseness, but it is not mandatory if the opposite joint passes inspection.
📋 Before You Begin
- Park your Tucson on firm, level ground. Shift into Park and apply the parking brake.
- Keep the front wheels pointed straight ahead and place wheel chocks behind both rear tires.
- Compare the replacement tie rod end with the removed part before installation. The stud, thread direction, and overall shape must match.
- No infotainment setting, scan-tool command, steering calibration, or battery disconnect is required.
- Plan to drive directly and cautiously to an alignment shop after completing the repair.
🔨 Step-by-Step Instructions
Follow these steps in order:
Step 1: Loosen the Wheel Nuts
- Use the 21mm deep socket and 1/2-inch drive breaker bar to loosen the five wheel nuts approximately one-quarter turn.
- Do not remove the nuts while the tire is supporting the vehicle.
Step 2: Raise and Support the Front Corner
- Use the floor jack rated 2-ton minimum under the specified front lifting point.
- Position a jack stand rated 2-ton minimum beneath the nearby reinforced support point.
- Lower the vehicle onto the stand, then gently verify that it is stable.
Step 3: Remove the Front Wheel
- Use the 21mm deep socket and 3/8-inch drive ratchet to remove the five wheel nuts.
- Remove the wheel and place it flat away from your work area.
Step 4: Record the Existing Tie Rod Position
- Use the wire brush to clean the exposed tie rod threads and jam-nut area.
- Apply penetrating oil to the jam nut and allow several minutes for it to soak.
- Use the paint marker to mark the relationship between the tie rod, jam nut, and outer tie rod end.
- Use the tape measure marked in millimeters to record the distance from a fixed point on the inner tie rod to the center of the outer joint.
- The jam nut is the locking nut that prevents the outer tie rod end from rotating.
Step 5: Loosen the Jam Nut
- Hold the outer tie rod end with the 17mm open-end wrench where flats are provided.
- Use the 22mm open-end wrench to loosen the jam nut approximately one-quarter turn.
- Do not move the jam nut farther than necessary because its position is your installation reference.
- Mark everything before turning the nut.
Step 6: Remove the Stud Nut
- If fitted, use the needle-nose pliers to straighten and remove the cotter pin. A cotter pin is the small locking pin passing through the stud and nut.
- Discard the removed cotter pin; never reuse it.
- Use the 17mm deep socket and 3/8-inch drive ratchet to remove the tie rod end stud nut from the steering knuckle.
Step 7: Separate the Tie Rod End
- Install the outer tie rod end puller over the steering-knuckle arm and stud.
- Tighten the puller using the appropriate 17mm deep socket and 3/8-inch drive ratchet until the tapered stud releases.
- A puller applies controlled force without damaging the steering knuckle or rubber joint boot.
- Do not strike the threaded stud or use a pickle fork if the joint may need inspection or return.
Step 8: Remove the Old Tie Rod End
- Rotate the outer tie rod end counterclockwise by hand while counting every complete turn and any partial turn.
- Write down the turn count immediately.
- Leave the jam nut near its marked position.
Step 9: Install the New Tie Rod End
- Thread the replacement tie rod end onto the inner tie rod by hand using exactly the recorded number of turns.
- Use the tape measure marked in millimeters and the paint marks to place it as close as possible to the original position.
- If it will not thread on easily by hand, stop and check the thread direction and part match. Do not force it with a wrench.
Step 10: Attach the Stud to the Steering Knuckle
- Insert the new tie rod end stud fully into the steering-knuckle arm.
- Install the new supplied stud nut by hand.
- Use the 17mm deep socket and 10-80 Nm torque wrench to tighten the factory-style nut to 24-34 Nm (18-25 ft-lbs).
- If the replacement manufacturer specifies a different torque for its supplied hardware, follow that specification.
- For a castle nut, tighten only enough beyond the minimum specification to align the next cotter-pin opening. Never loosen the nut to align it.
- Use the needle-nose pliers to install and bend a new cotter pin securely around the nut.
Step 11: Tighten the Jam Nut
- Hold the tie rod end with the 17mm open-end wrench so it cannot rotate.
- Use the 22mm open-end wrench and 10-80 Nm torque wrench with a suitable wrench adapter to tighten the jam nut to 49-59 Nm (36-44 ft-lbs).
- Keep any torque-wrench adapter at 90 degrees to the wrench so it does not change the effective torque.
- Verify that the joint boot is not twisted, torn, or pinched.
Step 12: Reinstall the Wheel
- Install the wheel and start all five wheel nuts by hand.
- Use the 21mm deep socket and 3/8-inch drive ratchet to snug the nuts in a star pattern.
- Use the floor jack rated 2-ton minimum to raise the vehicle slightly, remove the jack stand, and lower the tire to the ground.
Step 13: Torque the Wheel Nuts
- Use the 21mm deep socket and 40-150 Nm torque wrench to tighten the wheel nuts in a star pattern.
- Torque to 88-108 Nm (65-80 ft-lbs).
✅ After Repair
- Turn the steering wheel slowly from lock to lock while parked. Check for binding, unusual sounds, or contact with nearby components.
- Verify that the steering wheel remains reasonably centered and both front wheels appear straight.
- Test-drive at walking speed in a safe area before entering normal traffic.
- Stop immediately if the steering feels loose, the vehicle pulls sharply, or the steering wheel is far off-center.
- Have a professional four-wheel alignment performed immediately. Counting turns is not an alignment.
- Ask the alignment technician to inspect the opposite outer tie rod end, inner tie rods, ball joints, and control-arm bushings.
- Recheck wheel-nut torque after approximately 50 miles.
💰 DIY vs Shop Cost
Shop Cost: $220-$420 (part, labor, and alignment)
DIY Cost: $35-$100 (part only)
You Save: $120-$235 after budgeting separately for a professional alignment!
Shop labor rates vary but typically run $100-$150/hour. This repair takes a shop approximately 0.7-1.0 hour, plus alignment time.
🎯 Ready to get started?
HowToo makes it easy: same-day/2-day shipping on every part, plus all the tools and specialty tools you need! Check out the parts and tools sections below to add everything to your cart.