

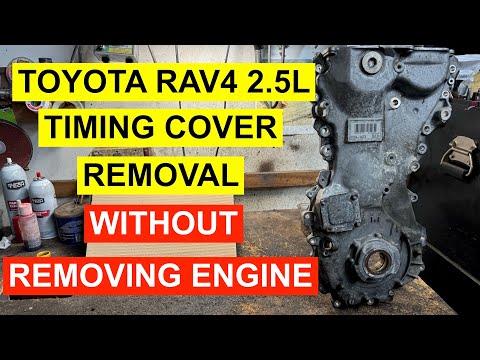



How to Fix Timing Chain Issues on a 2019 Toyota RAV4 2.5L (Engine: Inline 4 2.5L)
Step-by-step diagnosis and advanced service guide with tools, parts, and safety tips for 2019
How to Fix Timing Chain Issues on a 2019 Toyota RAV4 2.5L (Engine: Inline 4 2.5L)
Step-by-step diagnosis and advanced service guide with tools, parts, and safety tips for 2019


🔧 RAV4 - Timing Belt Replacement
Your RAV4 does not use a timing belt. The 2.5L gas engine uses an internal timing chain, which is designed to last much longer than a belt and is not a normal maintenance replacement item.
If you are hearing chain rattle, have cam/crank timing codes, or the engine has internal timing faults, this becomes an advanced timing chain service that requires engine support, precise timing alignment, sealant work, and careful torque procedures.
Difficulty Level: Advanced | Estimated Time: 8-12 hours
⚠️ Safety & Precautions
- ⚠️ Do not attempt to replace a timing belt on your RAV4 because there is no timing belt to replace.
- ⚠️ Timing chain work can cause severe engine damage if camshaft or crankshaft timing is set incorrectly.
- ⚠️ Disconnect the negative battery cable before working near the starter, alternator, or engine wiring.
- ⚠️ Support the engine properly before removing any engine mount. An engine support bar holds the engine from above while mounts are removed.
- ⚠️ Allow the engine to cool completely before removing coolant hoses or working near the exhaust side of the engine.
- ⚠️ Keep fingers, tools, and clothing away from rotating pulleys and the serpentine belt area.
🔧 Required Tools
You'll need the following tools for this repair:
- 10mm socket
- 12mm socket
- 14mm socket
- 17mm socket
- 19mm socket
- 22mm socket
- 3/8-inch ratchet
- 1/2-inch breaker bar
- 1/2-inch torque wrench
- 3/8-inch torque wrench
- Serpentine belt tool
- Harmonic balancer puller (specialty)
- Engine support bar (specialty)
- Floor jack (rated 3-ton minimum)
- Jack stands (rated 3-ton minimum)
- Plastic trim clip remover
- Gasket scraper
- Brake cleaner spray
- Drain pan
- Paint marker
- Shop towels
- Nitrile gloves
- Safety glasses
🔩 Required Parts
HowToo sells all the parts you need for this repair:
- Timing chain kit - Qty: 1
- Timing chain tensioner - Qty: 1
- Timing chain guides - Qty: 1 set
- Timing cover sealant - Qty: 1
- Crankshaft front oil seal - Qty: 1
- Valve cover gasket - Qty: 1
- Engine oil - Qty: 5 quarts
- Oil filter - Qty: 1
- Toyota-compatible engine coolant - Qty: As needed
- Serpentine belt - Qty: 1
📋 Before You Begin
- 🚗 Park your RAV4 on level ground, shift to Park, and set the parking brake.
- 🔋 Use a 10mm socket to disconnect the negative battery cable.
- 🧊 Let the engine cool completely before opening the cooling system.
- 🛞 Use a floor jack and jack stands to safely raise and support the front of the vehicle.
- 📌 Take photos before removing hoses, brackets, connectors, and covers. This helps during reassembly.
- 📌 A timing chain is a metal chain inside the engine that keeps the crankshaft and camshafts synchronized.
- 📌 A torque wrench tightens bolts to an exact tightness so parts are not loose or over-tightened.
🔨 Step-by-Step Instructions
Follow these steps in order:
Step 1: Confirm This Is the Correct Repair
- Use a scan tool if available to check for timing-related trouble codes before disassembly.
- Common timing-chain-related codes may include camshaft/crankshaft correlation faults.
- If the issue is only routine maintenance, stop here. Your RAV4 does not have a timing belt replacement interval.
- Do not replace parts without diagnosis.
Step 2: Disconnect Battery and Raise Vehicle
- Use a 10mm socket to loosen the negative battery terminal clamp.
- Move the cable away from the battery post so it cannot spring back.
- Use a floor jack to lift the front of your RAV4 at the proper front jacking point.
- Place jack stands under the approved support points before working underneath.
Step 3: Remove Lower Shields and Right Front Access Panels
- Use a plastic trim clip remover to remove the plastic clips from the lower engine splash shield.
- Use a 10mm socket to remove shield bolts.
- Remove the right front wheel if needed using a 21mm lug socket.
- Remove the right inner fender liner clips with a plastic trim clip remover.
- Torque wheel lug nuts to 103 Nm (76 ft-lbs) during final installation.
Step 4: Drain Fluids as Needed
- Place a drain pan under the engine.
- Use the proper socket to remove the engine oil drain plug if changing oil during the repair.
- Drain coolant only if a coolant hose, water outlet, or cover removal requires it.
- Dispose of used oil and coolant safely according to local rules.
Step 5: Remove the Serpentine Belt
- Use a serpentine belt tool on the belt tensioner to release belt tension.
- Slide the belt off the pulleys while holding the tensioner released.
- Slowly release the tensioner.
- Take a photo of the belt routing before removal.
- Photos save headaches later.
Step 6: Support the Engine
- Install an engine support bar across the upper body support points.
- Attach the support chain or hook to the engine lifting point.
- Apply light upward tension only. Do not lift the vehicle by the engine.
- Use a floor jack with a wood block under the engine only as extra support, not the main support.
Step 7: Remove Engine Mount Components
- Use 14mm and 17mm sockets to remove the right-side engine mount brackets as access requires.
- Label each bolt location because lengths may differ.
- Keep the engine supported the entire time the mount is removed.
- Torque engine mount fasteners to OEM specification during reassembly; verify by bolt location before tightening.
Step 8: Remove Valve Cover and Front Timing Cover Access Items
- Use a 10mm socket to remove ignition coil bolts and brackets that block the valve cover.
- Disconnect electrical connectors by pressing the release tab, not by pulling the wires.
- Use a 10mm socket to remove valve cover bolts.
- Lift the valve cover straight up and remove the old gasket.
- Use shop towels to keep dirt out of the engine.
Step 9: Remove Crankshaft Pulley
- Use a 22mm socket and 1/2-inch breaker bar to loosen the crankshaft pulley bolt.
- Use a harmonic balancer puller to remove the crankshaft pulley if it does not slide off by hand.
- A harmonic balancer puller safely pulls the crank pulley off without prying against the timing cover.
- Do not pry against the aluminum timing cover.
Step 10: Set Engine to Top Dead Center
- Use a 22mm socket on the crankshaft bolt location to rotate the engine clockwise only.
- Align the crankshaft and camshaft timing marks according to the timing marks on the engine components.
- Use a paint marker to mark the chain, cam sprockets, and crank sprocket before removal.
- Top Dead Center means cylinder 1 is at the top of its compression stroke.
- Never rotate backward unless specified.
Step 11: Remove Timing Cover
- Use 10mm, 12mm, and 14mm sockets to remove the timing cover bolts.
- Note bolt locations carefully because bolts can be different lengths.
- Use a gasket scraper carefully at approved pry points only.
- Do not gouge the aluminum sealing surfaces.
- Clean sealing surfaces with brake cleaner spray and shop towels.
Step 12: Remove Chain Tensioner, Guides, and Chain
- Use a 10mm socket to remove the timing chain tensioner bolts.
- Use a 10mm or 12mm socket to remove timing chain guide bolts.
- Remove the chain from the sprockets without rotating the camshafts or crankshaft.
- Keep hands clear of loaded tensioner parts.
- A tensioner keeps the chain tight while the engine runs.
Step 13: Install New Timing Chain Components
- Install the new timing chain guides using the correct socket.
- Install the new timing chain with colored links aligned to the crankshaft and camshaft timing marks.
- Install the new tensioner and release it only after the chain and guides are fully seated.
- Use a torque wrench on guide and tensioner bolts.
- Torque small timing guide and tensioner bolts to OEM specification for the exact bolt position.
- Timing marks must match exactly.
Step 14: Verify Timing by Hand
- Use a 22mm socket to rotate the crankshaft clockwise two full turns by hand.
- Stop immediately if the engine locks or feels like it hits something.
- Return to Top Dead Center and recheck all timing marks.
- If timing marks do not align correctly, remove and reset the chain before continuing.
Step 15: Reseal and Reinstall Timing Cover
- Use a gasket scraper and brake cleaner spray to make the sealing surfaces clean and dry.
- Apply timing cover sealant in the correct bead size and locations.
- Install the timing cover carefully without smearing the sealant.
- Use a 10mm, 12mm, and 14mm socket to install bolts by hand first.
- Use a torque wrench to tighten bolts in stages from the center outward.
- Torque timing cover bolts to OEM specification by bolt size and location.
Step 16: Install Crankshaft Pulley and Front Seal Area
- Install the new front crankshaft oil seal if removed or disturbed.
- Slide the crankshaft pulley into place by hand.
- Use a 22mm socket and torque wrench to tighten the crankshaft pulley bolt.
- Torque crankshaft pulley bolt to OEM specification and angle procedure if required.
Step 17: Reinstall Valve Cover
- Install the new valve cover gasket into the cover groove.
- Use a small amount of specified sealant only at timing cover joint areas if required.
- Set the valve cover in place without pinching the gasket.
- Use a 10mm socket to install bolts by hand first.
- Use a 3/8-inch torque wrench to tighten evenly.
- Torque valve cover bolts to OEM specification.
Step 18: Reinstall Engine Mount, Belt, and Shields
- Use 14mm and 17mm sockets to reinstall engine mount brackets.
- Use a torque wrench to tighten engine mount bolts to specification.
- Use a serpentine belt tool to route and install the serpentine belt.
- Check that the belt ribs sit correctly in every pulley groove.
- Use a 10mm socket and plastic trim clip remover to reinstall shields and liners.
Step 19: Refill Fluids and Reconnect Battery
- Install the oil drain plug and new oil filter if oil was drained.
- Refill engine oil with the correct amount of oil.
- Refill Toyota-compatible coolant if coolant was drained.
- Use a 10mm socket to reconnect the negative battery cable.
Step 20: First Start Check
- Before starting, check that no tools are left in the engine bay.
- Start the engine and listen for abnormal rattling, knocking, or grinding.
- Shut the engine off immediately if it runs rough or makes loud timing noise.
- Check for oil and coolant leaks with a flashlight.
✅ After Repair
- ✅ Let the engine idle until warm while watching for leaks.
- ✅ Recheck engine oil level and coolant level after the engine cools.
- ✅ Clear any stored timing-related codes with a scan tool if repairs were performed correctly.
- ✅ Road test gently for 10-15 minutes and recheck for leaks again.
- ✅ If the check engine light returns, stop driving and scan for codes before continuing.
💰 DIY vs Shop Cost
Shop Cost: $1,800-$3,200 (parts + labor)
DIY Cost: $250-$650 (parts only)
You Save: $1,150-$2,950 by doing it yourself!
Shop labor rates vary but typically run $100-$150/hour. This repair takes a shop approximately 8-12 hours.
🎯 Ready to get started?
HowToo makes it easy: same-day/2-day shipping on every part, plus all the tools and specialty tools you need! Check out the parts and tools sections below to add everything to your cart.