






How to Fix the Front LED Turn Signal on a 2019-2023 Ford F-150 Limited (Trim: Limited)
Diagnose wiring and BCM faults, then replace the sealed LED headlamp assembly safely for 2019, 2020, 2021, 2022, 2023
How to Fix the Front LED Turn Signal on a 2019-2023 Ford F-150 Limited (Trim: Limited)
Diagnose wiring and BCM faults, then replace the sealed LED headlamp assembly safely for 2019, 2020, 2021, 2022, 2023


🔧 F-150 - Front Turn Signal Repair
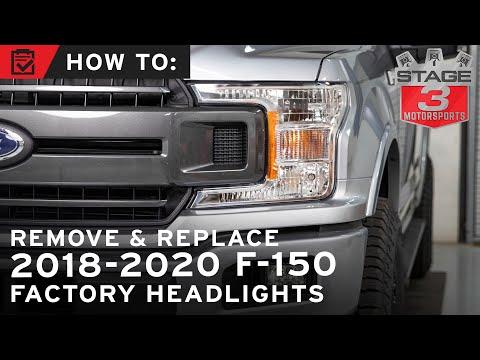
Don’t remove the headlamp looking for a bulb. Your F-150 Limited uses an integrated LED front direction indicator. Ford specifies that this LED isn’t separately serviceable, so a failed signal requires diagnosis and usually replacement of the affected headlamp assembly rather than a bulb. The bulb options shown in the parts sidebar apply to other lamp configurations, not the Limited LED headlamp. fordservicecontent.com)
Difficulty Level: Advanced | Estimated Time: 1.5-3 hours
⚠️ Safety & Precautions
- ⚠️ Switch the exterior lights and ignition completely off.
- ⚠️ Let the headlamp cool before touching its housing or connectors.
- ⚠️ Disconnect the negative battery terminal before unplugging or replacing the headlamp.
- ⚠️ Support the hood securely and keep keys away from the truck.
- ⚠️ Do not open, drill, or cut the sealed LED headlamp housing.
🔧 Required Tools
You'll need the following tools for this repair:
- 10mm socket
- 8mm socket
- 1/4-inch drive ratchet
- 1/4-inch drive 6-inch extension
- Plastic trim-removal tool
- Digital multimeter
- Automotive scan tool with Ford body-module coverage (specialty)
- Torque wrench rated 2-25 Nm
- Nitrile work gloves
- Safety glasses
🔩 Required Parts
HowToo sells all the parts you need for this repair:
- LED headlamp assembly matching the affected side - Qty: 1, only after diagnosis confirms internal failure
- Headlamp retaining clips - Qty: As needed
Do not purchase a 3457-style bulb for this repair. There is no separately replaceable front turn-signal bulb inside the Limited LED headlamp. Sealed LEDs are brilliant until one fails. Then the whole lamp gets invited to the parts counter.
📋 Before You Begin
- Park your F-150 on level ground and set the parking brake.
- Turn the ignition and all exterior lights off.
- Check whether the hazard lights operate on the failed side.
- Inspect the headlamp for water, impact damage, or a loose electrical connector.
- Use the scan tool to check the Body Control Module for lighting-related fault codes before removing parts.
- Disconnect the negative battery cable with the 10mm socket if headlamp removal is necessary.
🔨 Step-by-Step Instructions
Follow these steps in order:
Step 1: Confirm the Failure
- Switch on the hazard lights and observe both front signals from outside the truck.
- Check whether only the front LED is out or whether the rear signal and mirror indicator are also affected.
- If every indicator on one side is dead, diagnose the circuit or Body Control Module before replacing the headlamp.
Step 2: Scan the Lighting System
- Connect the automotive scan tool to the diagnostic connector below the driver-side dashboard.
- Read codes from the Body Control Module, commonly called the BCM.
- Command the affected turn signal on with the scan tool if bidirectional testing is available.
- If the BCM reports an open circuit, inspect the connector and wiring before condemning the LED assembly.
Step 3: Inspect the Headlamp Connector
- Switch the ignition off and remove the key from the work area.
- Use the 10mm socket to disconnect the negative battery terminal.
- Use the plastic trim-removal tool, 8mm socket, and 10mm socket to remove the trim and fasteners blocking access to the affected headlamp.
- Release the headlamp connector lock without pulling on the wires.
- Inspect the terminals for moisture, corrosion, heat damage, or pins pushed backward.
- A green terminal means corrosion, not bad luck.
Step 4: Test the Circuit
- Reconnect the battery temporarily with the 10mm socket while keeping the connector safely positioned.
- Use the digital multimeter and the correct wiring information to verify power and ground at the headlamp connector.
- Do not push oversized meter probes into the terminals because this can spread them and create another fault.
- If power, ground, wiring, and BCM operation are correct but the signal remains dark, the LED headlamp assembly has failed.
Step 5: Remove the Failed Assembly
- Disconnect the negative battery terminal again with the 10mm socket.
- Use the 8mm socket, 10mm socket, ratchet, and extension to remove the remaining headlamp fasteners.
- Support the assembly with both hands and pull it straight forward without prying against painted panels.
- Disconnect the electrical connector and place the headlamp on a padded surface.
- Keep each fastener organized by location because lengths can differ.
Step 6: Install the Replacement Assembly
- Compare the replacement headlamp's connectors, mounting tabs, and LED configuration with the removed unit.
- Connect the electrical plug until its lock clicks into place.
- Position the headlamp carefully and start every bolt by hand.
- Use the torque wrench and tighten fasteners to the specification supplied for the exact headlamp mounting location. Do not guess because plastic mounting tabs crack easily.
- Reinstall the removed trim and clips with the 8mm socket, 10mm socket, and plastic trim-removal tool.
- Reconnect the negative battery terminal with the 10mm socket.
Step 7: Verify Operation and Aim
- Switch on the hazards and confirm that the new front signal flashes evenly.
- Use the scan tool to clear BCM fault codes and run another system scan.
- Test the parking lamps, low beams, high beams, daytime running lamps, and turn signals.
- Check headlamp aim against a level wall and have it professionally aimed if the beam position changed.
✅ After Repair
- ✅ Confirm there is no rapid flashing or turn-signal warning on the instrument panel.
- ✅ Verify that all headlamp functions operate on both sides.
- ✅ Recheck the electrical connector and fasteners after the functional test.
- ✅ Watch for condensation inside the replacement lamp during the next several drives.
- ✅ Retain the old assembly until the repair and part warranty are confirmed.
💰 DIY vs Shop Cost
Shop Cost: $1,300-$2,700 (diagnosis, LED headlamp assembly, and labor)
DIY Cost: $900-$2,200 (assembly and supplies)
You Save: $300-$600 by doing it yourself!
Shop labor rates vary by location. This repair usually takes a shop approximately 1.5-2.5 hours, including diagnosis and lamp aiming.
🎯 Ready to get started?
HowToo makes it easy: same-day/2-day shipping on every part, plus all the tools and specialty tools you need! Check out the parts and tools sections below to add everything to your cart.