

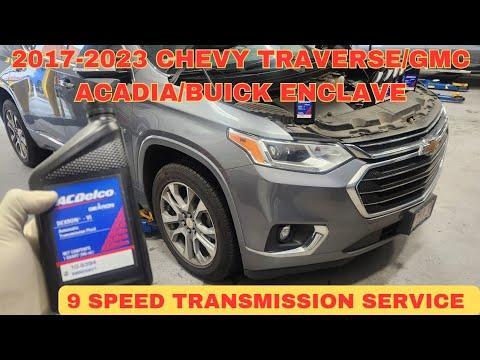






How to Change Transmission Fluid on a 2019 Chevrolet Traverse
Step-by-step 9-speed drain-and-fill guide with DEXRON-VI fluid, tools, torque specs, and safety tips
How to Change Transmission Fluid on a 2019 Chevrolet Traverse
Step-by-step 9-speed drain-and-fill guide with DEXRON-VI fluid, tools, torque specs, and safety tips


🔧 Traverse - Transmission Fluid Drain and Fill
Do a drain-and-fill, not a pressurized flush. Your Traverse uses a dipstickless 9-speed automatic, so the final fluid level must be checked with the vehicle level, the engine running, and the transmission fluid at the specified temperature. GM specifies DEXRON-VI automatic transmission fluid. chevrolet.com)
Difficulty Level: Intermediate | Estimated Time: 2-3 hours
Assumption: These instructions cover routine fluid replacement without transmission leaks or shifting faults.
⚠️ Safety & Precautions
- ⚠️ Support your Traverse on four properly rated jack stands. It must remain level.
- ⚠️ Never work beneath a vehicle supported only by a floor jack.
- ⚠️ The final level check is performed with the engine running. Keep hands, clothing, and tools away from moving parts.
- ⚠️ Transmission fluid will be hot at the final check. Wear gloves and safety glasses.
- ⚠️ Use only fluid clearly labeled as meeting the DEXRON-VI specification. Incorrect fluid can damage the transmission. carmanualsonline.info)
- ⚠️ Do not add shudder treatments or other additives during routine maintenance.
- ⚠️ Do not disconnect the battery unless an electrical connector must be unplugged.
🔧 Required Tools
You'll need the following tools for this repair:
- 11mm six-point socket
- 10mm socket
- 3/8-inch drive ratchet
- 3/8-inch drive extension set
- Inch-pound torque wrench rated below 150 in-lbs
- OBD-II scan tool with transmission temperature display (specialty)
- Long-neck transmission funnel
- Fluid drain pan rated 10-quart minimum
- Graduated measuring container rated 8-quart minimum
- Floor jack rated 3-ton minimum
- Jack stands rated 3-ton minimum
- Wheel chocks
- 24-inch carpenter’s level
- Nitrile mechanic gloves
- Safety glasses
- Shop towels
🔩 Required Parts
HowToo sells all the parts you need for this repair:
- DEXRON-VI automatic transmission fluid - Qty: 6 quarts
- Transmission drain-plug seal - Qty: 1 if damaged or supplied separately
- Transmission level-plug seal - Qty: 1 if damaged or supplied separately
The transmission-fluid aisle is open in the parts sidebar. Check the bottle itself for an explicit DEXRON-VI approval before adding it. Six quarts gives you enough for a typical drain-and-fill plus final adjustment.
📋 Before You Begin
- Park on a firm, level surface and allow the drivetrain to cool enough to handle safely.
- Chock the wheels using the wheel chocks.
- Connect the OBD-II scan tool and confirm that it can display Transmission Fluid Temperature.
- Raise your Traverse with the 3-ton floor jack and support it evenly on four 3-ton jack stands.
- Place the 24-inch carpenter’s level along a suitable flat body or subframe reference. Adjust the stands until the vehicle is level front-to-rear and side-to-side.
- Locate the top fill cap before draining anything. Never empty a transmission until you know the fill point opens.
- No infotainment service mode or transmission programming is required.
🔨 Step-by-Step Instructions
Follow these steps in order:
Step 1: Access the Transmission Fill Cap
- Open the hood and locate the engine-control-module assembly above the transmission area.
- Use the 10mm socket, extension, and ratchet to remove the accessible retaining fasteners.
- Move the assembly aside only far enough to reach the transmission fill cap. Do not stretch the wiring.
- Remove the fill cap by hand. If it will not open, stop before draining the transmission.
- Open the fill point first. Always.
Step 2: Drain the Old Fluid
- Position the 10-quart drain pan beneath the transmission drain plug.
- Use the 11mm six-point socket and ratchet to loosen the drain plug carefully.
- Remove the plug by hand and allow the fluid to drain until it slows to an occasional drip.
- Inspect the old fluid for metallic debris, a strong burned smell, or coolant contamination.
- Do not remove the transmission pan during this routine service.
Step 3: Measure the Drained Fluid
- Pour the drained fluid into the graduated measuring container.
- Record the exact amount removed. This provides a safe starting refill quantity.
- Normal darkening alone does not prove the transmission is damaged. Heavy metal particles or milky fluid require diagnosis before driving.
Step 4: Reinstall the Drain Plug
- Clean the drain plug and sealing surface with shop towels.
- Replace the plug seal if it is cut, flattened, or supplied as a separate service item.
- Thread the plug in completely by hand to prevent cross-threading.
- Use the 11mm socket and inch-pound torque wrench to tighten it to 12 Nm (106 in-lbs).
- Do not overtighten this small plug. More torque isn’t more sealed.
Step 5: Add the Initial Refill
- Insert the long-neck transmission funnel into the top fill opening.
- Pour in the same measured amount of fresh DEXRON-VI fluid that drained out.
- Add the fluid slowly to prevent it from backing up through the fill opening.
- Install the fill cap by hand after the initial refill.
Step 6: Circulate the New Fluid
- Confirm that your Traverse is securely supported and level.
- Start the engine and keep your foot firmly on the brake pedal.
- Move the selector slowly through Reverse, Neutral, Drive, and the available lower ranges, pausing approximately three seconds in each position.
- Return the selector to Park and leave the engine idling.
- Inspect the drain plug for leakage using a flashlight.
Step 7: Bring the Fluid to Checking Temperature
- Use the OBD-II scan tool to monitor Transmission Fluid Temperature.
- Allow the fluid temperature to reach 85-95°C (185-203°F) with the engine idling. The transmission level changes with temperature, so this range matters. static.nhtsa.gov)
- Keep your Traverse level throughout the check.
- Do not shut the engine off before removing the level plug.
Step 8: Check and Correct the Fluid Level
- With the engine running, selector in Park, and fluid within 85-95°C (185-203°F), place the drain pan beneath the level-check plug.
- Use the 11mm six-point socket and ratchet to remove the level-check plug carefully.
- If fluid exits as a thin stream and slows to a drip, allow the excess to drain until only a slow trickle remains.
- If no fluid exits, reinstall the plug loosely, add approximately 250 ml through the top fill opening, and repeat the check while maintaining the specified temperature.
- The level is correct when fluid produces a small trickle from the level opening.
- The transmission has no dipstick. An internal standpipe and this temperature-based check establish the level. static.nhtsa.gov
Step 9: Install the Level Plug
- Inspect the level-plug seal and replace it if damaged.
- Thread the level plug in by hand while the engine continues idling.
- Use the 11mm socket and inch-pound torque wrench to tighten the plug to 9 Nm (80 in-lbs). GM’s documented 9T65 level procedure specifies this torque. static.nhtsa.gov
- Wipe the area clean and check immediately for leakage.
Step 10: Reassemble and Lower the Vehicle
- Shut the engine off.
- Confirm that the top fill cap is fully seated.
- Return the engine-control-module assembly to its original position.
- Use the 10mm socket and ratchet to reinstall its retaining fasteners snugly without crushing the plastic mounting points.
- Use the 3-ton floor jack to lift your Traverse clear of the stands, remove all four stands, and lower it carefully.
✅ After Repair
- ✅ Start the engine and confirm there are no warning messages or transmission-fluid leaks.
- ✅ Drive gently for 10-15 minutes. Confirm smooth engagement into Drive and Reverse.
- ✅ Recheck the drain and level-plug areas for leaks after the road test.
- ✅ Do not reset the engine-oil-life monitor. It does not track transmission-fluid service.
- ✅ Record the date and mileage for future maintenance.
- ✅ If the transmission slips, bangs into gear, shudders, or contains significant metal debris, stop driving and diagnose the fault. Fresh fluid cannot repair internal damage.
💰 DIY vs Shop Cost
Shop Cost: $250-$450 (parts + labor)
DIY Cost: $80-$140 (parts only)
You Save: $170-$310 by doing it yourself!
Shop labor rates vary but typically run $100-$150/hour. This repair takes a shop approximately 1-2 hours.
🎯 Ready to get started?
HowToo makes it easy: same-day/2-day shipping on every part, plus all the tools and specialty tools you need! Check out the parts and tools sections below to add everything to your cart.