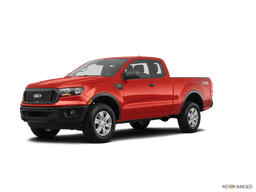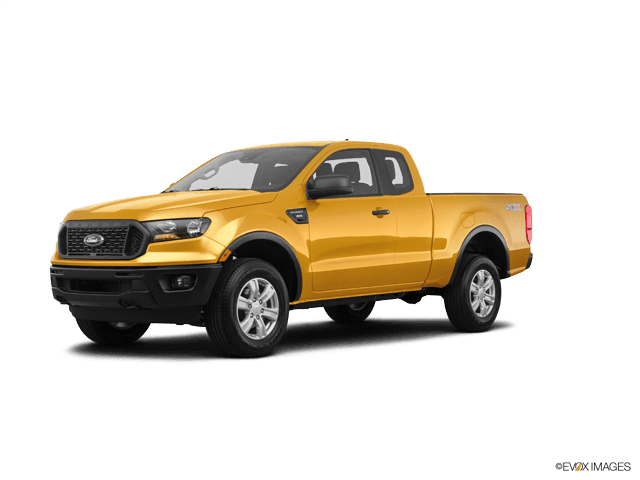








How to Change Transmission Fluid on a 2019-2024 Ford Ranger 10-Speed Automatic (Engine: Inline 4 2.3L)
Step-by-step MERCON ULV service guide with filter, tools, temperature check, and tips for 2019, 2020, 2021, 2022, 2023, 2024
How to Change Transmission Fluid on a 2019-2024 Ford Ranger 10-Speed Automatic (Engine: Inline 4 2.3L)
Step-by-step MERCON ULV service guide with filter, tools, temperature check, and tips for 2019, 2020, 2021, 2022, 2023, 2024


🔧 Ranger - Automatic Transmission Fluid Change
Changing the automatic transmission fluid on your Ranger helps protect the 10-speed automatic transmission from heat and wear. This service is more involved than an engine oil change because the transmission fluid level must be checked at a specific temperature using the side-mounted fluid level plug.
Difficulty Level: Intermediate | Estimated Time: 2-3 hours
⚠️ Safety & Precautions
- ⚠️ Transmission fluid gets very hot. Let your Ranger cool before draining, then use gloves when checking the level warm.
- ⚠️ The vehicle must stay level while raised. An uneven vehicle can cause the transmission fluid level to be wrong.
- ⚠️ Always support your Ranger with jack stands. Never work under a vehicle supported only by a jack.
- ⚠️ Keep the engine running during the final fluid level check. Use wheel chocks and keep your foot on the brake when shifting.
- ⚠️ Use only MERCON ULV automatic transmission fluid. Other fluid types can cause shift problems or transmission damage.
- ⚠️ Battery disconnect is not required for this repair.
🔧 Required Tools
You'll need the following tools for this repair:
- Safety glasses
- Nitrile gloves
- Wheel chocks
- Floor jack (rated 3-ton minimum)
- Jack stands (rated 3-ton minimum)
- Drain pan (12-quart minimum)
- 8mm socket
- 10mm socket
- 13mm socket
- 1/4-inch ratchet
- 3/8-inch ratchet
- 3/8-inch torque wrench
- Extension set
- Plastic scraper
- Brake cleaner
- Lint-free shop towels
- Fluid transfer pump (specialty)
- Scan tool with transmission temperature data (specialty)
- Infrared thermometer
- Measuring container with quart marks
🔩 Required Parts
HowToo sells all the parts you need for this repair:
- MERCON ULV automatic transmission fluid - Qty: 6-8 quarts
- Automatic transmission filter - Qty: 1
- Transmission pan gasket - Qty: 1
- Transmission pan bolts - Qty: 1 set, if replacing corroded or damaged bolts
- Transmission fluid level plug seal - Qty: 1
- Transmission pan drain plug seal - Qty: 1, if equipped
📋 Before You Begin
- 🅿️ Park your Ranger on a flat, level surface.
- 🛞 Set the parking brake and place wheel chocks behind the rear wheels.
- 🌡️ A scan tool is required because the final level is checked by transmission fluid temperature, not by a dipstick. A scan tool reads live temperature data from the transmission control system.
- 🧰 A fluid transfer pump is required. This is a hand pump used to push new fluid into the transmission fill/check opening.
- 📏 Measure the old fluid that comes out. This gives you a safe starting amount for refilling.
- ⚠️ Assumption: This procedure is for a drain, pan/filter service, refill, and level check on the factory 10-speed automatic transmission.
🔨 Step-by-Step Instructions
Follow these steps in order:
Step 1: Raise and Support Your Ranger
- Use a floor jack (rated 3-ton minimum) to lift your Ranger at approved frame lift points.
- Place jack stands (rated 3-ton minimum) under the frame so the truck sits level front-to-back and side-to-side.
- Gently lower your Ranger onto the jack stands.
- Shake the truck lightly by hand to confirm it is stable before going underneath.
- Tip: Level vehicle equals accurate fluid level.
Step 2: Remove Any Skid Plate or Underbody Shield
- Use a 10mm socket, 13mm socket, and 3/8-inch ratchet to remove any underbody shield or skid plate blocking the transmission pan.
- Set the fasteners aside in order so they go back into the same locations.
- If the shield uses smaller screws, use an 8mm socket with a 1/4-inch ratchet.
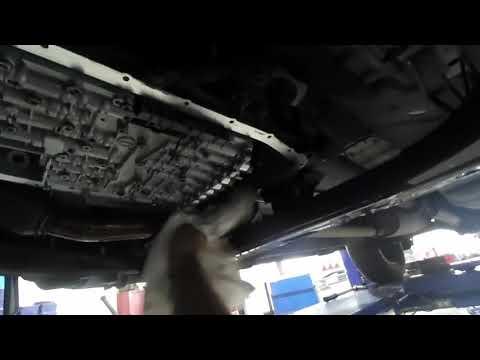
Step 3: Locate the Transmission Pan and Level Plug
- Use a flashlight if needed to locate the transmission pan under the center of your Ranger.
- Identify the fluid level/check plug on the transmission case or pan area before draining.
- The level plug is used to set the final fluid level while the engine is running.
- Do not drain the transmission until you know you can access the fill/check point.
Step 4: Position the Drain Pan
- Place a drain pan (12-quart minimum) under the transmission pan.
- Put on safety glasses and nitrile gloves.
- Keep a measuring container with quart marks nearby for the old fluid.
Step 5: Drain the Transmission Fluid
- If your transmission pan has a drain plug, use the correct socket from your socket set and a 3/8-inch ratchet to remove it.
- Let the fluid drain fully into the drain pan (12-quart minimum).
- If no drain plug is fitted, use a 10mm socket, extension set, and 3/8-inch ratchet to loosen the transmission pan bolts slowly, starting at one corner.
- Let one corner of the pan drop slightly so fluid can pour out in a controlled stream.
- Measure the drained fluid using the measuring container with quart marks.
- Tip: Loosen slowly to avoid a fluid wave.
Step 6: Remove the Transmission Pan
- Use a 10mm socket, extension set, and 3/8-inch ratchet to remove the remaining pan bolts.
- Support the pan with one hand while removing the final bolts.
- Lower the pan carefully because more fluid may still be inside.
- Pour remaining fluid into the drain pan (12-quart minimum).
Step 7: Replace the Transmission Filter
- Use a 10mm socket and 1/4-inch ratchet if the filter is retained by bolts.
- Pull the old filter straight down by hand.
- Make sure the old filter seal comes out with the filter.
- Lubricate the new filter seal with a small amount of MERCON ULV automatic transmission fluid.
- Push the new automatic transmission filter straight into place by hand.
- If filter bolts were removed, reinstall them with the 10mm socket and 1/4-inch ratchet.
- Tighten filter bolts snugly only unless your replacement filter instructions provide a specific torque.
Step 8: Clean the Pan and Magnet
- Use a plastic scraper to remove old gasket material from the pan sealing surface.
- Use brake cleaner and lint-free shop towels to clean the inside of the pan.
- Clean the pan magnet with brake cleaner and lint-free shop towels.
- A light gray paste on the magnet is normal. Metal chunks or heavy debris are not normal.
- Do not use sandpaper or a metal scraper on the sealing surface.
Step 9: Install the Pan Gasket
- Place the new transmission pan gasket onto the clean pan.
- Hold the pan in place by hand and start all pan bolts by hand first.
- Use a 10mm socket and 3/8-inch ratchet to lightly seat the bolts in a crisscross pattern.
- Use a 3/8-inch torque wrench to tighten the transmission pan bolts evenly to Torque to 12 Nm (106 in-lbs).
- Do not overtighten. The pan can bend and cause leaks.
Step 10: Reinstall the Drain Plug If Equipped
- Install a new transmission pan drain plug seal if your pan uses one.
- Use the correct socket from your socket set and a 3/8-inch torque wrench to tighten the drain plug.
- If a torque value is not supplied with your replacement plug or seal, tighten it snugly without over-tightening the pan threads.
Step 11: Add Initial Transmission Fluid
- Use the fluid transfer pump (specialty) to pump MERCON ULV automatic transmission fluid into the fill/check opening.
- Add about the same amount of fluid you measured during draining.
- If you removed the pan and filter, expect the initial refill to be roughly 5-7 quarts.
- Install the level/check plug loosely by hand so fluid does not spill while starting the engine.
Step 12: Warm the Transmission Fluid
- Connect the scan tool with transmission temperature data (specialty) to the diagnostic port under the dash.
- Start the engine and keep your foot firmly on the brake pedal.
- With the engine idling, move the shifter slowly through P-R-N-D, pausing about 3 seconds in each position.
- Return the shifter to Park and leave the engine idling.
- Watch transmission fluid temperature on the scan tool.
Step 13: Set the Final Fluid Level
- Keep the engine idling and the vehicle level.
- When the transmission fluid temperature is approximately 35-45°C (95-113°F), remove the level/check plug using the correct socket from your socket set and 3/8-inch ratchet.
- If no fluid comes out, use the fluid transfer pump (specialty) to add MERCON ULV automatic transmission fluid until fluid begins to trickle from the level/check opening.
- If a heavy stream comes out, let it drain until it becomes a thin trickle.
- The correct level is reached when fluid exits as a small, steady trickle at the specified temperature range.
- Use an infrared thermometer only as a backup check; the scan tool temperature is the preferred reading.
Step 14: Reinstall the Level Plug
- Install a new transmission fluid level plug seal.
- Reinstall the level/check plug by hand first to avoid cross-threading.
- Use the correct socket from your socket set and a 3/8-inch torque wrench to tighten the plug.
- If the plug or seal kit does not provide a torque value, tighten it snugly without forcing it.
- Wipe the area clean with lint-free shop towels.
Step 15: Reinstall the Underbody Shield
- Use a 10mm socket, 13mm socket, and 3/8-inch ratchet to reinstall the skid plate or underbody shield.
- If smaller screws were removed, use an 8mm socket and 1/4-inch ratchet.
- Tighten all shield fasteners snugly.
Step 16: Lower Your Ranger
- Use the floor jack (rated 3-ton minimum) to raise your Ranger slightly off the jack stands.
- Remove the jack stands (rated 3-ton minimum).
- Lower your Ranger slowly to the ground.
- Remove the wheel chocks.
✅ After Repair
- ✅ With the engine running, check underneath for leaks around the pan, drain plug, and level plug.
- ✅ Road test your Ranger gently for 10-15 minutes.
- ✅ Confirm smooth shifts from a stop, during light acceleration, and during coast-down.
- ✅ Recheck underneath for leaks after the road test.
- ✅ Dispose of used transmission fluid properly at a recycling center or parts store that accepts used fluid.
- ✅ No battery registration, coding, or infotainment reset is required.
💰 DIY vs Shop Cost
Shop Cost: $350-$650 (parts + labor)
DIY Cost: $120-$250 (parts only)
You Save: $230-$400 by doing it yourself!
Shop labor rates vary but typically run $100-$150/hour. This repair takes a shop approximately 1.5-2.5 hours.
🎯 Ready to get started?
HowToo makes it easy: same-day/2-day shipping on every part, plus all the tools and specialty tools you need! Check out the parts and tools sections below to add everything to your cart.