

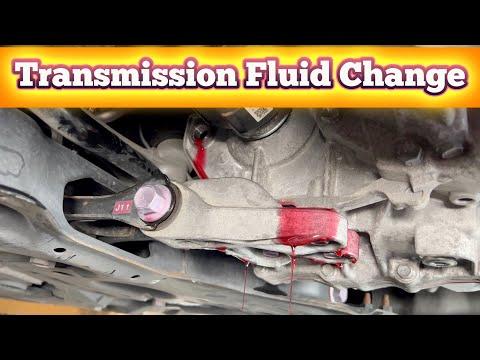







How to Change Transmission Fluid on a 2018 Toyota Prius Hybrid
Step-by-step transaxle fluid replacement with tools, Toyota ATF WS, torque specs, and safety tips
How to Change Transmission Fluid on a 2018 Toyota Prius Hybrid
Step-by-step transaxle fluid replacement with tools, Toyota ATF WS, torque specs, and safety tips


🔧 Prius - Transmission Fluid Replacement
Your Prius uses Toyota ATF WS fluid inside its hybrid transaxle. This service drains the old fluid and refills the transaxle through a side fill opening; there is no transmission filter or dipstick to service.
Difficulty Level: Beginner | Estimated Time: 1-1.5 hours
Assumption: This procedure is for the stock U.S.-market FWD hybrid transaxle.
⚠️ Safety & Precautions
- ⚠️ Switch the Prius completely off and verify the green READY indicator is not illuminated.
- 🔑 Keep the key fob at least 15 feet away so the hybrid system cannot be activated accidentally.
- 🟧 Never touch, disconnect, or probe orange high-voltage cables or connectors.
- 🛡️ Support the Prius on four jack stands. It must remain level for an accurate fluid level.
- 🌡️ Allow the transaxle and exhaust to cool before working underneath the vehicle.
- 🔋 Do not disconnect the 12-volt battery; battery disconnection is not required.
- 🚫 Never work beneath a vehicle supported only by a floor jack.
🔧 Required Tools
You'll need the following tools for this repair:
- 2-ton low-profile floor jack
- 2-ton jack stands - Qty: 4
- Rubber wheel chocks - Qty: 2
- Safety glasses
- Nitrile mechanic gloves
- 10mm socket
- 10mm hex-bit socket
- 3/8-inch drive ratchet
- 3/8-inch drive 6-inch extension
- 3/8-inch drive torque wrench rated 10-80 Nm
- Plastic trim-clip removal tool
- 6-quart drain pan
- ATF hand-transfer pump with flexible hose
- 24-inch carpenter’s level
🔩 Required Parts
HowToo sells all the parts you need for this repair:
- Toyota ATF WS transmission fluid - Qty: 4 liters
- Transmission drain-plug sealing washer - Qty: 1
- Transmission fill-plug sealing washer - Qty: 1
- Brake cleaner - Qty: 1 can
- Lint-free shop towels - Qty: 1 pack
📋 Before You Begin
- 🚗 Park your Prius on firm, level ground and apply the parking brake.
- ⏻ Press the power button to turn the vehicle off, then confirm the READY light is off.
- ⏳ Wait at least five minutes before raising the vehicle.
- 📏 Plan to raise all four corners to equal heights. Use the carpenter’s level on a flat underbody surface to verify the vehicle is level.
- 🧰 A hand-transfer pump moves fluid from its container into a fill opening that cannot be reached with a normal funnel.
- 📱 No infotainment setting, scan-tool command, fluid-temperature procedure, or battery registration is required.
🔨 Step-by-Step Instructions
Follow these steps in order:
Step 1: Secure and Raise the Prius
- Place the rubber wheel chocks around the wheels that remain on the ground during lifting.
- Use the 2-ton low-profile floor jack at Toyota’s reinforced lifting points.
- Position all four 2-ton jack stands beneath the approved support points and lower the Prius onto them.
- Use the 24-inch carpenter’s level to confirm the vehicle is level front-to-rear and side-to-side.
- Push gently against the vehicle to confirm it is stable before going underneath.
Step 2: Remove the Lower Access Panel
- Put on the safety glasses and nitrile mechanic gloves.
- Use the 10mm socket with the 3/8-inch drive ratchet to remove the relevant lower-engine cover bolts.
- Use the plastic trim-clip removal tool to release the plastic retainers without breaking them.
- Move the access panel aside so the transaxle fill and drain plugs are accessible.
- Arrange fasteners in their removal order.
Step 3: Remove the Fill Plug First
- Locate the fill plug on the side of the aluminum transaxle case. The drain plug is at the bottom.
- Clean around the fill plug using brake cleaner and a lint-free shop towel.
- Use the 10mm hex-bit socket, 6-inch extension, and 3/8-inch drive ratchet to loosen and remove the fill plug.
- Remove the old sealing washer from the fill plug.
- Do not drain the fluid until the fill plug has been removed successfully. This ensures the transaxle can be refilled.
Step 4: Drain the Old Fluid
- Place the 6-quart drain pan directly beneath the transaxle drain plug.
- Clean around the drain plug using brake cleaner and a lint-free shop towel.
- Use the 10mm hex-bit socket and 3/8-inch drive ratchet to remove the drain plug carefully.
- Allow the fluid to drain until it slows to occasional drops, usually 10-15 minutes.
- Inspect the old fluid for metallic flakes or debris. A dark red or brown color can be normal, but visible metal pieces require professional diagnosis.
Step 5: Install the Drain Plug
- Clean the drain plug using brake cleaner and a lint-free shop towel.
- Install one new transmission drain-plug sealing washer.
- Thread the drain plug into the transaxle by hand to prevent cross-threading.
- Use the 10mm hex-bit socket and 3/8-inch drive torque wrench to torque the drain plug to 50 Nm (37 ft-lbs).
- Wipe the area clean using a lint-free shop towel.
Step 6: Fill the Transaxle
- Connect the flexible hose to the ATF hand-transfer pump and place the pump in the Toyota ATF WS container.
- Insert the hose into the transaxle fill opening.
- Use the ATF hand-transfer pump to add Toyota ATF WS slowly.
- Continue until fluid begins running back out of the fill opening as a thin stream.
- The refill amount is approximately 3.6 liters (3.8 US quarts), but the fill-opening level is the final measurement.
- Allow excess fluid to drain until it becomes a slow trickle while the Prius remains level.
- Do not use universal CVT fluid or conventional automatic-transmission fluid. Use only fluid labeled Toyota ATF WS.
Step 7: Install the Fill Plug
- Install one new transmission fill-plug sealing washer on the cleaned fill plug.
- Thread the plug into the transaxle by hand.
- Use the 10mm hex-bit socket and 3/8-inch drive torque wrench to torque the fill plug to 50 Nm (37 ft-lbs).
- Clean the plug and surrounding case using brake cleaner and a lint-free shop towel.
Step 8: Reinstall the Lower Access Panel
- Position the lower access panel against the underbody.
- Use the plastic trim-clip removal tool by hand to reinstall the original plastic retainers.
- Use the 10mm socket and 3/8-inch drive ratchet to reinstall the cover bolts snugly without overtightening the plastic panel.
- Confirm the panel edges are seated and no fasteners remain unused.
Step 9: Lower the Prius
- Use the 2-ton low-profile floor jack to raise each end slightly and remove the four jack stands.
- Lower the Prius slowly to the ground using the floor jack.
- Remove the rubber wheel chocks.
✅ After Repair
- ✅ Start the Prius and verify the green READY indicator appears normally.
- 🕹️ With the brake pedal held, select Reverse and Drive briefly, then return to Park.
- 🚗 Take a gentle 10-minute test drive and listen for unusual noises.
- 🔍 Park on clean, level ground and inspect beneath the transaxle for leaks around both plugs.
- ♻️ Pour the used fluid into a sealed container and take it to an authorized used-oil recycling facility. Do not pour it onto the ground or into a drain.
- 📋 No fluid reset, scan-tool calibration, or maintenance-menu reset is required.
💰 DIY vs Shop Cost
Shop Cost: ₹8,000-₹14,000 (parts + labor)
DIY Cost: ₹4,000-₹7,000 (parts only)
You Save: ₹4,000-₹7,000 by doing it yourself!
Labor rates around Sonīpat vary, but this repair typically takes a shop approximately 0.8-1.0 hour.
🎯 Ready to get started?
HowToo makes it easy: same-day/2-day shipping on every part, plus all the tools and specialty tools you need! Check out the parts and tools sections below to add everything to your cart.