


How to Change Transmission Fluid on a 2018 Ford Mustang (Trim: EcoBoost | Engine: Inline 4 2.3L | Body: Coupe)
Step-by-step guide for automatic and manual service with tools, parts, torque specs, and safety tips for 2018
How to Change Transmission Fluid on a 2018 Ford Mustang (Trim: EcoBoost | Engine: Inline 4 2.3L | Body: Coupe)
Step-by-step guide for automatic and manual service with tools, parts, torque specs, and safety tips for 2018
🔧 Mustang - Transmission Fluid Change
This service replaces the old transmission fluid in your Mustang to help protect the gears, bearings, clutches, and internal seals. Because the transmission type was not provided, the procedure below covers both factory transmission paths used on your Mustang: the 10-speed automatic and the 6-speed manual.
Difficulty Level: Intermediate | Estimated Time: 1.5-3 hours
⚠️ Safety & Precautions
- ⚠️ Work only on a cool drivetrain. Hot transmission fluid can burn skin.
- ⚠️ Support your Mustang with jack stands on a level surface. Never work under a vehicle held only by a jack.
- ⚠️ Keep the vehicle level during filling. Fluid level is checked by height inside the case, so tilt can cause an incorrect level.
- ⚠️ Automatic transmission fluid level is temperature-sensitive and requires a scan tool that reads transmission fluid temperature.
- ⚠️ Do not overfill. Overfilled transmission fluid can foam and cause shifting problems.
- ⚠️ Battery disconnect is not required for this service.
🔧 Required Tools
You'll need the following tools for this repair:
- Floor jack rated 3-ton minimum
- Jack stands rated 3-ton minimum
- Wheel chocks
- Safety glasses
- Nitrile gloves
- Drain pan 10-quart minimum
- Metric socket set 8mm-15mm
- 3/8-inch drive ratchet
- 3/8-inch drive torque wrench 5-80 ft-lbs
- Fluid transfer pump
- OBD-II scan tool with transmission temperature data
- Infrared thermometer
- Clean microfiber towels
- Brake cleaner
- 10mm hex socket
- 8mm hex socket
- Torx T30 socket
- Plastic scraper
🔩 Required Parts
HowToo sells all the parts you need for this repair:
- Automatic transmission fluid meeting Ford MERCON ULV specification - Qty: 6-12 quarts
- Automatic transmission pan gasket - Qty: 1
- Automatic transmission filter - Qty: 1
- Automatic transmission drain plug seal - Qty: 1
- Manual transmission fluid meeting Ford specification for MT-82 transmission - Qty: 3 quarts
- Manual transmission drain plug seal - Qty: 1
- Manual transmission fill plug seal - Qty: 1
📋 Before You Begin
- Park your Mustang on a flat, solid surface.
- Set the parking brake and place wheel chocks at the front wheels.
- Raise the vehicle with a floor jack and support it with jack stands at the approved lift points.
- Keep the vehicle as level as possible from front to rear and side to side.
- An OBD-II scan tool plugs into the diagnostic port and lets you read transmission fluid temperature on automatic models.
- A fluid transfer pump is a hand pump used to push new fluid up into the transmission fill opening.
- If your Mustang has the 10-speed automatic, follow Path A.
- If your Mustang has the 6-speed manual, follow Path B.
🔨 Step-by-Step Instructions
Follow these steps in order:
Step 1: Raise and Secure the Vehicle
- Use the floor jack rated 3-ton minimum to lift your Mustang at the correct jacking points.
- Place jack stands rated 3-ton minimum under the approved support points.
- Use wheel chocks to keep the vehicle from moving.
- Gently shake the vehicle by hand to confirm it is stable before going underneath.
- Stable stands save lives.
Step 2: Remove Any Underbody Shielding
- Use an 8mm socket, 10mm socket, or Torx T30 socket as needed to remove the underbody fasteners below the transmission.
- Use a 3/8-inch drive ratchet to remove the fasteners by hand.
- Set the shield and fasteners aside in order.
- No torque spec applies until reinstallation.
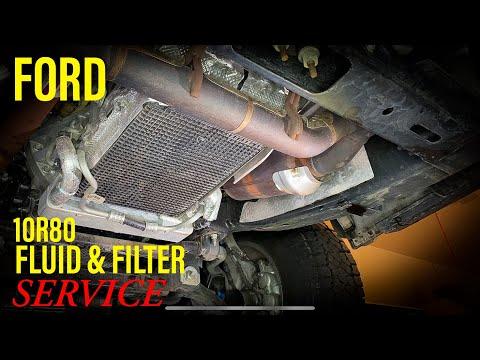
Step 3: Identify Your Transmission Path
- Use a flashlight to look at the transmission pan area.
- The 10-speed automatic has a larger pan and requires a temperature-based level check.
- The 6-speed manual has separate fill and drain plugs on the transmission case.
- Follow only the path that matches the transmission installed in your Mustang.
Step 4A: Automatic - Drain the Fluid
- Place a 10-quart drain pan under the automatic transmission pan.
- Use the correct metric socket from the 8mm-15mm socket set to remove the drain plug if equipped.
- If no drain plug is present, use the correct metric socket to loosen the pan bolts gradually, starting at one corner to control the fluid flow.
- Allow the fluid to drain until it slows to a drip.
- Keep your face and hands clear of the fluid stream.
Step 5A: Automatic - Remove the Pan and Filter
- Use the correct metric socket from the 8mm-15mm socket set and a 3/8-inch drive ratchet to remove the transmission pan bolts.
- Lower the pan carefully into the drain pan.
- Use the correct socket or hand pressure to remove the automatic transmission filter, depending on the filter style installed.
- Use a plastic scraper to clean gasket material from the pan sealing surface if needed.
- Use brake cleaner and clean microfiber towels to clean the pan and magnet.
Step 6A: Automatic - Install the New Filter and Pan Gasket
- Use clean hands with nitrile gloves to install the new automatic transmission filter.
- Position the new automatic transmission pan gasket on the pan.
- Raise the pan into place by hand.
- Start all pan bolts by hand to avoid cross-threading.
- Use a 3/8-inch drive torque wrench to tighten the pan bolts evenly in a crisscross pattern.
- Torque to 10 Nm (89 in-lbs) unless the pan or gasket kit specifies a different value.
Step 7A: Automatic - Add Initial Fluid
- Use the fluid transfer pump to add automatic transmission fluid meeting Ford MERCON ULV specification through the transmission fill port.
- Add only the approximate amount drained at first.
- Install the fill plug lightly by hand so fluid does not splash out during warm-up.
- Do not final-tighten the fill plug yet.
Step 8A: Automatic - Warm Fluid and Set Level
- Connect the OBD-II scan tool with transmission temperature data.
- Start the engine and keep your foot firmly on the brake.
- Move the shifter slowly through each gear position, pausing 3 seconds in each position, then return to Park.
- Monitor transmission fluid temperature with the scan tool.
- With the engine running and transmission warm, remove the level/fill plug using the correct socket.
- Use the fluid transfer pump to add fluid until a thin stream begins to run out of the level opening.
- Let the fluid drain until it becomes a slow drip.
- Install the plug with a new seal.
- Torque to 35 Nm (26 ft-lbs) unless the plug style specifies otherwise.
- Level check must be warm.
Step 4B: Manual - Remove the Fill Plug First
- Place the drain pan under the manual transmission.
- Use the 8mm hex socket or 10mm hex socket to loosen and remove the fill plug first.
- Removing the fill plug first confirms you can refill the transmission before draining it.
- If the fill plug will not loosen, do not remove the drain plug.
Step 5B: Manual - Drain the Fluid
- Move the drain pan under the manual transmission drain plug.
- Use the 8mm hex socket or 10mm hex socket to remove the drain plug.
- Let the fluid drain until it slows to a drip.
- Inspect the drain plug magnet for metal fuzz. A light paste is normal; chunks are not.
- Clean the drain plug with brake cleaner and a clean microfiber towel.
Step 6B: Manual - Reinstall the Drain Plug
- Install a new manual transmission drain plug seal if equipped.
- Thread the drain plug in by hand first.
- Use the 8mm hex socket or 10mm hex socket with a 3/8-inch drive torque wrench to tighten the drain plug.
- Torque to 35 Nm (26 ft-lbs) unless the plug design specifies otherwise.
Step 7B: Manual - Refill the Transmission
- Use the fluid transfer pump to add manual transmission fluid meeting Ford specification for the MT-82 transmission through the fill hole.
- Fill until fluid just begins to run back out of the fill opening.
- Let excess fluid drain until it becomes a slow drip.
- This means the fluid level is at the bottom edge of the fill hole.
Step 8B: Manual - Reinstall the Fill Plug
- Install a new manual transmission fill plug seal if equipped.
- Thread the fill plug in by hand first.
- Use the 8mm hex socket or 10mm hex socket with a 3/8-inch drive torque wrench to tighten the fill plug.
- Torque to 35 Nm (26 ft-lbs) unless the plug design specifies otherwise.
Step 9: Clean and Inspect for Leaks
- Use brake cleaner and clean microfiber towels to clean any spilled fluid from the transmission case and pan area.
- Start the engine if automatic, or keep the engine off if manual for the first visual check.
- Use a flashlight to inspect the drain plug, fill plug, and pan gasket area for leaks.
Step 10: Reinstall Underbody Shielding
- Use your hands to position the underbody shield.
- Start all fasteners by hand.
- Use the 8mm socket, 10mm socket, or Torx T30 socket with the 3/8-inch drive ratchet to snug the fasteners.
- Torque to 5-7 Nm (44-62 in-lbs) for small underbody shield fasteners.
Step 11: Lower the Vehicle
- Use the floor jack rated 3-ton minimum to lift your Mustang slightly off the jack stands.
- Remove the jack stands carefully.
- Lower the vehicle slowly to the ground with the floor jack.
- Remove the wheel chocks after the vehicle is fully on the ground.
✅ After Repair
- ✅ Drive gently for 10-15 minutes and check for normal shifting.
- ✅ Recheck underneath for leaks after the test drive.
- ✅ On automatic models, recheck fluid level if shifting feels delayed, harsh, or abnormal.
- ✅ Dispose of used transmission fluid at a recycling center or parts store that accepts waste oil.
- ✅ No battery registration, coding, or infotainment reset is required for this service.
💰 DIY vs Shop Cost
Shop Cost: $250-$550 (parts + labor)
DIY Cost: $80-$220 (parts only)
You Save: $170-$330 by doing it yourself!
Shop labor rates vary but typically run $100-$150/hour. This repair takes a shop approximately 1.0-2.0 hours.
🎯 Ready to get started?
HowToo makes it easy: same-day/2-day shipping on every part, plus all the tools and specialty tools you need! Check out the parts and tools sections below to add everything to your cart.
