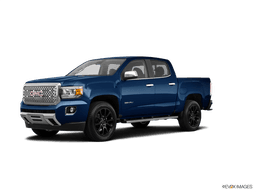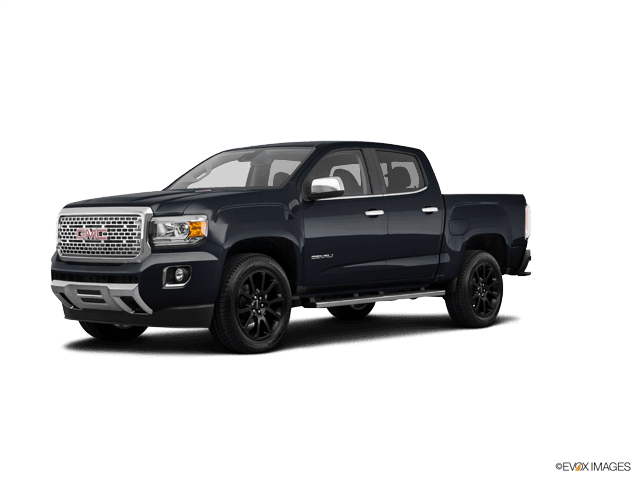








How to Change Transmission Fluid on a 2017-2021 GMC Canyon 2.8L Diesel (Trim: Denali | Engine: Inline 4 2.8L)
Step-by-step six-speed automatic fluid and filter service with tools, parts, torque specs, and safety tips for 2017, 2018, 2019, 2020
How to Change Transmission Fluid on a 2017-2021 GMC Canyon 2.8L Diesel (Trim: Denali | Engine: Inline 4 2.8L)
Step-by-step six-speed automatic fluid and filter service with tools, parts, torque specs, and safety tips for 2017, 2018, 2019, 2020


🔧 Canyon - Automatic Transmission Fluid and Filter Change
I’d service your Canyon with a pan drop, filter replacement, and DEXRON-VI refill. This changes the serviceable fluid without the risks of a pressurized flush. The transmission has no dipstick, so the final level must be checked through the level plug while the engine runs.
Assumption: These instructions apply to the factory six-speed automatic used with the 2.8L diesel. Verify the transmission identification before opening any plugs.
Difficulty Level: Advanced | Estimated Time: 3-4 hours
⚠️ Safety & Precautions
- ⚠️ Keep your Canyon perfectly level on four jack stands. A tilted truck produces an incorrect fluid level.
- ⚠️ Never work beneath a vehicle supported only by a floor jack.
- ⚠️ The final check requires a running engine and warm fluid. Keep clothing and tools clear of the exhaust and rotating parts.
- ⚠️ Automatic transmission fluid can cause serious burns. Wear gloves and safety glasses.
- ⚠️ Remove the fill plug before draining anything. If the fill plug won’t open, stop while the transmission still contains fluid.
- ⚠️ Don’t substitute universal fluid or add transmission additives. Use licensed DEXRON-VI automatic transmission fluid.
- ⚠️ Don’t perform a machine flush on a transmission with unknown service history or existing shift problems.
- ⚠️ Battery disconnection isn’t required for this service.
🔧 Required Tools
You'll need the following tools for this repair:
- 3-ton floor jack
- 3-ton jack stands - Qty: 4
- Wheel chocks
- Metric socket set, 8mm-18mm
- Metric combination wrench set, 8mm-18mm
- 3/8-inch drive ratchet
- 3/8-inch drive extension set
- 3/8-inch drive torque wrench, 10-80 ft-lbs
- 1/4-inch drive inch-pound torque wrench
- Plastic trim scraper
- Fluid transfer pump with flexible hose
- OBD-II scan tool with transmission temperature display (specialty)
- 10-quart drain pan
- Graduated fluid measuring container
- Digital level
- Brake-cleaner spray nozzle
- Shop towels
- Nitrile gloves
- Safety glasses
🔩 Required Parts
HowToo sells all the parts you need for this repair:
- VAICO automatic transmission fluid kit - Qty: 1
- DEXRON-VI automatic transmission fluid - Qty: approximately 6-8 quarts for service
- Automatic transmission filter - Qty: 1
- Transmission pan gasket - Qty: 1
- Transmission filter seal - Qty: 1
- Transmission drain-plug seal - Qty: 1 if equipped
- Transmission-safe brake cleaner - Qty: 2 cans
The kit shown in the parts list packages the fluid, filter, and pan gasket together. Confirm its six-speed transmission qualifier before ordering.
📋 Before You Begin
- 📋 Drive your Canyon for about 10 minutes, then park it on a firm, level surface.
- 📋 Apply the parking brake, place the selector in Park, and chock the wheels.
- 📋 Raise all four corners with the 3-ton floor jack and support them with four 3-ton jack stands.
- 📋 Use the digital level on the frame to make sure the truck is level front-to-rear and side-to-side.
- 📋 Connect the OBD-II scan tool and locate the transmission-fluid-temperature reading. This tool reads temperature data reported by the vehicle.
- 📋 Clean around every transmission plug before removal. Dirt inside an automatic transmission gets expensive quickly.
🔨 Step-by-Step Instructions
Follow these steps in order:
Step 1: Identify the transmission plugs
- Use safety glasses and a flashlight to locate the transmission pan, fill plug, and level-check plug.
- Don’t confuse a transmission plug with a transfer-case or engine-oil plug.
- Clean the fill-plug area with brake cleaner and shop towels.
Step 2: Loosen the fill plug first
- Use the correctly fitting metric socket and 3/8-inch ratchet to loosen the upper fill plug.
- Leave the plug loosely installed until you’re ready to refill.
- Stop if the plug is damaged, seized, or cannot be positively identified.
- Never drain what you can’t refill.
Step 3: Drain the old fluid
- Position the 10-quart drain pan beneath the transmission pan.
- If the pan has a drain plug, use the correctly fitting metric socket to remove it slowly.
- If there’s no drain plug, use the metric socket set to loosen the pan bolts gradually, starting at one corner.
- Leave several bolts loosely installed on the opposite side. Carefully lower one edge so the fluid drains in a controlled stream.
- Measure the removed fluid with the graduated container and record the amount.
Step 4: Remove the transmission pan
- Support the pan with one hand and use the metric socket and extension to remove the remaining bolts.
- Lower the pan carefully because it will still contain fluid.
- Check the fluid for a strong burnt smell or visible metal pieces. Fine gray paste on the magnet is normal wear; flakes or chunks are not.
Step 5: Remove the old filter
- Place the drain pan beneath the filter.
- Pull the filter straight down by hand while gently rocking it.
- Remove the old filter-neck seal from the transmission bore using a plastic trim scraper if it stayed behind.
- Don’t scratch the aluminum sealing bore.
Step 6: Clean the pan and magnet
- Use brake cleaner, shop towels, and the plastic trim scraper to clean the pan and gasket surface.
- Remove the magnet, clean away the gray paste, and reinstall it in its original position.
- Don’t use powered abrasive discs or metal scrapers on the aluminum sealing surfaces.
- Allow the pan to dry completely before installation.
Step 7: Install the new filter
- Lightly wet the new filter seal with fresh DEXRON-VI fluid.
- Install the seal squarely into the transmission bore by hand.
- Push the new filter straight upward until fully seated.
- Verify that the filter is secure and level.
Step 8: Reinstall the transmission pan
- Place the new gasket on the clean pan. Don’t apply silicone unless the gasket manufacturer specifically requires it.
- Hold the pan against the transmission and start every bolt by hand.
- Use the metric socket and inch-pound torque wrench to tighten the bolts gradually in a crisscross pattern.
- Torque the pan bolts to 9 Nm (80 in-lbs) unless the installed gasket kit specifies a different value.
- Install the drain plug with its new seal if equipped. Use the torque value supplied for the exact plug and pan rather than guessing.
Step 9: Add the initial fluid
- Remove the fill plug using the correctly fitting metric socket.
- Use the fluid transfer pump to add DEXRON-VI fluid.
- Start with approximately one quart less than the amount measured during draining.
- Install the fill plug finger-tight to prevent fluid loss during the initial circulation.
Step 10: Circulate the new fluid
- Confirm that your Canyon remains firmly supported and level.
- Start the engine and keep your foot firmly on the brake pedal.
- Move the selector slowly through Reverse, Neutral, Drive, and the lower ranges, pausing about three seconds in each position.
- Return the selector to Park and leave the engine idling.
- Inspect the pan, gasket, and plugs for leakage.
Step 11: Set the final fluid level
- Use the OBD-II scan tool to monitor transmission-fluid temperature.
- Keep the engine idling, your Canyon level, and the selector in Park.
- Perform the level check with the fluid within the specified service temperature range, generally about 30-50°C (86-122°F).
- Place the drain pan beneath the level plug and remove the plug using the correctly fitting metric socket.
- If no fluid emerges, use the transfer pump to add DEXRON-VI through the fill opening until fluid begins to leave the level opening.
- Allow the flow to reduce to a thin stream or steady drip.
- Reinstall the level plug and tighten it to the transmission’s plug specification.
- Reinstall and tighten the fill plug to the transmission’s plug specification.
- Don’t set the level with the engine off. Fluid drains back internally and creates a false overfilled reading.
Step 12: Clean and lower the vehicle
- Turn off the engine and clean all residual fluid with brake cleaner and shop towels.
- Use the floor jack to lift your Canyon from the stands.
- Remove all four jack stands and lower the vehicle carefully.
- Remove the wheel chocks after the vehicle is fully on the ground.
✅ After Repair
- ✅ Road-test your Canyon for 10-15 minutes using light throttle.
- ✅ Confirm that Reverse and Drive engage normally and that shifts feel consistent.
- ✅ Park on clean pavement and inspect the pan and plugs for leaks.
- ✅ Recheck the fluid level at the correct temperature if shifting changes, fluid leaked, or the amount added differed substantially from the amount removed.
- ✅ Dispose of the used fluid at an approved recycling facility. Never pour it onto the ground or into a drain.
- ✅ If the pan contains metal flakes, the fluid smells badly burnt, or the transmission slips, stop driving and have the transmission diagnosed.
💰 DIY vs Shop Cost
Shop Cost: $350-$650 equivalent, depending on local parts and labor pricing
DIY Cost: $180-$350 equivalent for fluid, filter, gasket, and supplies
You Save: Approximately $150-$300 by doing it yourself!
Labor rates vary by region. This service normally takes a shop approximately 1.5-2.5 hours.
🎯 Ready to get started?
HowToo makes it easy: same-day/2-day shipping on every part, plus all the tools and specialty tools you need! Check out the parts and tools sections below to add everything to your cart.