


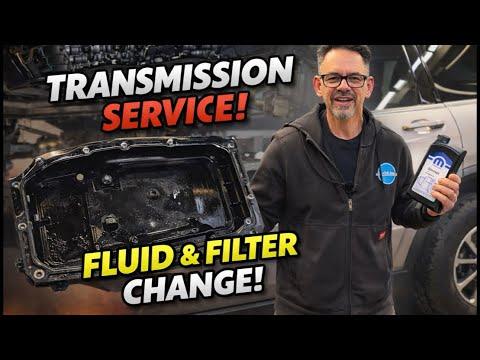


How to Change Transmission Fluid on a 2014-2021 Jeep Grand Cherokee (Engine: V8 5.7L)
Step-by-step sealed 8-speed ATF service with pan/filter, tools, fluid level, and torque specs for 2014, 2015, 2016, 2017, 2018, 2019, 2020, 2021
How to Change Transmission Fluid on a 2014-2021 Jeep Grand Cherokee (Engine: V8 5.7L)
Step-by-step sealed 8-speed ATF service with pan/filter, tools, fluid level, and torque specs for 2014, 2015, 2016, 2017, 2018, 2019, 2020, 2021
🔧 Grand Cherokee - Automatic Transmission Fluid Service
This job replaces the automatic transmission fluid and the transmission pan/filter assembly. Your Grand Cherokee uses a sealed 8-speed automatic transmission, meaning there is no dipstick, so the final fluid level must be checked from underneath at the correct transmission temperature.
Difficulty Level: Advanced | Estimated Time: 2-4 hours
⚠️ Safety & Precautions
- ⚠️ Work only on a cool vehicle. Exhaust and transmission parts can burn you.
- ⚠️ Support your Grand Cherokee level on jack stands. Never crawl under a vehicle held only by a jack.
- ⚠️ The engine must run during the final level check, so keep hands, clothes, and tools away from moving and hot parts.
- ⚠️ This transmission has no dipstick. Fluid level must be set with the vehicle level and the fluid at the correct temperature.
- ⚠️ Use only fluid approved for the ZF 8-speed automatic transmission. Wrong fluid can damage the transmission.
- ⚠️ Battery disconnect is not required for this repair.
🔧 Required Tools
You'll need the following tools for this repair:
- Floor jack (rated 3-ton minimum)
- Jack stands (rated 3-ton minimum)
- Wheel chocks
- Safety glasses
- Nitrile gloves
- Drain pan (10-quart minimum)
- 8mm socket
- 10mm socket
- 13mm socket
- Ratchet
- Torque wrench (inch-pound)
- Torque wrench (foot-pound)
- Fluid transfer pump (specialty)
- OBD scan tool with live transmission temperature data (specialty)
- Infrared thermometer
- Plastic trim tool
- Shop towels
- Brake cleaner
🔩 Required Parts
HowToo sells all the parts you need for this repair:
- Automatic transmission pan/filter assembly - Qty: 1
- Automatic transmission fluid meeting Mopar 8/9 speed ATF or ZF Lifeguard 8 specification - Qty: 7-9 quarts
- Transmission pan bolts - Qty: 1 set
- Transmission fill plug seal - Qty: 1
- Transmission drain plug seal - Qty: 1
📋 Before You Begin
- Park your Grand Cherokee on a flat, level surface.
- Set the parking brake and place wheel chocks behind the wheels.
- Raise and support the vehicle level. A sealed transmission must be level for the fluid check to be accurate.
- A fluid transfer pump is a hand pump that pushes new fluid into the transmission from below.
- An OBD scan tool plugs into the diagnostic port and lets you read transmission fluid temperature.
- Do not perform the final fill by guessing. The fluid temperature matters.
🔨 Step-by-Step Instructions
Follow these steps in order:
Step 1: Raise and Support the Vehicle
- Use a floor jack to raise your Grand Cherokee at the approved lift points.
- Place jack stands under the approved support points.
- Make sure the vehicle is level front-to-back and side-to-side.
- Use wheel chocks to stop the vehicle from rolling.
- Shake gently to confirm stability.
Step 2: Remove the Lower Splash Shield
- Put on safety glasses and nitrile gloves.
- Use an 8mm socket, 10mm socket, or plastic trim tool to remove the lower shield fasteners.
- Lower the shield and place it aside.
- Keep the clips and bolts organized for reinstallation.
Step 3: Loosen the Fill Plug First
- Place a drain pan under the transmission.
- Find the fill plug on the side of the transmission/pan area.
- Use the correct socket from your tool set, commonly an 8mm socket or 10mm socket, to loosen the fill plug.
- Do not drain the transmission until you know the fill plug can be removed.
- Fill plug first, always.
Step 4: Drain the Old Fluid
- Move the drain pan directly under the drain plug.
- Use the correct socket from your tool set to remove the drain plug.
- Let the fluid drain until it slows to a drip.
- Watch for metal chunks or a strong burnt smell. A small amount of fine gray paste is normal.
Step 5: Remove the Transmission Pan/Filter Assembly
- Use a 10mm socket and ratchet to remove the pan bolts.
- Support the pan with one hand as the last bolts come out.
- Lower the pan slowly into the drain pan. More fluid will spill out.
- The filter is built into the pan, so the whole pan/filter assembly is replaced.
Step 6: Clean the Sealing Surface
- Use shop towels to clean the transmission sealing surface.
- Use brake cleaner on a towel to remove oily residue.
- Do not spray cleaner directly into the open transmission.
- Do not use a metal scraper. It can gouge the sealing surface.
Step 7: Install the New Pan/Filter Assembly
- Hold the new automatic transmission pan/filter assembly in place.
- Start all bolts by hand first so they do not cross-thread.
- Use a 10mm socket to snug the bolts in a crisscross pattern.
- Use an inch-pound torque wrench to tighten the pan bolts evenly.
- Torque to 10 Nm (89 in-lbs).
Step 8: Install the Drain Plug
- Install the new transmission drain plug seal.
- Use the correct socket from your tool set to install the drain plug.
- Use a foot-pound torque wrench to tighten it.
- Torque to 20 Nm (15 ft-lbs).
Step 9: Add Initial Fluid
- Insert the hose from the fluid transfer pump into the fill opening.
- Pump in the correct automatic transmission fluid.
- Stop when fluid starts to run back out of the fill hole.
- Install the fill plug finger-tight for now.
Step 10: Warm and Circulate the Fluid
- Connect the OBD scan tool to the diagnostic port under the dash.
- Select live data and monitor transmission fluid temperature.
- Start the engine and keep your foot firmly on the brake.
- Move the shifter slowly through P-R-N-D, pausing about 3 seconds in each position.
- Return the shifter to Park and leave the engine running.
- Wait until the transmission fluid temperature is about 30-50°C (86-122°F).
Step 11: Set the Final Fluid Level
- With the engine running and the vehicle level, remove the fill plug using the correct socket.
- Use the fluid transfer pump to add fluid until it runs out in a thin stream.
- When the stream becomes a slow drip, the level is correct.
- Install the new transmission fill plug seal.
- Use a foot-pound torque wrench to tighten the fill plug.
- Torque to 35 Nm (26 ft-lbs).
Step 12: Reinstall the Lower Splash Shield
- Shut the engine off.
- Use shop towels and brake cleaner to clean any spilled fluid.
- Lift the splash shield into place.
- Use an 8mm socket, 10mm socket, or plastic trim tool to reinstall the fasteners.
Step 13: Lower the Vehicle
- Use the floor jack to raise your Grand Cherokee slightly off the jack stands.
- Remove the jack stands.
- Lower the vehicle slowly to the ground.
- Remove the wheel chocks.
✅ After Repair
- Start the engine and check underneath for leaks.
- Take a gentle 10-15 minute test drive.
- Confirm smooth shifting and no warning lights.
- Recheck underneath for leaks after the test drive.
- Recycle the used transmission fluid at an approved fluid recycling center.
💰 DIY vs Shop Cost
Shop Cost: $450-$750 (parts + labor)
DIY Cost: $220-$380 (parts only)
You Save: $230-$370 by doing it yourself!
Shop labor rates vary but typically run $100-$150/hour. This repair takes a shop approximately 2-3 hours.
🎯 Ready to get started?
HowToo makes it easy: same-day/2-day shipping on every part, plus all the tools and specialty tools you need! Check out the parts and tools sections below to add everything to your cart.
