

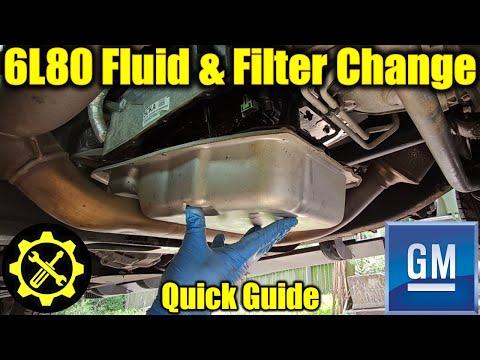






How to Change Transmission Fluid on a 2009-2019 Chevrolet Tahoe 6L80 (Trim: LT)
Step-by-step fluid and filter replacement with tools, torque specs, and safety tips for 2009, 2010, 2011, 2012, 2013, 2014, 2015, 2016, 2017, 2018, 2019
How to Change Transmission Fluid on a 2009-2019 Chevrolet Tahoe 6L80 (Trim: LT)
Step-by-step fluid and filter replacement with tools, torque specs, and safety tips for 2009, 2010, 2011, 2012, 2013, 2014, 2015, 2016, 2017, 2018, 2019


🔧 Tahoe - Transmission Fluid and Filter Change
This service drains the 6-speed automatic transmission, removes the pan, replaces the filter, and refills it with GM-approved DEXRON-VI fluid. The final fluid level must be checked with the engine running and the transmission at a specific temperature, so a scan tool is essential.
Difficulty Level: Advanced | Estimated Time: 2-3 hours
Assumption: This procedure applies to the factory-installed GM 6L80 six-speed automatic transmission.
⚠️ Safety & Precautions
- ⚠️ Keep your Tahoe level and supported by four jack stands. An incorrect vehicle angle causes an incorrect fluid level.
- ⚠️ Never work beneath a vehicle supported only by a floor jack.
- ⚠️ The engine must run during the final level check. Keep hands, clothing, and tools away from the exhaust and rotating parts.
- ⚠️ Transmission fluid can cause burns. Do not remove plugs when the fluid is excessively hot.
- ⚠️ Do not overfill or underfill the transmission. Either condition can cause shifting problems and internal damage.
- ⚠️ Do not use universal fluid unless its label explicitly confirms GM DEXRON-VI approval.
- 🔋 Battery disconnection is not required.
🔧 Required Tools
You'll need the following tools for this repair:
- Four-post vehicle lift or four 3-ton jack stands
- 3-ton floor jack
- Wheel chocks
- 10mm socket
- 13mm socket
- 15mm socket
- Ratchet with 3/8-inch drive
- 3-inch extension with 3/8-inch drive
- Torque wrench rated 5-30 Nm
- Plastic gasket scraper
- Small seal-puller hook
- Rubber mallet
- Fluid drain pan rated 10-quart minimum
- Graduated fluid measuring container rated 8-quart minimum
- Transmission fluid transfer pump with threaded adapter (specialty)
- GM-capable scan tool with transmission-fluid temperature display (specialty)
- Infrared thermometer rated 0-150°C
- Brake-cleaner spray nozzle
- Shop towels
- Nitrile gloves
- Safety glasses
🔩 Required Parts
HowToo sells all the parts you need for this repair:
- GM-approved DEXRON-VI automatic transmission fluid - Qty: 7 quarts
- 6L80 automatic transmission filter - Qty: 1
- Transmission filter neck seal - Qty: 1
- Transmission pan gasket - Qty: 1
- Transmission drain-plug seal - Qty: 1
- Transmission level-plug seal - Qty: 1
- Non-chlorinated brake cleaner - Qty: 2 cans
📋 Before You Begin
- 📍 Park your Tahoe on a firm, level surface and apply the parking brake.
- 🛑 Chock the wheels before raising the vehicle.
- 📏 If using jack stands, raise and support all four corners at equal height. Confirm stability before going underneath.
- 🌡️ Begin with the transmission cool enough to handle safely. The final check requires a fluid temperature of approximately 35-45°C.
- 🧰 Connect the GM-capable scan tool and locate the transmission-fluid temperature data before draining anything.
- ♻️ Arrange for the used fluid to be delivered to an authorized recycling facility.
🔨 Step-by-Step Instructions
Follow these steps in order:
Step 1: Raise and level the vehicle
- Use the 3-ton floor jack to raise your Tahoe only at approved frame lifting points.
- Place all four 3-ton jack stands under secure frame support points.
- Use the infrared thermometer or a level reference to confirm that the vehicle is approximately level from front to rear.
- Push the vehicle gently to verify that it is stable before going underneath.
Step 2: Confirm the fill plug can be removed
- Locate the transmission fill plug on the right side of the transmission case.
- Use the correct listed socket that fits the original plug securely, typically the 15mm socket.
- Loosen the fill plug before draining the transmission. Stop the repair if it cannot be removed.
- Always prove you can refill before draining.
Step 3: Drain the old transmission fluid
- Position the 10-quart drain pan beneath the transmission pan.
- Use the 13mm socket and 3/8-inch ratchet to remove the transmission drain plug.
- Allow the fluid to drain until it slows to an occasional drip.
- Measure the drained fluid with the graduated container. This gives you a safe initial refill estimate.
- Inspect the fluid for metal flakes, heavy sludge, or a strong burned odor. Fine gray paste on the pan magnet is normal; metal chips are not.
Step 4: Remove the transmission pan
- Move the drain pan beneath the entire transmission pan because additional fluid will spill.
- Use the 10mm socket, extension, and 3/8-inch ratchet to loosen the pan bolts evenly.
- Leave two bolts loosely installed at one end while carefully lowering the opposite edge.
- Use the rubber mallet to tap the pan lightly if it sticks. Do not drive a metal tool between the sealing surfaces.
- Support the pan with one hand, remove the final bolts with the 10mm socket, and lower it carefully.
Step 5: Remove the old filter and seal
- Pull the transmission filter straight downward by hand. More fluid will drain from it.
- Check whether the filter neck seal remained inside the transmission pump bore.
- If the old seal remains, use the small seal-puller hook to remove it without scratching the aluminum bore.
- A filter neck seal is the rubber ring that seals the filter’s inlet tube to the transmission.
Step 6: Clean and inspect the pan
- Use the plastic gasket scraper to remove gasket residue without gouging the pan.
- Use non-chlorinated brake cleaner, the spray nozzle, and shop towels to clean the pan and magnet.
- Do not wipe exposed transmission parts with lint-producing cloth.
- Inspect the pan for dents around the filter pickup area and straighten or replace it if damaged.
- Do not apply silicone sealant unless the replacement gasket manufacturer specifically requires it.
Step 7: Install the new filter
- Lightly wet the new filter neck seal with fresh DEXRON-VI fluid.
- Press the seal squarely into its bore by hand until fully seated.
- Push the new transmission filter straight into the seal by hand until it is fully seated and stable.
- Do not strike the filter with a hammer or mallet.
Step 8: Reinstall the transmission pan
- Place the new gasket on the clean pan and align every bolt hole.
- Hold the pan against the transmission and install all bolts finger-tight.
- Use the 10mm socket and torque wrench to tighten the bolts gradually in a crisscross pattern.
- Torque the transmission pan bolts to 9 Nm (80 in-lbs).
- Install the drain plug with its new seal using the 13mm socket and torque wrench.
- Torque the transmission drain plug to 18 Nm (13 ft-lbs).
Step 9: Add the initial fluid quantity
- Remove the loosened fill plug using the 15mm socket and 3/8-inch ratchet.
- Use the transmission fluid transfer pump to add GM-approved DEXRON-VI fluid through the fill opening.
- Begin by adding approximately the same volume that was measured during draining, usually 5-6 quarts after a pan-and-filter service.
- Stop when fluid begins to reach the fill opening, then install the fill plug finger-tight.
- Do not add the transmission’s total dry capacity; substantial fluid remains in the torque converter and cooler.
Step 10: Circulate the new fluid
- Verify that the parking brake is applied and all four wheels are safely supported.
- Connect the GM-capable scan tool and display transmission-fluid temperature.
- Start the engine and keep it idling. Do not raise engine speed.
- Hold the service brake and move the selector through Reverse, Neutral, Drive, and the manual ranges, pausing about three seconds in each position.
- Return the selector to Park and leave the engine running.
Step 11: Set the final fluid level
- Monitor the scan tool until transmission-fluid temperature reaches approximately 35-45°C.
- With the engine idling and your Tahoe level, place the drain pan beneath the level-check opening.
- Use the correct listed socket for the level plug, typically the 13mm socket, and carefully remove the plug.
- If no fluid exits, use the transfer pump to add DEXRON-VI through the fill opening until fluid begins to drip from the level opening.
- If fluid pours out in a stream, allow it to drain until it becomes a slow drip.
- The level is correct when fluid produces a thin stream or slow drip within the specified temperature range.
- Install the level plug with a new seal using the torque wrench.
- Torque the transmission level plug to 9 Nm (80 in-lbs).
- Install the side fill plug using the 15mm socket and torque wrench.
- Torque the transmission fill plug to 20 Nm (15 ft-lbs).
- Temperature and vehicle level are critical here.
Step 12: Clean and lower the vehicle
- Shut off the engine.
- Use non-chlorinated brake cleaner and shop towels to remove spilled fluid from the pan and exhaust.
- Use the 3-ton floor jack to lift each end slightly and remove the jack stands.
- Lower your Tahoe carefully and remove the wheel chocks.
✅ After Repair
- ✅ Start the engine and inspect the pan, drain plug, fill plug, and level plug for leaks.
- 🚙 Road-test your Tahoe for 10-15 minutes using light throttle. Confirm that all shifts are smooth.
- 🔍 Recheck underneath for leaks after the road test.
- 🌡️ If a leak was repaired or fluid was lost, repeat the level-setting procedure with the scan tool at 35-45°C.
- ⚠️ Delayed engagement, slipping, harsh shifts, or abnormal metal in the pan requires professional transmission diagnosis.
- ♻️ Transfer the used fluid into sealed containers and take it to an approved recycling facility. Never pour it onto the ground or into a drain.
💰 DIY vs Shop Cost
Shop Cost: ₹18,000-₹35,000 (parts + labor)
DIY Cost: ₹9,000-₹18,000 (parts only)
You Save: ₹9,000-₹17,000 by doing it yourself!
Local labor and imported DEXRON-VI pricing vary. This repair takes a shop approximately 1.5-2.5 hours.
🎯 Ready to get started?
HowToo makes it easy: same-day/2-day shipping on every part, plus all the tools and specialty tools you need! Check out the parts and tools sections below to add everything to your cart.