







How to Change Transmission Fluid on a 2007-2021 GMC Sierra 1500 (Engine: V6 4.3L)
Step-by-step pan drop service with filter, DEXRON-VI fluid, tools, and torque specs for 2007, 2008, 2010, 2011, 2012, 2013, 2014, 2015, 2016, 2017, 2018, 2019, 2020, 2021
How to Change Transmission Fluid on a 2007-2021 GMC Sierra 1500 (Engine: V6 4.3L)
Step-by-step pan drop service with filter, DEXRON-VI fluid, tools, and torque specs for 2007, 2008, 2010, 2011, 2012, 2013, 2014, 2015, 2016, 2017, 2018, 2019, 2020, 2021


🔧 Sierra 1500 - Transmission Fluid & Filter Change
This job replaces the automatic transmission fluid in the pan and the transmission filter. On your Sierra 1500, the 6-speed automatic transmission uses DEXRON-VI automatic transmission fluid.
This is a service, not a full flush. A pan drop usually replaces about half of the total fluid, which is normal and safer for a DIY service.
Difficulty Level: Intermediate | Estimated Time: 2-3 hours
⚠️ Safety & Precautions
- ⚠️ Transmission fluid can be very hot. Let the truck cool before removing the pan.
- ⚠️ Support your Sierra 1500 with jack stands. Never work under a truck held only by a jack.
- ⚠️ Keep the truck as level as possible during draining and filling so the fluid level reads correctly.
- ⚠️ Use only DEXRON-VI ATF. The wrong fluid can cause shifting problems or transmission damage.
- ⚠️ Do not start the engine with the transmission pan removed.
- ⚠️ Battery disconnect is not required for this service.
🔧 Required Tools
You'll need the following tools for this repair:
- Floor jack rated 3-ton minimum
- Jack stands rated 3-ton minimum
- Wheel chocks
- Safety glasses
- Nitrile gloves
- Drain pan 10-quart minimum
- 10mm socket
- 13mm socket
- 3/8-inch ratchet
- 3/8-inch torque wrench inch-pound capable
- Socket extension 6-inch
- Flat plastic scraper
- Rubber mallet
- Funnel with long flexible neck
- Clean lint-free shop towels
- OBD2 scan tool with transmission temperature display
🔩 Required Parts
HowToo sells all the parts you need for this repair:
- DEXRON-VI automatic transmission fluid - Qty: 6 quarts
- Automatic transmission filter - Qty: 1
- Transmission pan gasket - Qty: 1
- Transmission filter seal - Qty: 1
📋 Before You Begin
- Park your Sierra 1500 on level ground.
- Set the parking brake and place wheel chocks behind the rear wheels.
- If raising the truck, use a floor jack rated 3-ton minimum and support it with jack stands rated 3-ton minimum.
- Let the transmission cool until the pan is safe to touch.
- A torque wrench tightens bolts to an exact amount so they are not too loose or too tight.
- An OBD2 scan tool plugs into the diagnostic port and can show transmission fluid temperature.
- Plan to measure how much fluid drains out. This helps you refill close to the correct amount before final checking.
🔨 Step-by-Step Instructions
Follow these steps in order:
Step 1: Warm the Fluid Slightly
- Start the engine and let it idle for 2-3 minutes.
- With your foot on the brake, move the shifter slowly through P-R-N-D-M, pausing 3 seconds in each position, then return to Park.
- Shut the engine off.
- Warm fluid drains better.
Step 2: Raise and Secure the Truck
- Use the floor jack rated 3-ton minimum to raise the front of your Sierra 1500 if more room is needed.
- Place jack stands rated 3-ton minimum under solid frame points.
- Keep the truck as level as possible.
- Put on safety glasses and nitrile gloves.
Step 3: Position the Drain Pan
- Place the drain pan 10-quart minimum under the transmission pan.
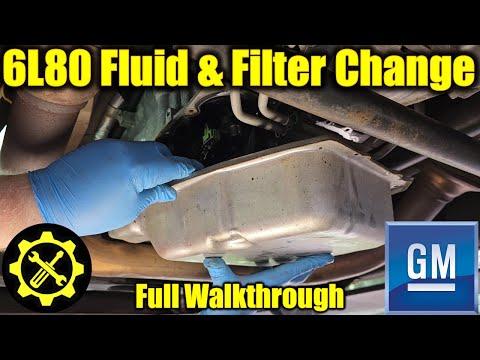
- The transmission pan is the wide metal pan on the bottom of the transmission, behind the engine oil pan.
- Have clean lint-free shop towels nearby for spills.
Step 4: Loosen the Transmission Pan Bolts
- Use a 13mm socket, 3/8-inch ratchet, and 6-inch socket extension to loosen the transmission pan bolts.
- Loosen the rear and side bolts first.
- Leave a few front bolts loosely threaded so the pan can tilt downward at the rear.
- Let the fluid drain into the drain pan.
- Loosen slowly to control the spill.
Step 5: Remove the Transmission Pan
- Once most fluid has drained, support the pan with one hand.
- Use the 13mm socket and 3/8-inch ratchet to remove the remaining pan bolts.
- Lower the pan carefully because fluid will still be inside.
- If the pan sticks, tap it lightly with a rubber mallet. Do not pry hard against the sealing surface.
Step 6: Remove the Old Filter
- Pull the transmission filter straight down by hand.
- Some extra fluid may drain out, so keep the drain pan 10-quart minimum underneath.
- Check whether the old filter seal stayed in the transmission bore.
- If the old seal is stuck, carefully remove it without scratching the bore.
Step 7: Clean the Pan and Magnet
- Use clean lint-free shop towels to wipe out the transmission pan.
- Clean the magnet inside the pan. The magnet collects normal fine metal dust from transmission wear.
- Use a flat plastic scraper to remove old gasket material if needed.
- Do not use a metal scraper on the pan sealing surface.
Step 8: Install the New Filter
- Lubricate the new transmission filter seal with a small amount of fresh DEXRON-VI automatic transmission fluid.
- Install the new seal into the transmission bore if it is not already on the filter.
- Push the new automatic transmission filter straight up by hand until fully seated.
- Make sure the filter sits flat and does not hang loose.
Step 9: Install the Pan and Gasket
- Place the new transmission pan gasket on the clean pan.
- Hold the pan in position and start all pan bolts by hand.
- Use the 13mm socket and 3/8-inch ratchet to snug the bolts in a crisscross pattern.
- Use the 3/8-inch torque wrench inch-pound capable to tighten the pan bolts to Torque to 12 Nm (106 in-lbs).
- Snug, not crushed.
Step 10: Add Initial Transmission Fluid
- Lower your Sierra 1500 so it is level if it was raised.
- Open the hood and locate the transmission dipstick/fill tube at the rear of the engine bay.
- Use a funnel with long flexible neck to add DEXRON-VI automatic transmission fluid.
- Add about 4 quarts first, or slightly less than the amount you measured coming out.
- Do not overfill.
Step 11: Circulate the Fluid
- Start the engine and keep your foot firmly on the brake.
- Move the shifter slowly through P-R-N-D-M, pausing 3 seconds in each position.
- Return the shifter to Park and leave the engine idling.
- Use the OBD2 scan tool with transmission temperature display to monitor transmission fluid temperature.
Step 12: Check and Set the Fluid Level
- With the engine idling, transmission in Park, and truck level, check the dipstick.
- When the transmission reaches normal operating temperature, use the dipstick HOT range.
- Add DEXRON-VI automatic transmission fluid in small amounts using the funnel with long flexible neck.
- Recheck after each small addition.
- The final level should be within the HOT range, not above it.
Step 13: Inspect for Leaks
- With the engine still idling, use safety glasses and look under the truck for leaks around the pan gasket.
- Use clean lint-free shop towels to wipe any spilled fluid from the pan area.
- If a leak appears, shut the engine off and recheck the pan gasket and bolt torque with the 3/8-inch torque wrench inch-pound capable.
✅ After Repair
- Take a short 10-minute test drive and make sure shifts feel smooth.
- Park on level ground, leave the engine idling, and recheck the transmission fluid level in the HOT range.
- Check again for leaks after the test drive.
- Dispose of used transmission fluid properly at a recycling center or parts store that accepts used fluid.
- No battery registration, coding, or infotainment reset is required for this service.
💰 DIY vs Shop Cost
Shop Cost: $250-$450 parts + labor
DIY Cost: $80-$170 parts only
You Save: $170-$280 by doing it yourself!
Shop labor rates vary but typically run $100-$150/hour. This repair takes a shop approximately 1.5-2.0 hours.
🎯 Ready to get started?
HowToo makes it easy: same-day/2-day shipping on every part, plus all the tools and specialty tools you need! Check out the parts and tools sections below to add everything to your cart.