
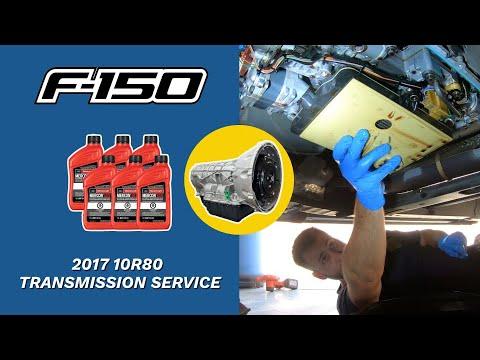







How to Change Transmission Fluid on a 1980-2025 Ford F-150 10R80
Step-by-step drain-and-refill guide with MERCON ULV fluid, tools, and safety tips for 1980, 1981, 1982, 1983, 1984, 1985, 1986, 1987, 1988, 1989, 1990, 1991, 1992, 1993, 1994, 1995, 1996, 1997, 1998, 1999, 2000, 2001, 2002, 2003, 2004, 2005, 2006, 2007, 2008, 2009, 2010, 2011, 2012, 2013, 2014, 2015, 2016, 2017, 2018, 2019, 2020, 2021, 2022, 2023, 2024, 2025
How to Change Transmission Fluid on a 1980-2025 Ford F-150 10R80
Step-by-step drain-and-refill guide with MERCON ULV fluid, tools, and safety tips for 1980, 1981, 1982, 1983, 1984, 1985, 1986, 1987, 1988, 1989, 1990, 1991, 1992, 1993, 1994, 1995, 1996, 1997, 1998, 1999, 2000, 2001, 2002, 2003, 2004, 2005, 2006, 2007, 2008, 2009, 2010, 2011, 2012, 2013, 2014, 2015, 2016, 2017, 2018, 2019, 2020, 2021, 2022, 2023, 2024, 2025


🔧 F-150 - Transmission Fluid Change
Do a simple drain-and-refill with MERCON ULV fluid. Don’t use a power flush or any additives. Your F-150 uses the 10R80 ten-speed, and the final fluid level must be checked warm, with the engine running and the truck perfectly level.
Difficulty Level: Intermediate | Estimated Time: 2-3 hours
Assumption: These instructions cover routine fluid replacement without removing the transmission pan or filter.
⚠️ Safety & Precautions
- ⚠️ Support the truck with four properly rated jack stands. Never work beneath a vehicle supported only by a jack.
- ⚠️ Keep the truck level. Raising only the front produces an incorrect fluid reading.
- ⚠️ Transmission fluid and nearby exhaust parts become hot during the final level check.
- ⚠️ Keep hands, clothing, hoses, and tools away from rotating parts while the engine runs.
- ⚠️ Use only fluid meeting Ford WSS-M2C949-A, MERCON ULV. Ford warns that other fluid can damage the 10R80. fordservicecontent.com)
- ⚠️ Don’t add transmission flush chemicals or friction modifiers.
- 🔋 Battery disconnection isn’t required.
🔧 Required Tools
You'll need the following tools for this repair:
- 3-ton floor jack
- 3-ton jack stands, set of four
- Wheel chocks
- Metric socket set, 8mm-19mm
- 3/8-inch drive ratchet
- 3/8-inch drive torque wrench, 10-80 Nm
- Fluid transfer pump with flexible hose
- Drain pan, 15-quart minimum
- Graduated measuring container, 6-quart minimum
- Scan tool with transmission temperature display
- Infrared thermometer
- Plastic trim-clip removal tool
- Nitrile gloves
- Safety glasses
- Shop towels
🔩 Required Parts
HowToo sells all the parts you need for this repair:
- MERCON ULV automatic transmission fluid - Qty: 6 quarts
- Transmission drain-plug seal - Qty: 1
- Brake cleaner - Qty: 1 can
The transmission’s approximate dry capacity is about 12-13 quarts, but a routine drain-and-refill removes much less. Measure what comes out instead of pouring in the full dry capacity. fordservicecontent.com)
📋 Before You Begin
- 📍 Park on firm, level pavement and apply the parking brake.
- 🛞 Place the transmission in Park and chock the wheels.
- 🌡️ Begin with the transmission warm, not extremely hot. A short 10-minute drive is enough.
- 📱 Connect the scan tool and select the transmission-fluid-temperature reading.
- 🧰 Confirm that the fill plug can be loosened before draining anything. A drained transmission with a stuck fill plug makes for a very long afternoon.
- 🧼 Clean the drain and fill areas before opening them.
🔨 Step-by-Step Instructions
Follow these steps in order:
Step 1: Raise and level the truck
- Use the 3-ton floor jack at approved frame lifting points.
- Place four 3-ton jack stands beneath the frame so the F-150 sits level front-to-rear and side-to-side.
- Push firmly on the truck before going underneath. It must remain completely stable.
- Level matters more than lifting height.
Step 2: Remove the lower shield
- Put on safety glasses and nitrile gloves.
- Use the appropriate metric socket and plastic trim-clip removal tool to remove the transmission-area splash shield, if fitted.
- Keep each fastener with its original location.
Step 3: Locate and loosen the fill point
- Locate the 10R80 fluid-level indicator and fill-plug assembly on the passenger side of the transmission, close to the exhaust.
- Clean around it with brake cleaner and shop towels.
- Use the matching metric socket to carefully break the fill plug loose, but don’t remove it yet.
- Stop if the plug is seized or access puts your hand against hot exhaust components.
Step 4: Drain the old fluid
- Position the 15-quart drain pan beneath the transmission drain plug.
- Use the matching metric socket and 3/8-inch ratchet to remove the drain plug slowly.
- Allow the fluid to drain until it slows to an occasional drip.
- Inspect the fluid for metallic flakes, heavy sludge, burnt odor, or coolant contamination.
- Measure the drained amount with the graduated measuring container.
Step 5: Reinstall the drain plug
- Clean the drain plug with brake cleaner and fit a new seal.
- Start the plug by hand to prevent cross-threading.
- Use the 3/8-inch torque wrench and tighten it to the current Ford service specification for the installed plug and pan.
- Don’t tighten the plug by feel. The transmission pan threads are easy to damage.
Step 6: Add the initial fluid amount
- Remove the previously loosened fill plug using the matching metric socket.
- Use the fluid transfer pump to add MERCON ULV fluid.
- Start by adding approximately the same amount that drained out, minus about 0.5 quart.
- Install the fill plug loosely enough to prevent fluid splash.
Step 7: Circulate the new fluid
- Confirm the parking brake is applied and all four wheels remain securely supported.
- Start the engine and leave it idling.
- Hold the brake pedal and move the shifter slowly through Reverse, Neutral, Drive, and Manual mode.
- Pause about five seconds in each position, then return to Park.
- Don’t accelerate while the truck is supported.
Step 8: Bring the transmission to checking temperature
- Use the scan tool to monitor transmission-fluid temperature while the engine idles.
- Follow the Ford 10R80 temperature window displayed by the service procedure or scan-tool guided test.
- Don’t rely only on an infrared reading. The infrared thermometer measures pan temperature, not the internal fluid temperature.
Step 9: Set the final fluid level
- Leave the engine idling in Park and keep the F-150 level.
- Carefully remove the fill plug with the matching metric socket. The exhaust may now be extremely hot.
- Remove the level indicator and wipe it clean with a shop towel.
- Reinsert it fully, remove it again, and read both sides.
- Ford specifies the 10R80 level at the appropriate 4-5 indicator range once the required checking conditions are met. fordservicecontent.com)
- If low, use the fluid transfer pump to add fluid in 100-200 ml increments.
- Recheck after every addition. Don’t overfill it.
Step 10: Close and inspect the system
- Install the level indicator and fill plug by hand.
- Use the 3/8-inch torque wrench to tighten the fill plug to the current Ford specification for that plug assembly.
- Clean the transmission case with brake cleaner and shop towels.
- Shut off the engine and inspect the drain and fill points for leakage.
Step 11: Reinstall the shield and lower the truck
- Use the appropriate metric socket and plastic trim-clip removal tool to reinstall the lower shield.
- Use the 3-ton floor jack to raise the frame slightly and remove the jack stands.
- Lower the F-150 slowly and remove the wheel chocks.
✅ After Repair
- ✅ Drive gently for 10-15 minutes and verify normal engagement through all gears.
- ✅ Check underneath for leaks after the road test and again the following morning.
- ✅ Save the drained-fluid quantity and service mileage in your maintenance records.
- ✅ If the old fluid contained metal, smelled badly burnt, or shifting remains harsh, stop driving and have the 10R80 diagnosed.
- ✅ A fluid change doesn’t repair internal wear or the harsh-shift concerns documented on some 2017-2020 F-150 10R80 transmissions. fordservicecontent.com
💰 DIY vs Shop Cost
Shop Cost: $250-$500 equivalent, depending on local labor and service method
DIY Cost: $70-$130 equivalent for fluid and supplies
You Save: Approximately $150-$370 by doing it yourself!
Shop pricing in Haryana varies considerably. This repair normally takes approximately 1.5-2.5 labor hours.
🎯 Ready to get started?
HowToo makes it easy: same-day/2-day shipping on every part, plus all the tools and specialty tools you need! Check out the parts and tools sections below to add everything to your cart.