









How to Change Transmission Fluid in a 2019-2023 Cadillac XT4
Step-by-step drain-and-fill guide with required tools, fluid level checks, and safety tips for 2019, 2020, 2021, 2022, 2023
How to Change Transmission Fluid in a 2019-2023 Cadillac XT4
Step-by-step drain-and-fill guide with required tools, fluid level checks, and safety tips for 2019, 2020, 2021, 2022, 2023


🔧 XT4 - Transmission Fluid Drain and Fill
Use a measured drain-and-fill, not a power flush. Your XT4 has a sealed automatic transmission with no conventional dipstick. The final level must be checked with the vehicle level, the engine running, and transmission-fluid temperature monitored by a scan tool.
Assumption: This procedure applies to the stock nine-speed automatic. Exact plug locations and tightening specifications should be confirmed against current GM service information before loosening them.
Difficulty Level: Advanced | Estimated Time: 2-3 hours
⚠️ Safety & Precautions
- ⚠️ Support your XT4 at all four factory lift points. The vehicle must remain perfectly level.
- ⚠️ Never work beneath a vehicle supported only by a floor jack.
- ⚠️ Keep hands, clothing, hoses, and tools clear of moving and hot components while checking the level with the engine running.
- ⚠️ Transmission fluid can cause burns. Wear gloves and safety glasses.
- ⚠️ Remove the fill plug before draining. If it won't open, stop before emptying the transmission.
- ⚠️ Do not substitute Dexron VI or a “universal” ATF unless its manufacturer explicitly approves the exact GM specification required by your transmission.
- ⚠️ Do not add transmission flush chemicals or friction-modifier additives.
- ⚠️ Disconnecting the battery isn't required for a routine drain-and-fill.
🔧 Required Tools
You'll need the following tools for this repair:
- Four-post lift or four jack stands rated 2-ton minimum
- Floor jack rated 2-ton minimum
- Wheel chocks
- Metric socket set, 8mm-18mm
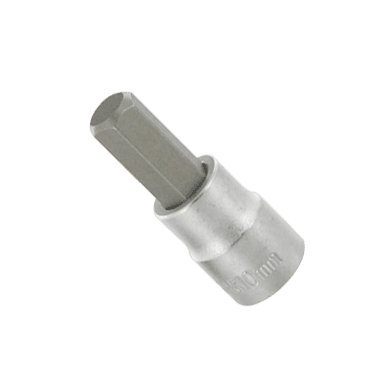
- Metric hex-bit socket set, 5mm-10mm
- 3/8-inch drive ratchet
- 3/8-inch drive torque wrench, 5-80 Nm
- Trim-clip removal tool
- OBD-II scan tool with transmission-fluid temperature display (specialty)
- ATF fluid-transfer pump with flexible hose (specialty)
- Drain pan with 8-quart capacity
- Graduated measuring container with 6-quart capacity
- Digital level
- Shop towels
- Nitrile gloves
- Safety glasses
🔩 Required Parts
HowToo sells the transmission-service aisle, but the displayed fluids don't clearly document the exact GM specification required here. I wouldn't put generic ATF in your XT4.
- GM-specified automatic transmission fluid - Qty: 6 quarts for a normal drain-and-fill supply
- Transmission drain-plug seal - Qty: 1
- Transmission fill-plug seal - Qty: 1
- Transmission level-plug seal - Qty: 1
Correct fluid is cheaper than a transmission.
📋 Before You Begin
- Park on firm, level ground and allow the drivetrain to cool.
- Use the floor jack and four jack stands to raise your XT4 evenly at its factory lift points.
- Use the digital level on the rocker-panel area to confirm the vehicle is level front-to-rear and side-to-side.
- Connect the OBD-II scan tool. “TFT” means transmission-fluid temperature.
- Verify the scan tool can display live TFT before draining anything.
- Check the transmission case and axle-seal areas for leakage. A leak must be repaired before setting the level.
- Measure every quantity removed. This gives you a safe starting refill amount.
🔨 Step-by-Step Instructions
Follow these steps in order:
Step 1: Remove the lower shields
- Use the appropriate metric socket and trim-clip removal tool to remove the lower splash shield beneath the transmission.
- Arrange the fasteners in removal order so each one returns to its original position.
- Identify the fill, drain, and fluid-level plugs using current GM service information. Don't identify them by guesswork.
Step 2: Loosen the fill plug first
- Place the drain pan beneath the transmission.
- Use the correctly fitting metric socket or hex-bit socket to loosen the fill plug.
- If the fill plug is seized or damaged, stop. Don't drain fluid from a transmission you can't refill.
- Inspect the plug and sealing surface after removal.
Step 3: Drain the old fluid
- Position the drain pan directly below the drain plug.
- Use the correctly fitting socket to remove the drain plug slowly.
- Allow the fluid to drain until it becomes an occasional drip.
- Inspect the fluid for burnt odor, metal flakes, or clutch-material debris. Fine gray residue is less concerning than shiny chips or chunks.
Step 4: Measure the drained quantity
- Pour the removed fluid into the graduated measuring container.
- Record the exact amount removed.
- Do not assume the total transmission capacity is the refill quantity. A drain-and-fill removes only part of the total fluid.
Step 5: Reinstall the drain plug
- Clean the drain plug and transmission sealing surface with shop towels.
- Install a new drain-plug seal.
- Start the plug by hand to prevent cross-threading.
- Use the torque wrench and tighten to the latest GM service-manual specification for the identified plug. Do not use generic drain-plug torque because the transmission case can be damaged.
Step 6: Add the initial refill
- Use the ATF fluid-transfer pump to add the same measured quantity that drained out.
- Use only the exact GM-specified fluid shown in current service information or on the original fluid container specification.
- Install the fill plug finger-tight so fluid doesn't splash out during the circulation step.
Step 7: Circulate the new fluid
- Apply the parking brake and hold the brake pedal firmly.
- Start the engine and keep it idling.
- Move the selector slowly through Reverse, Neutral, Drive, and the available manual ranges.
- Pause approximately three seconds in each position, then return to Park.
- Do not raise engine speed while the vehicle is supported.
Step 8: Monitor fluid temperature
- Use the OBD-II scan tool to monitor live transmission-fluid temperature.
- Keep the engine idling and wait until TFT reaches the temperature window specified by current GM service information.
- Do not estimate temperature by touching the case. A sealed transmission's fluid level changes noticeably with temperature.
Step 9: Set the fluid level
- Keep your XT4 level and the engine idling.
- Place the drain pan beneath the fluid-level plug.
- Use the correctly fitting socket or hex-bit socket to remove the level plug.
- If no fluid exits, use the transfer pump to add the specified ATF through the fill opening until fluid begins to escape from the level opening.
- Allow excess fluid to drain until it becomes a thin stream or slow drip, following the GM temperature-controlled procedure.
- Install a new level-plug seal and start the plug by hand.
- Use the torque wrench and tighten to the latest GM service-manual specification for that exact plug.
Step 10: Finish the refill
- Switch off the engine after completing the level check.
- Install a new fill-plug seal and start the fill plug by hand.
- Use the torque wrench and tighten it to the latest GM service-manual specification.
- Use shop towels to clean all spilled fluid from the transmission case.
Step 11: Reinstall the shields
- Use the original metric socket and trim-clip removal tool to reinstall the lower splash shield.
- Make sure every shield edge is captured correctly and isn't touching the exhaust or driveline.
- Lower your XT4 carefully and remove the wheel chocks.
✅ After Repair
- Start the engine and check the drain, fill, and level plugs for leakage.
- Road-test gently for 10-15 minutes. Confirm smooth engagement into Reverse and Drive.
- Recheck underneath for leaks after the road test.
- Transmission adaptation resetting usually isn't required for a basic drain-and-fill.
- If the old fluid contained metal pieces, smelled severely burnt, or the transmission already slips, stop driving and have it diagnosed.
- Dispose of used ATF through an authorized recycling facility. Don't pour it onto the ground or into a drain.
💰 DIY vs Shop Cost
Shop Cost: $250-$450 (parts + labor)
DIY Cost: $90-$180 (fluid and seals only)
You Save: $160-$270 by doing it yourself!
Shop labor rates vary by region. This repair takes a shop approximately 1-2 hours, plus temperature-setting time.
🎯 Ready to get started?
HowToo has opened the transmission-fluid service aisle for your XT4. Match the fluid to the exact GM specification before ordering, and skip the additives and flush chemicals. Same-day/2-day shipping is available on eligible parts, plus the tools and specialty tools you need.
