

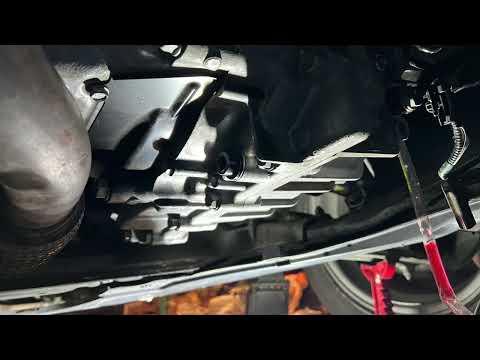







How to Change Transmission Fluid in a 2014-2022 Honda Accord Hybrid e-CVT (Trim: Hybrid | Engine: Inline 4 2.0L)
Step-by-step drain-and-fill guide with Honda ATF DW-1, tools, torque specs, and safety tips for 2014, 2015, 2017, 2018, 2019, 2020, 2021, 2022
How to Change Transmission Fluid in a 2014-2022 Honda Accord Hybrid e-CVT (Trim: Hybrid | Engine: Inline 4 2.0L)
Step-by-step drain-and-fill guide with Honda ATF DW-1, tools, torque specs, and safety tips for 2014, 2015, 2017, 2018, 2019, 2020, 2021, 2022


🔧 Accord - Hybrid Transmission Fluid Change
Your Accord uses an electronic continuously variable transmission, or e-CVT. This service drains the old fluid and refills it with genuine Honda-specification fluid; it does not replace all fluid trapped inside the transmission.
Difficulty Level: Beginner | Estimated Time: 1-1.5 hours
⚠️ Safety & Precautions
- ⚠️ Keep the Accord level and securely supported before working underneath it.
- ⚠️ Never rely on a floor jack alone; use four properly rated jack stands.
- ⚠️ The transmission and fluid may be hot. Let the vehicle cool before removing the drain plug.
- ⚠️ Do not touch, disconnect, or probe any orange high-voltage cables or connectors.
- ⚠️ High-voltage system isolation and 12-volt battery disconnection are not required for this service.
- ⚠️ Use only Honda ATF DW-1. Honda HCF-2 CVT fluid is not correct for the Hybrid e-CVT.
🔧 Required Tools
You'll need the following tools for this repair:
- Floor jack (rated 2-ton minimum)
- Jack stands (rated 2-ton minimum, set of four)
- Wheel chocks
- 3/8-inch-drive ratchet
- 3/8-inch-drive extension
- 10mm socket
- 17mm socket
- Flat-blade trim-clip tool
- Torque wrench (10-80 ft-lbs)
- Fluid-transfer pump with 3/8-inch hose
- Drain pan (8-quart minimum)
- Graduated measuring container (4-quart minimum)
- Long-neck funnel
- Shop towels
- Nitrile gloves
- Safety glasses
🔩 Required Parts
HowToo sells all the parts you need for this repair:
- Honda ATF DW-1 transmission fluid - Qty: 3 US quarts
- Transmission drain-plug sealing washer - Qty: 1
- Transmission fill-plug sealing washer - Qty: 1
- Replacement underbody shield clips - Qty: As needed
📋 Before You Begin
- 📍 Park on a firm, level surface and apply the parking brake.
- 📍 Drive for approximately 10 minutes to warm the fluid, then switch the power system completely off.
- 📍 Chock the wheels before lifting the Accord.
- 📍 Lift and support all four corners at equal height so the vehicle remains level.
- 📍 Confirm that the replacement fluid is labeled Honda ATF DW-1.
- 📍 No infotainment service mode, scan tool, transmission relearn, or battery registration is required.
🔨 Step-by-Step Instructions
Follow these steps in order:
Step 1: Warm and secure the vehicle
- Use the wheel chocks behind the rear wheels before lifting the front.
- Use the floor jack at the approved center lifting points, then place four jack stands beneath the approved side support points.
- Gently shake the vehicle to confirm that it is stable before going underneath.
- Keep the vehicle level for accurate filling.
Step 2: Remove the lower splash shield
- Put on the safety glasses and nitrile gloves.
- Use the flat-blade trim-clip tool to release the plastic retainers without twisting them sideways.
- Use the 10mm socket and 3/8-inch-drive ratchet to remove any shield bolts.
- Lower the shield and arrange its fasteners in their removal order.
Step 3: Loosen the fill plug first
- Locate the transmission fill plug on the front-facing side of the e-CVT housing.
- Place the drain pan underneath in case a small amount of fluid escapes.
- Use the 17mm socket, extension, and 3/8-inch-drive ratchet to loosen and remove the fill plug.
- Inspect the plug and remove its old sealing washer.
- Do not drain the transmission until the fill plug can be removed. This prevents being left with an empty transmission that cannot be refilled.
Step 4: Drain the old transmission fluid
- Position the 8-quart drain pan directly beneath the transmission drain plug.
- Use the square end of the 3/8-inch-drive ratchet to loosen the drain plug.
- Finish removing the plug carefully by hand and allow the fluid to drain completely.
- Let it drain until only an occasional drip remains, usually 10-15 minutes.
- Pour the drained fluid into the graduated measuring container and record the amount removed.
- Normal drained fluid is reddish-brown. Metallic flakes, a burnt odor, or milky fluid require professional inspection.
Step 5: Clean and reinstall the drain plug
- Use shop towels to clean the drain plug and the transmission sealing surface.
- Remove the old washer and install one new transmission drain-plug sealing washer.
- Start the drain plug by hand to prevent cross-threading.
- Use the torque wrench with its 3/8-inch square drive to tighten the plug to 49 Nm (36 ft-lbs).
- A new washer helps prevent slow leaks.
Step 6: Refill the e-CVT
- Install the fluid-transfer pump on a container of Honda ATF DW-1.
- Insert the 3/8-inch pump hose into the open fill port.
- Use the fluid-transfer pump to add the same measured quantity that was drained.
- A normal drain-and-fill is approximately 2.2-2.4 US quarts (2.1-2.3 liters). Do not automatically add all three quarts.
- Pause periodically and use the graduated measuring container to track the amount added.
- Keep dirt, funnels used for other fluids, and HCF-2 fluid away from the fill opening.
Step 7: Install the fill plug
- Install one new transmission fill-plug sealing washer on the fill plug.
- Start the fill plug by hand until it turns freely against the housing.
- Use the 17mm socket and torque wrench to tighten the fill plug to 44 Nm (33 ft-lbs).
- Use shop towels to wipe the transmission housing clean so any later seepage is easy to identify.
Step 8: Reinstall the splash shield
- Raise the lower shield into its original position.
- Use the flat-blade trim-clip tool to reset each reusable plastic clip before installation.
- Press the plastic clips into their original holes by hand.
- Use the 10mm socket and 3/8-inch-drive ratchet to reinstall the shield bolts snugly. Do not overtighten bolts threaded into plastic retainers.
Step 9: Lower the vehicle
- Use the floor jack to lift each end slightly and remove the jack stands.
- Lower the Accord slowly onto level ground.
- Remove the wheel chocks only after the vehicle is fully lowered.
✅ After Repair
- ✅ With the brake pedal firmly pressed, start the Accord and verify the green “READY” indicator appears.
- ✅ Move the selector slowly through Reverse, Neutral, Drive, and Park, pausing approximately three seconds in each position.
- ✅ Inspect beneath the vehicle for leakage around both transmission plugs.
- ✅ Take a gentle 10-minute test drive and confirm there are no warning messages, abnormal noises, or delayed engagement.
- ✅ Recheck the floor beneath the transmission after the test drive.
- ✅ Record the service date and mileage. No transmission-fluid maintenance reminder reset or scan-tool relearn is required.
- ✅ Take the used fluid to an authorized oil recycler or service facility; never pour it onto the ground or into a drain.
💰 DIY vs Shop Cost
Shop Cost: ₹6,000-₹11,000 (parts + labor)
DIY Cost: ₹2,500-₹4,500 (parts only)
You Save: ₹3,500-₹6,500 by doing it yourself!
Local labor rates vary. This repair takes a shop approximately 0.5-1 hour.
🎯 Ready to get started?
HowToo makes it easy: same-day/2-day shipping on every part, plus all the tools and specialty tools you need! Check out the parts and tools sections below to add everything to your cart.