


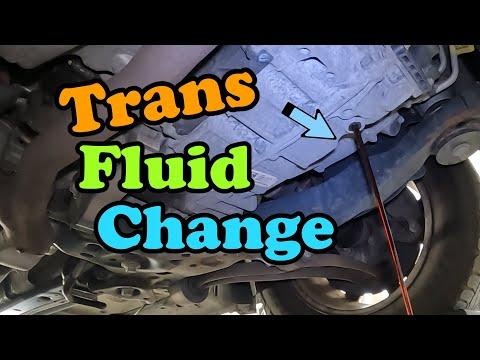






How to Change Transmission Fluid in a 2011-2025 Ford Explorer 6F55 (Engine: V6 3.5L)
Step-by-step drain-and-refill guide with MERCON LV fluid, tools, torque specs, and safety tips for 2011, 2012, 2013, 2014, 2015, 2016, 2017, 2018, 2019
How to Change Transmission Fluid in a 2011-2025 Ford Explorer 6F55 (Engine: V6 3.5L)
Step-by-step drain-and-refill guide with MERCON LV fluid, tools, torque specs, and safety tips for 2011, 2012, 2013, 2014, 2015, 2016, 2017, 2018, 2019


🔧 Explorer - Transmission Fluid Drain and Refill
Do a drain and refill, not a machine flush. Your Explorer’s 6F55 six-speed transmission requires MERCON LV fluid. A simple drain usually removes about 4–5 quarts, while the complete transmission holds about 9 quarts. Ford specifies checking the final level hot, with the engine running and the transmission in Park. manualzz.com)
This guide covers routine fluid replacement without removing the transmission pan. The internal filter isn’t part of a normal beginner drain-and-refill service.
Difficulty Level: Intermediate | Estimated Time: 1.5–2 hours
⚠️ Safety & Precautions
- ⚠️ Transmission fluid and nearby turbo components can cause serious burns. Wear gloves and safety glasses.
- ⚠️ Never work underneath your Explorer while it’s supported only by a jack.
- ⚠️ Keep the vehicle level while draining and checking the fluid.
- ⚠️ Don’t start the engine while the air-filter assembly is removed.
- ⚠️ Don’t use additives, cleaners, or universal fluid that doesn’t explicitly meet Ford’s MERCON LV specification. Ford warns that additives can affect transmission operation. fordservicecontent.com
- ⚠️ If the old fluid contains shiny metal pieces, smells severely burned, or the transmission already slips, stop and have it diagnosed.
- ⚠️ Battery disconnection isn’t required.
🔧 Required Tools
You'll need the following tools for this repair:
- Floor jack rated 2-ton minimum
- Four jack stands rated 2-ton minimum
- Two wheel chocks
- 8mm socket
- 10mm socket
- 11mm socket
- 3/8-inch-drive ratchet
- 3/8-inch-drive torque wrench
- 6-quart graduated drain pan
- 6-quart graduated measuring container
- Long-neck transmission funnel
- Flat-blade screwdriver
- Clean lint-free shop towels
- Nitrile mechanic gloves
- Safety glasses
🔩 Required Parts
HowToo sells all the parts you need for this repair:
- Automatic transmission fluid meeting MERCON LV specification - Qty: 6 quarts
- Transmission drain-plug sealing material or replacement plug - Qty: 1 if damaged or leaking
Do not substitute MERCON ULV. It belongs to later Explorer transmissions and isn’t correct for your 6F55.
📋 Before You Begin
- 📋 Park on level pavement, apply the parking brake, and chock the wheels.
- 📋 Drive for only 10–15 minutes before draining. Warm fluid drains better, but don’t begin immediately after a long highway drive.
- 📋 Confirm that you can reach the dipstick and fill opening before removing the drain plug.
- 📋 On the turbocharged engine, the dipstick sits beneath the air-filter housing. The housing must be loosened and moved for access. manualzz.com
- 📋 Cleanliness matters. Even a little grit introduced through the fill opening can create expensive trouble. Transmissions hold grudges.
🔨 Step-by-Step Instructions
Follow these steps in order:
Step 1: Raise and level the vehicle
- Place the wheel chocks securely against the tires remaining on the ground.
- Use the 2-ton floor jack at the approved lifting points.
- Lower your Explorer onto all four 2-ton jack stands, keeping it level front-to-rear and side-to-side.
- Push the vehicle gently before going underneath. It shouldn’t move.
Step 2: Remove the lower shield
- Put on the safety glasses and nitrile mechanic gloves.
- Use the 8mm socket or 10mm socket, depending on the installed fasteners, to remove the lower splash shield.
- Place its fasteners in order so they return to their original holes.
Step 3: Confirm fill-port access
- Open the hood and remove the decorative engine cover by lifting it straight upward by hand.
- Use the flat-blade screwdriver to loosen the air-intake hose clamp.
- Use the 8mm socket to remove the air-filter housing fasteners.
- Lift and rotate the housing enough to expose the transmission dipstick and filler opening.
- Don’t disconnect wiring or start the engine with the housing removed.
- Never drain before confirming you can refill.
Step 4: Drain the old fluid
- Place the graduated drain pan directly below the transmission drain plug.
- Use the 11mm socket and 3/8-inch-drive ratchet to loosen the drain plug slowly.
- Remove the plug by hand while pressing it inward until the last threads release.
- Allow the fluid to drain until it slows to an occasional drip.
- Inspect the plug and fluid. Fine dark paste is less concerning than glitter, flakes, or solid pieces.
Step 5: Measure the drained fluid
- Pour the used fluid into the graduated measuring container.
- Record the exact amount removed. A typical drain is roughly 4–5 quarts, but the measured amount from your Explorer is the starting refill quantity.
- Don’t pour in the transmission’s entire dry capacity. Much of the old fluid remains inside the torque converter and cooler.
Step 6: Reinstall the drain plug
- Clean the plug and surrounding case with lint-free shop towels.
- Replace the plug if its threads or sealing surface are damaged.
- Start it several turns by hand. Cross-threading the aluminum case is an expensive mistake.
- Use the 3/8-inch-drive torque wrench and 11mm socket to tighten the plug to 27 Nm (20 ft-lbs).
- Wipe the area clean so any later leak is easy to spot.
Step 7: Add the initial refill
- Turn the transmission dipstick cap counterclockwise and remove it.
- Insert the long-neck transmission funnel into the filler opening.
- Add approximately 0.5 quart less than the measured amount removed.
- Add fluid slowly to prevent it from backing up through the narrow opening.
- Install the dipstick cap and rotate it clockwise until firmly seated.
Step 8: Reinstall the air-filter housing
- Position the air-filter housing onto its locating pins.
- Use the 8mm socket and 3/8-inch-drive ratchet to install its fasteners snugly.
- Reconnect the intake hose and use the flat-blade screwdriver to tighten its clamp securely.
- Install the engine cover by aligning its mounts and pressing downward by hand.
Step 9: Circulate the new fluid
- Start the engine with your foot firmly on the brake.
- Move the selector slowly through Park, Reverse, Neutral, Drive, and Manual.
- Pause approximately five seconds in each position, then return it to Park.
- Check underneath for leakage around the drain plug.
Step 10: Bring the fluid to checking temperature
- Reinstall the lower shield loosely or lower the vehicle before driving.
- Drive approximately 20 miles until the transmission reaches normal operating temperature.
- Ford specifies checking the level at 82–93°C (179–199°F). fordservicecontent.com)
- If the vehicle was driven hard, towed, or sat in heavy hot-weather traffic, let it cool for at least 30 minutes before checking.
Step 11: Check the final fluid level
- Park on perfectly level ground and apply the parking brake.
- Leave the engine running with the transmission in Park.
- Wear the nitrile mechanic gloves because the dipstick and surrounding components will be hot.
- Move the air-filter housing aside using the flat-blade screwdriver and 8mm socket as described earlier. Don’t shut off the engine for the level reading.
- Turn the dipstick cap counterclockwise, remove it, and wipe it using a clean lint-free shop towel.
- Fully reinstall the dipstick, remove it again, and read both sides.
- The fluid must sit within the MIN-to-MAX crosshatched area.
- If low, use the long-neck transmission funnel to add MERCON LV in 4-ounce increments. Recheck after every addition.
- If above MAX, remove fluid. Overfilling can foam the fluid and damage the transmission.
- Ford’s official procedure requires the engine running, transmission in Park, and fluid at normal operating temperature for this check. manualzz.com)
Step 12: Finish the installation
- Turn the dipstick cap clockwise until it offers strong resistance.
- Switch off the engine.
- Reinstall the air-filter housing, intake clamp, engine cover, and lower splash shield using the same tools.
- Lower your Explorer carefully with the 2-ton floor jack and remove the 2-ton jack stands.
✅ After Repair
- ✅ Test-drive for 10–15 minutes and confirm smooth engagement in Reverse and Drive.
- ✅ Recheck the drain plug and surrounding area for leaks.
- ✅ Check the fluid level again hot after several normal drives if you’re uncertain about the first reading.
- ✅ Don’t expect one drain to replace every quart. Two or three drain-and-refill services, separated by normal driving, exchange more old fluid gently.
- ✅ Take the used fluid to an automotive-fluid recycling facility. Never pour it onto the ground or into a drain.
- ✅ Ford’s normal schedule lists automatic-transmission fluid replacement at 150,000 miles (240,000 km), although severe heat, heavy traffic, towing, and dusty conditions justify closer inspection. fordservicecontent.com
💰 DIY vs Shop Cost
Shop Cost: $250–$450 (parts + labor)
DIY Cost: $65–$110 (parts only)
You Save: $140–$385 by doing it yourself!
Shop labor rates vary but typically run $100-$150/hour. This repair takes a shop approximately 1–1.5 hours.
🎯 Ready to get started?
HowToo offers same-day/2-day shipping on every part, plus all the tools and specialty tools you need! Check out the parts and tools sections below to add everything to your cart.
