

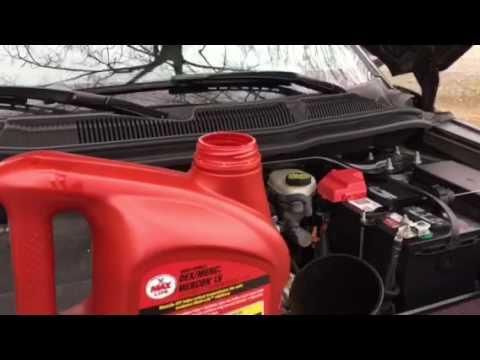





How to Change Transmission Fluid in a 2011-2025 Ford Explorer 6F50 (Engine: V6 3.5L)
Step-by-step drain-and-refill guide with MERCON LV fluid, tools, torque specs, and safety tips for 2011, 2012, 2013, 2014, 2015, 2016, 2017, 2018, 2019
How to Change Transmission Fluid in a 2011-2025 Ford Explorer 6F50 (Engine: V6 3.5L)
Step-by-step drain-and-refill guide with MERCON LV fluid, tools, torque specs, and safety tips for 2011, 2012, 2013, 2014, 2015, 2016, 2017, 2018, 2019


🔧 Explorer - Transmission Fluid Drain and Refill
This procedure replaces part of the old fluid in the 6F50 six-speed automatic transmission by draining the pan and refilling through the transmission fill opening. A drain-and-refill is safer for routine maintenance than a power flush, especially when the service history is unknown.
Assumption: This procedure applies to the factory 6F50 automatic transmission fitted to your Explorer.
Difficulty Level: Intermediate | Estimated Time: 1.5-2.5 hours
⚠️ Safety & Precautions
- ⚠️ Support your Explorer with jack stands on a solid, level surface. Never work beneath a vehicle supported only by a jack.
- 🔥 Transmission fluid can cause burns. Let the exhaust cool before removing the drain plug.
- 🧤 Wear nitrile gloves and safety glasses. Used transmission fluid irritates skin.
- 📏 Your Explorer must be level during the final fluid check or the reading will be inaccurate.
- 🛢️ Use only MERCON LV automatic transmission fluid. MERCON V and universal fluids are not approved substitutes.
- 🚫 Do not add the transmission’s full dry capacity after draining. A normal drain removes only part of the fluid.
- 🔋 Battery disconnection is not required.
🔧 Required Tools
You'll need the following tools for this repair:
- 8mm socket
- 10mm socket
- 11mm socket
- Socket ratchet with 150mm extension
- Torque wrench rated 5-30 Nm
- Flat-blade screwdriver
- Trim-clip removal tool
- Low-profile floor jack rated 2-ton minimum
- Jack stands rated 2-ton minimum
- Wheel chocks
- Drain pan with 8-litre capacity
- Fluid measuring jug with 100ml markings
- Long-neck transmission funnel
- Digital infrared thermometer
- Lint-free shop towels
- Nitrile gloves
- Safety glasses
🔩 Required Parts
HowToo sells all the parts you need for this repair:
- MERCON LV automatic transmission fluid - Qty: 6 quarts
- Transmission drain-plug sealing washer - Qty: 1
A typical drain-and-refill uses approximately 4.5-5.0 quarts, but measure what comes out and verify the final level.
📋 Before You Begin
- 🅿️ Park your Explorer on level, solid ground and apply the parking brake.
- 🧱 Use wheel chocks to secure the wheels before lifting the vehicle.
- 🚗 Drive for approximately 15 minutes so the transmission reaches normal operating temperature.
- 🌡️ Use a digital infrared thermometer at the transmission pan as a practical temperature guide. The final check should be made with the fluid warm, approximately 85-93°C.
- 🧼 Clean the funnel and measuring jug thoroughly. Even small amounts of dirt can damage transmission components.
- 📱 No infotainment-menu setting, scan-tool command, battery registration, or coding is required.
🔨 Step-by-Step Instructions
Follow these steps in order:
Step 1: Warm the Transmission
- Drive your Explorer for approximately 15 minutes, using each forward gear normally.
- Park on level ground and use the digital infrared thermometer to check the transmission-pan temperature.
- Switch the engine off before raising the vehicle.
Step 2: Raise and Secure the Vehicle
- Use wheel chocks to secure the wheels remaining on the ground.
- Use the 2-ton floor jack at the approved front lifting point, then lower your Explorer onto 2-ton jack stands at the reinforced support points.
- If additional rear clearance is needed, raise and support the rear in the same manner.
- Confirm that your Explorer is level and stable before going underneath it.
- Gently push the body to verify stability.
Step 3: Remove the Lower Shield
- Put on safety glasses and nitrile gloves.
- Use an 8mm socket and ratchet to remove the lower splash-shield screws.
- Use a trim-clip removal tool to release any plastic retainers without breaking them.
- Lower the shield and place its fasteners together in a safe location.
Step 4: Confirm the Fill Opening Can Be Accessed
- Open the bonnet and locate the transmission fluid fill cap and short dipstick below the air-intake area on the driver side of the engine compartment.
- If the air-cleaner outlet tube blocks access, use a flat-blade screwdriver or 8mm socket to loosen its clamps.
- Use a 10mm socket to remove the air-cleaner retaining fastener, then move the air-cleaner assembly aside carefully.
- Remove the transmission fill cap by hand before draining any fluid.
- The short dipstick is the fluid-level gauge attached to or located directly beneath the fill cap.
- Never drain before confirming refill access.
Step 5: Drain the Old Fluid
- Position the 8-litre drain pan beneath the transmission drain plug.
- Use an 11mm socket, extension, and ratchet to loosen the drain plug carefully.
- Remove the plug by hand while keeping your face and arms away from the hot fluid stream.
- Allow the transmission to drain until the flow becomes a slow drip, usually 10-15 minutes.
Step 6: Measure and Inspect the Fluid
- Use the measuring jug to record exactly how much fluid drained out.
- Inspect the fluid in good light. Dark fluid may indicate age, but metallic flakes, a strong burnt smell, or clutch debris suggest internal wear.
- Do not perform repeated fluid changes immediately if the drained fluid contains substantial metal or friction material. Professional diagnosis is recommended.
Step 7: Install the Drain Plug
- Use lint-free shop towels to clean the drain plug and the sealing surface.
- Install a new transmission drain-plug sealing washer.
- Thread the drain plug in by hand to prevent cross-threading.
- Use the torque wrench and 11mm socket to tighten the plug to 12 Nm (106 in-lbs).
- Do not overtighten the plug because the transmission case can be damaged.
Step 8: Add the Initial Refill
- Insert the long-neck transmission funnel into the fill opening.
- Add new MERCON LV fluid equal to the measured amount removed, stopping approximately 250ml short initially.
- Pour slowly to prevent the narrow fill opening from overflowing.
- Install the fill cap and short dipstick by hand.
Step 9: Circulate the New Fluid
- Confirm that no tools remain near the belt, fan, or air intake.
- Start the engine and keep your foot firmly on the brake pedal.
- Move the selector slowly through P-R-N-D-M, pausing approximately five seconds in each position.
- Return the selector to Park and leave the engine idling.
- Use the digital infrared thermometer to monitor the transmission-pan temperature as it approaches approximately 85-93°C.
Step 10: Check and Correct the Fluid Level
- Keep the engine idling, parking brake applied, and your Explorer level.
- Wear nitrile gloves, remove the fill cap and short dipstick by hand, then wipe the gauge with a lint-free shop towel.
- Reinstall the dipstick fully, remove it again, and read both sides.
- The warm fluid level should be within the crosshatched operating range on the short dipstick.
- If low, use the long-neck transmission funnel to add MERCON LV fluid in 100ml increments.
- After each addition, wait approximately 30 seconds and check again with the dipstick.
- If overfilled, fluid must be extracted through the fill opening before driving. Overfilling can cause aeration, shifting problems, and leaks.
Step 11: Reassemble the Intake
- Switch the engine off after the fluid level is correct.
- Install the transmission fill cap securely by hand.
- Reposition the air-cleaner assembly and use the 10mm socket and torque wrench to tighten its retaining fastener to 8 Nm (71 in-lbs).
- Use the flat-blade screwdriver or 8mm socket to tighten the air-intake clamps until secure without crushing the plastic tube.
Step 12: Check for Leaks and Refit the Shield
- Use safety glasses and inspect the drain-plug area for fresh fluid.
- Raise the lower shield into position.
- Use the trim-clip removal tool by hand to reinstall the plastic retainers.
- Use the 8mm socket and torque wrench to tighten the shield screws to 5 Nm (44 in-lbs).
Step 13: Lower the Vehicle
- Use the 2-ton floor jack to raise your Explorer slightly above the jack stands.
- Remove the jack stands, then lower the vehicle slowly to the ground.
- Remove the wheel chocks only after your Explorer is fully lowered.
✅ After Repair
- 🚗 Take a gentle 10-minute test drive and confirm that each shift is smooth.
- 🔍 Park on clean, level ground and inspect beneath the drain plug for leaks.
- 🌡️ Recheck the dipstick level with the engine idling and the transmission warm. Add only MERCON LV in 100ml increments if needed.
- 📝 Record the date, odometer reading, fluid specification, and drained quantity.
- ♻️ Take the used fluid to an authorised oil recycler or service workshop. Do not pour it onto the ground or into a drain.
- ⚠️ If your Explorer slips, shudders, delays engagement, or contains metal debris, stop driving and have the transmission diagnosed.
💰 DIY vs Shop Cost
Shop Cost: ₹9,000-₹16,000 (parts + labour)
DIY Cost: ₹4,500-₹8,000 (parts only)
You Save: ₹4,500-₹8,000 by doing it yourself!
Local labour rates vary. This repair takes a shop approximately 1.0-1.5 hours.
🎯 Ready to get started?
HowToo makes it easy: same-day/2-day shipping on every part, plus all the tools and specialty tools you need! Check out the parts and tools sections below to add everything to your cart.