








How to Change Transmission Fluid in a 2009-2019 Ford Escape 6F35 (Trim: S | Engine: Inline 4 2.5L)
Step-by-step drain and refill guide with MERCON LV fluid, tools, level checks, and safety tips for 2009, 2010, 2011, 2012
How to Change Transmission Fluid in a 2009-2019 Ford Escape 6F35 (Trim: S | Engine: Inline 4 2.5L)
Step-by-step drain and refill guide with MERCON LV fluid, tools, level checks, and safety tips for 2009, 2010, 2011, 2012


🔧 Escape - Transmission Fluid Drain and Refill
A simple drain and refill is the right DIY service for your Escape. Don’t use a powered flush or additives. The 6F35 automatic transmission has no dipstick, so fluid temperature and vehicle level are critical.
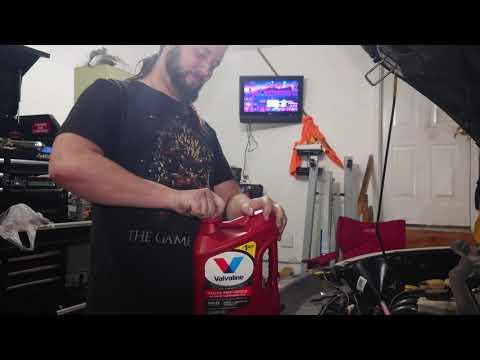
Ford specifies Motorcraft MERCON LV Automatic Transmission Fluid. The listed 8.5-liter capacity is a dry-fill figure, not what normally drains during routine service. Expect roughly 4 to 5 quarts, but measure what comes out and set the final level through the level plug. fordservicecontent.com)
Difficulty Level: Intermediate | Estimated Time: 1.5-2.5 hours
⚠️ Safety & Precautions
- ⚠️ Support your Escape on four jack stands. It must remain level during the final fluid check.
- ⚠️ Never work under a vehicle supported only by a floor jack.
- ⚠️ Transmission fluid and nearby exhaust components can cause burns.
- ⚠️ Keep hands, clothing, and tools clear while the engine runs.
- ⚠️ Don’t remove the large transmission case bolts. Identify the drain and level plugs before loosening anything.
- ⚠️ Don’t use MERCON ULV, MERCON V, universal fluid, flush chemicals, or friction additives. Ford warns that incorrect fluid or additives can damage the transmission. fordservicecontent.com
- ⚠️ Battery disconnection isn’t required.
🔧 Required Tools
You'll need the following tools for this repair:
- 3/8-inch drive metric socket set
- 3/8-inch drive ratchet
- 3/8-inch drive torque wrench
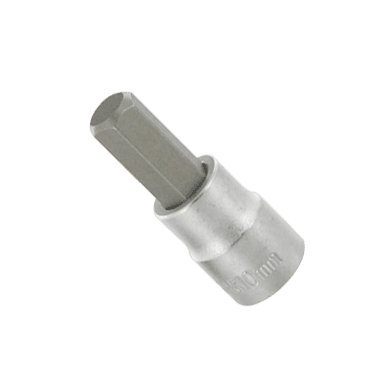
- Metric hex-bit socket set
- Fluid transfer pump with flexible hose
- Drain pan rated for 10 quarts minimum
- 5-quart graduated measuring container
- Digital infrared thermometer
- OBD-II scan tool with transmission-temperature display
- Floor jack rated 2-ton minimum
- Four jack stands rated 2-ton minimum
- Four wheel chocks
- 24-inch carpenter’s level
- Plastic trim-clip tool
- Funnel with long flexible hose
- Nitrile gloves
- Safety glasses
- Shop towels
🔩 Required Parts
HowToo sells all the parts you need for this repair:
- Motorcraft MERCON LV automatic transmission fluid - Qty: 5 quarts
- Transmission drain-plug sealing washer - Qty: 1
- Transmission level-plug sealing washer - Qty: 1
A routine drain and refill doesn’t require removing the transmission or replacing its internal filter. Don’t open the case just because a filter appears in a parts list. That turns a sensible service into a weekend you didn’t ask for.
📋 Before You Begin
- Park on level pavement, set the parking brake, and chock the rear wheels.
- Take a 10-minute drive so the fluid is warm, not scorching hot.
- Connect the OBD-II scan tool and select transmission-fluid temperature. An OBD-II scan tool reads information from the vehicle’s diagnostic connector under the dashboard.
- Raise your Escape with the floor jack and support it securely on four jack stands.
- Use the carpenter’s level on the door sill or flat underbody structure. Adjust the stands until the vehicle sits level front-to-rear and side-to-side.
- No infotainment service mode or battery coding is required.
🔨 Step-by-Step Instructions
Follow these steps in order:
Step 1: Remove the lower cover
- Put on the safety glasses and nitrile gloves.
- Use the metric socket set and plastic trim-clip tool to remove the fasteners holding the lower splash shield.
- Set the fasteners aside in their installed order.
Step 2: Identify the service plugs
- Use a work light and locate the transmission drain plug at the bottom of the transmission case.
- Locate the level-check plug on the side of the transmission.
- Locate the upper fill opening or transmission vent access before draining.
- Use the correct metric socket or hex-bit socket to make sure the fill and level plugs will loosen.
- Never drain before confirming you can refill it.
Step 3: Drain the old fluid
- Place the 10-quart drain pan directly beneath the drain plug.
- Use the correctly fitting socket and ratchet to loosen the drain plug slowly.
- Remove the plug by hand and allow the fluid to drain completely.
- Inspect the fluid for burnt odor, metallic flakes, or clutch-material debris.
- If the fluid contains heavy metal debris or the transmission slips, stop the service and have the transmission diagnosed.
Step 4: Measure the drained fluid
- Pour the old fluid into the graduated measuring container.
- Record the exact amount removed. This gives you a safe starting refill quantity.
- Clean the drain plug with shop towels and replace its sealing washer.
Step 5: Reinstall the drain plug
- Thread the drain plug into the case by hand to prevent cross-threading.
- Use the torque wrench and the verified service specification for the plug fitted to your transmission.
- Don’t guess or overtighten this plug. The aluminum transmission case is much more expensive than a torque-spec lookup.
Step 6: Add fresh transmission fluid
- Use the fluid transfer pump or long flexible funnel at the upper fill opening.
- Add approximately the same quantity of MERCON LV that you measured during draining.
- Stop about 0.25 quart short of the measured quantity before beginning the level-setting process.
- Keep the container sealed between pours so dirt can’t enter the fluid.
Step 7: Circulate the new fluid
- Confirm your Escape is secure and level on all four jack stands.
- Start the engine and hold the brake pedal firmly.
- Move the selector slowly through P-R-N-D-S, pausing about five seconds in each position.
- Return the selector to Park and leave the engine idling.
- Use the scan tool to monitor transmission-fluid temperature.
Step 8: Set the final fluid level
- Keep the engine running, the transmission in Park, and the vehicle perfectly level.
- When the fluid reaches the specified checking-temperature range for the 6F35, place the drain pan beneath the level plug.
- Use the correct socket or hex-bit socket to remove the level plug carefully.
- If no fluid comes out, use the transfer pump to add MERCON LV in small amounts until fluid begins to escape from the opening.
- If a heavy stream comes out, allow it to drain until it becomes a thin trickle.
- The correct level is reached when fluid leaves the level opening as a light trickle at the specified temperature.
- Install a new sealing washer and thread the level plug in by hand.
- Use the torque wrench and the verified service specification for the plug installed on your transmission.
Step 9: Inspect and reassemble
- Use shop towels to clean all spilled fluid from the transmission case.
- With the engine idling, inspect the drain and level plugs for leakage.
- Turn off the engine.
- Use the metric socket set and trim-clip tool to reinstall the lower splash shield.
- Use the floor jack to remove the four jack stands, then lower your Escape carefully.
✅ After Repair
- ✅ Drive gently for 10-15 minutes and confirm that engagement and shifts feel normal.
- ✅ Park on clean, level ground and inspect underneath for fresh red fluid.
- ✅ Recheck the plug areas after the next drive.
- ✅ Don’t judge the final level from the amount added alone. Temperature and the level opening provide the final check.
- ✅ Dispose of the used transmission fluid at an approved automotive-fluid recycling facility.
- ✅ If the fluid was extremely dark, repeat a simple drain and refill after several hundred miles rather than performing a pressurized flush.
💰 DIY vs Shop Cost
Shop Cost: $180-$350, approximately ₹15,000-₹29,000 before local taxes and exchange-rate differences
DIY Cost: $55-$100, approximately ₹4,600-₹8,400 for fluid and seals
You Save: $100-$250 by doing it yourself!
Shop labor rates vary considerably by location. This service normally takes a shop approximately 1-1.5 hours.
🎯 Ready to get started?
HowToo makes it easy: same-day/2-day shipping on every part, plus all the tools and specialty tools you need! Check out the parts and tools sections below to add everything to your cart.
