

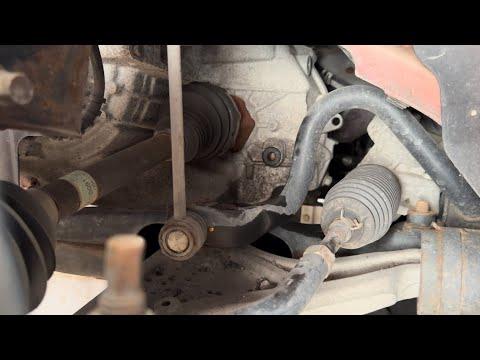







How to Change Transmission Fluid (Drain & Refill) on a 2016 Ford Fusion
Step-by-step DIY ATF service with tools, MERCON LV fluid/parts list, safety tips, and torque specs
How to Change Transmission Fluid (Drain & Refill) on a 2016 Ford Fusion
Step-by-step DIY ATF service with tools, MERCON LV fluid/parts list, safety tips, and torque specs


🔧 Transmission Fluid - Drain & Refill
This service drains the old automatic transmission fluid and refills with fresh fluid to help shift quality and transmission life. On your Fusion’s automatic transmission, a simple drain-and-fill replaces part of the fluid (not all of it), which is the normal DIY method.
Difficulty Level: Intermediate | Estimated Time: 1-2 hours
⚠️ Safety & Precautions
- ⚠️ Transmission fluid can be very hot—let the car cool and wear gloves.
- ⚠️ Support the car on jack stands on a level surface; never rely on a jack alone.
- ⚠️ Keep the car level while draining and filling, or the fluid level can be wrong.
- ⚠️ Set the parking brake and use wheel chocks.
🔧 Required Tools
You'll need the following tools for this repair:
- Floor jack (rated 2-ton minimum)
- Jack stands (rated 2-ton minimum)
- Wheel chocks
- Safety glasses
- Nitrile gloves
- Drain pan (10-quart minimum)
- Funnel with long neck
- Fluid transfer pump (specialty)
- Socket set (8mm–13mm)
- Ratchet (3/8" drive)
- Torque wrench (10–100 Nm range)
- Trim clip remover
- Shop towels
🔩 Required Parts
HowToo sells all the parts you need for this repair:
- Automatic transmission fluid (MERCON LV) - Qty: 5 quarts
- Transmission drain plug washer - Qty: 1
📋 Before You Begin
- 🅿️ Park on a level surface, set the parking brake, and chock the rear wheels.
- 🌡️ Warm the transmission with a 10-minute drive, then let it sit 10-15 minutes so it’s warm (not scorching).
- 📏 Lift the front (or whole car) and keep it level on jack stands.
- 🧼 Clean around the drain/fill areas so dirt can’t fall in.
🔨 Step-by-Step Instructions
Follow these steps in order:
Step 1: Remove the lower splash shield (if equipped)
- Use an 8mm socket and trim clip remover to remove the fasteners and lower the shield.
- Bag the clips so none get lost.
Step 2: Position the drain pan
- Slide a drain pan (10-quart minimum) under the transmission drain plug area.
- Use shop towels to wipe dirt off the plug area.
Step 3: Drain the transmission fluid
- Use a ratchet (3/8" drive) with the correct socket to loosen and remove the drain plug.
- Let the fluid drain until it becomes a slow drip (this may take 10-20 minutes).
- Install a new drain plug washer on the drain plug.
Step 4: Reinstall and torque the drain plug
- Thread the plug in by hand first to avoid cross-threading.
- Use a torque wrench to tighten: Torque to 35 Nm (26 ft-lbs).
Step 5: Refill with fresh MERCON LV
- Locate the transmission fill point (commonly an engine-bay fill cap/dipstick tube area or a side fill plug on the transmission case).
- Use a funnel with long neck (top fill) or a fluid transfer pump (specialty) (side fill) to add fluid.
- Add the same amount you drained as a starting point (typically about 4 quarts on a drain-and-fill).
- A fluid transfer pump is a hand pump that pushes new fluid into a side fill hole when a funnel won’t fit.
Step 6: Circulate fluid and set the level
- Start the engine and keep your foot on the brake.
- Slowly move the shifter through P-R-N-D and back to P, pausing 2-3 seconds in each gear.
- With the engine idling and the car level on stands, check the level using the vehicle’s fill/level method:
- If your Fusion has a dipstick: remove it, wipe with shop towels, reinsert, then read. Add fluid using the funnel in small amounts.
- If your Fusion uses a level/check plug: remove the check plug using the correct socket, then add fluid with the fluid transfer pump until it just begins to dribble out, then reinstall the plug and tighten with a torque wrench to 12 Nm (106 in-lbs).
Step 7: Reinstall the splash shield
- Reinstall the shield using the 8mm socket and trim clip remover.
- Snug fasteners evenly (do not overtighten plastic clips).
✅ After Repair
- 🔍 With the engine running, inspect the drain plug area for leaks.
- 🧪 Road test 10-15 minutes, then recheck for leaks on clean pavement.
- 📏 If shifts feel odd, recheck the fluid level with the car level and fluid warm.
- 🧼 Dispose of used ATF properly (local oil recycling center).
💰 DIY vs Shop Cost
Shop Cost: ₹6,000-₹12,000 (parts + labor)
DIY Cost: ₹2,500-₹6,000 (parts only)
You Save: ₹3,500-₹6,000 by doing it yourself!
Shop labor rates vary but typically run ₹1,000-₹2,500/hour. This repair takes a shop approximately 1-2 hours.
🎯 Ready to get started?
HowToo makes it easy: same-day/2-day shipping on every part, plus all the tools and specialty tools you need! Check out the parts and tools sections below to add everything to your cart.
Assumption: Instructions are for the Fusion’s common automatic transmission drain-and-fill using MERCON LV; your fill/check method may be dipstick or check-plug style, so both paths are included above.