






How to Change the Oil and Oil Filter on a 2010-2021 Kia Forte 2.0L (Trim: LX | Engine: Inline 4 2.0L)
Step-by-step DIY guide with tools, oil capacity, torque specs, and safety tips for 2010, 2011, 2012, 2013, 2014, 2015, 2016, 2017, 2018, 2019, 2020, 2021
How to Change the Oil and Oil Filter on a 2010-2021 Kia Forte 2.0L (Trim: LX | Engine: Inline 4 2.0L)
Step-by-step DIY guide with tools, oil capacity, torque specs, and safety tips for 2010, 2011, 2012, 2013, 2014, 2015, 2016, 2017, 2018, 2019, 2020, 2021


🔧 Forte - Engine Oil and Oil Filter Replacement
This service drains the old engine oil, replaces the oil filter, and refills your Forte with fresh oil. Regular oil changes protect the 2.0L engine from wear, sludge, and overheating.
Difficulty Level: Beginner | Estimated Time: 45-60 minutes
Service specification: Approximately 3.8 L (4.0 US qt) with filter; use SAE 5W-20 oil meeting API certification requirements.
⚠️ Safety & Precautions
- 🛑 Never work beneath your Forte while it is supported only by a floor jack.
- 🧤 Allow hot exhaust components to cool before reaching underneath the engine.
- 👓 Wear safety glasses and oil-resistant gloves.
- 🚗 Lift only at the specified front jacking point and support the side pinch-weld points with jack stands.
- 🔋 Battery disconnection is not required.
- ♻️ Take the used oil and filter to an authorized recycling or collection facility. Do not pour oil onto the ground or into a drain.
🔧 Required Tools
You'll need the following tools for this repair:
- 17mm six-point socket
- 3/8-inch-drive ratchet
- 3/8-inch-drive torque wrench rated 10-80 Nm
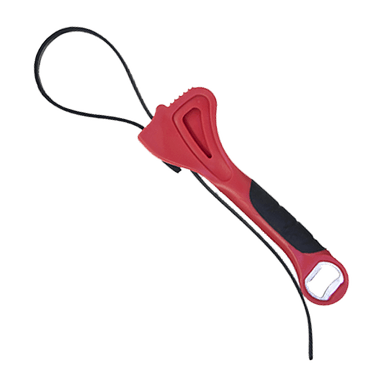
- Oil-filter strap wrench adjustable 60-100mm
- 10mm socket
- Plastic trim-clip removal tool
- Floor jack rated 2-ton minimum
- Jack stands rated 2-ton minimum
- Rubber wheel chocks
- Oil drain pan rated 8 L minimum
- Long-neck automotive funnel
- Oil-safe measuring container graduated in liters
- Shop towels
- Nitrile gloves
- Safety glasses
🔩 Required Parts
HowToo sells all the parts you need for this repair:
- SAE 5W-20 API-certified engine oil - Qty: 3.8 L (4.0 US qt)
- Engine oil filter - Qty: 1
- Engine oil drain-plug crush washer - Qty: 1
📋 Before You Begin
- 🚗 Park your Forte on firm, level ground, select first gear, apply the parking brake, and switch off the engine.
- 🛞 Place rubber wheel chocks securely behind both rear tires.
- 🌡️ Run the engine for three to five minutes if it is cold, then shut it off. Warm oil drains more completely, but it should not be hot enough to burn you.
- 📖 Open the hood and remove the oil-filler cap. Pull the dipstick partly out to let air enter while the oil drains.
- 🔋 No infotainment setting, scan tool, or battery-disconnect procedure is required.
🔨 Step-by-Step Instructions
Follow these steps in order:
Step 1: Raise and support the front
- Use the 2-ton floor jack at the reinforced front-center jacking point beneath the front subframe.
- Position the 2-ton jack stands under the reinforced front side pinch welds. A pinch weld is the folded metal seam along the lower edge of the body.
- Lower your Forte carefully onto both stands, then gently push the body to confirm it is stable.
- Leave the floor jack lightly touching the front jacking point as a backup without lifting the vehicle off the stands.
Step 2: Access the drain plug and filter
- Put on the nitrile gloves and safety glasses.
- Locate the metal engine oil pan beneath the engine. The drain plug is at the bottom-rear area of the pan.
- If an access panel blocks the drain plug or filter, use the 10mm socket and 3/8-inch-drive ratchet for its bolts and the plastic trim-clip removal tool for its clips.
- Keep all fasteners organized for reinstallation.
Step 3: Drain the old engine oil
- Place the 8 L drain pan beneath the drain plug, slightly toward the rear because the oil initially exits with some force.
- Use the 17mm six-point socket and 3/8-inch-drive ratchet to loosen the drain plug counterclockwise.
- Finish removing the plug by hand while pressing it toward the pan, then pull it away quickly.
- Allow the oil to drain until it slows to an occasional drip, usually five to ten minutes.
- Keep firm pressure on the plug while unscrewing.
Step 4: Install the drain plug
- Use a shop towel to clean the drain plug and the flat sealing surface around the oil-pan opening.
- Remove the old crush washer and place one new drain-plug crush washer onto the plug.
- Thread the plug clockwise by hand until fully seated. Stop and restart if it does not turn easily.
- Use the 17mm socket and 3/8-inch-drive torque wrench to tighten the plug to Torque to 39 Nm (29 ft-lbs).
- Do not use an impact wrench or overtighten the plug; the oil-pan threads can be damaged.
Step 5: Remove the old oil filter
- Move the drain pan underneath the oil filter at the lower front area of the engine.
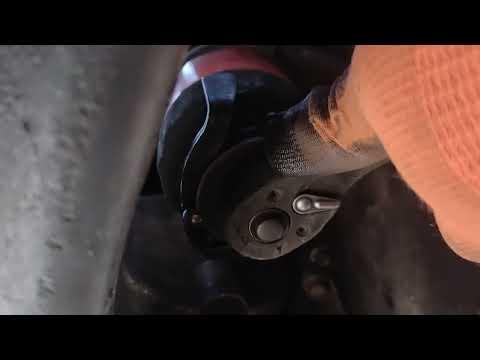
- Use the adjustable 60-100mm oil-filter strap wrench to turn the filter counterclockwise until loose. A strap wrench grips the outside of a round filter.
- Unscrew the filter by hand while keeping it upright as long as possible.
- Confirm the old rubber filter gasket came off with the filter. Remove it by hand if it remains stuck to the engine.
- Use a shop towel to clean the filter mounting surface without pushing dirt into the center opening.
Step 6: Install the new oil filter
- Pour a small amount of fresh 5W-20 oil onto a clean gloved fingertip and lightly coat the new filter's rubber gasket.
- Thread the new filter clockwise by hand until its gasket contacts the mounting surface.
- Tighten the filter by hand approximately three-quarters of a turn after gasket contact.
- If using the 3/8-inch-drive torque wrench with a correctly fitting filter adapter, tighten to Torque to 14 Nm (10 ft-lbs).
- Do not tighten the new filter with the strap wrench.
Step 7: Reinstall the lower access panel
- Use shop towels to wipe spilled oil from the oil pan, filter area, and splash shield.
- If removed, position the access panel and start every fastener by hand.
- Use the plastic trim-clip removal tool by hand to reinstall reusable clips and the 10mm socket with 3/8-inch-drive ratchet to snug the panel bolts.
- Do not overtighten the small panel fasteners.
Step 8: Lower the vehicle
- Use the 2-ton floor jack to raise your Forte slightly off the jack stands.
- Remove both 2-ton jack stands, then lower the vehicle slowly onto level ground.
- Keep the parking brake applied and the rear wheel chocks in place.
Step 9: Add fresh engine oil
- Insert the long-neck automotive funnel into the oil-filler opening.
- Use the graduated oil-safe measuring container to add approximately 3.5 L of SAE 5W-20 oil.
- Remove the funnel, install the filler cap, and fully seat the dipstick.
- Wait two minutes, then remove and wipe the dipstick with a shop towel.
- Reinsert the dipstick completely, remove it, and check the level. Add oil in 100-200 mL amounts until it approaches the full mark.
- Do not exceed the dipstick's full mark. Total capacity with a new filter is approximately 3.8 L (4.0 US qt).
Step 10: Check operation and leaks
- Make sure the filler cap and dipstick are installed, then start the engine.
- Confirm the red oil-pressure warning light turns off within a few seconds. Shut the engine off immediately if it stays illuminated.
- Use the safety glasses and a flashlight-free visual inspection from beside the vehicle to check beneath it for leaks. Do not crawl underneath while the engine is running.
- Run the engine for approximately one minute, shut it off, and wait five minutes.
- Use a shop towel to check the dipstick again. Add measured 5W-20 oil through the long-neck funnel if needed.
✅ After Repair
- ✅ Confirm the final oil level is between the dipstick marks and close to the full mark.
- 🔍 Check around the drain plug and oil filter again after the first drive.
- 🛢️ Pour the used oil into a sealed container using the long-neck funnel and recycle it with the old filter through an authorized local collection facility.
- 📝 Record the date and odometer reading. Under severe driving conditions, including heavy dust, repeated short trips, and prolonged idling, follow the severe-service interval in the owner's manual.
- 🔄 If a service reminder is displayed, reset it using User Settings > Service Interval > Reset. Menu availability depends on the installed instrument cluster.
💰 DIY vs Shop Cost
Shop Cost: ₹3,500-₹6,500 (approximately $42-$78, parts + labor)
DIY Cost: ₹2,200-₹4,000 (approximately $26-$48, parts only)
You Save: ₹1,300-₹2,500 (approximately $16-$30) by doing it yourself!
Sonīpat-area labor and oil prices vary. This repair takes a shop approximately 0.4-0.7 hours.
🎯 Ready to get started?
HowToo makes it easy: same-day/2-day shipping on every part, plus all the tools and specialty tools you need! Check out the parts and tools sections below to add everything to your cart.