








How to Change the Oil and Filter on a 2013-2023 Nissan Altima 2.5L (Engine: Inline 4 2.5L)
Step-by-step DIY guide with tools, 0W-20 capacity, torque specs, and safety tips for 2013, 2014, 2015, 2016, 2017, 2018, 2019, 2020, 2021, 2022, 2023
How to Change the Oil and Filter on a 2013-2023 Nissan Altima 2.5L (Engine: Inline 4 2.5L)
Step-by-step DIY guide with tools, 0W-20 capacity, torque specs, and safety tips for 2013, 2014, 2015, 2016, 2017, 2018, 2019, 2020, 2021, 2022, 2023


🔧 Altima - Engine Oil and Oil Filter Change
This service drains the old engine oil, replaces the oil filter and refills your Altima with fresh oil. Regular oil changes protect the 2.5L engine from wear, sludge and overheating.
Difficulty Level: Beginner | Estimated Time: 45-60 minutes
⚠️ Safety & Precautions
- ⚠️ Work on level, solid ground and never crawl beneath a vehicle supported only by a jack.
- 🧤 Warm the engine briefly, but allow hot exhaust and oil components to cool before touching them.
- 🛑 Engage the parking brake and chock both rear wheels before raising the front.
- 🛡️ Wear safety glasses and nitrile gloves because used oil can irritate skin.
- 🔋 Battery disconnection is not required for this service.
- ♻️ Collect all used oil and take it to an authorized recycling or waste-oil facility.
🔧 Required Tools
You'll need the following tools for this repair:
- Vehicle ramps rated 2-ton minimum
- Rear wheel chocks rated 2-ton minimum
- 14mm six-point socket
- 3/8-inch-drive ratchet
- 3/8-inch-drive torque wrench rated 10-80 ft-lbs
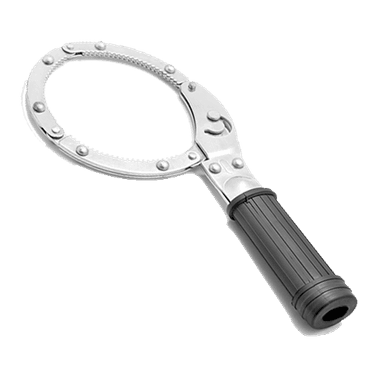
- 65mm 14-flute oil filter wrench (specialty)
- 3/8-inch-drive 6-inch extension
- 10mm socket
- Flat-blade trim-clip tool
- Oil drain pan with 6-quart minimum capacity
- Long-neck automotive funnel
- Engine oil dipstick cleaning towels
- Nitrile mechanic gloves
- ANSI Z87.1 safety glasses
🔩 Required Parts
HowToo sells all the parts you need for this repair:
- SAE 0W-20 full-synthetic engine oil meeting API SP and ILSAC GF-6A - Qty: 5 US quarts
- Engine oil filter - Qty: 1
- Engine oil drain-plug crush washer - Qty: 1
📋 Before You Begin
- 📍 Park your Altima on level, solid pavement and confirm there is adequate lighting.
- 🌡️ Run the engine for three to five minutes, then shut it off and wait several minutes.
- 🛑 Apply the parking brake and place the wheel chocks firmly behind both rear tires.
- 🛢️ The refill capacity with a new filter is approximately 4.9 US quarts (4.6 liters). Add oil gradually and use the dipstick for the final level.
- 📱 Record the current odometer reading so you know when the next service is due.
🔨 Step-by-Step Instructions
Follow these steps in order:
Step 1: Raise the Front of the Vehicle
- Place the 2-ton vehicle ramps directly in front of the front tires.
- Drive slowly onto the ramps, center both tires and shift the CVT into Park.
- Apply the parking brake firmly, shut off the engine and secure both rear wheels with the 2-ton wheel chocks.
- Gently rock the vehicle by hand. It must remain stable before you go underneath.
Step 2: Open the Oil-Fill Cap
- Open the hood and locate the oil-fill cap on top of the engine.
- Turn the cap counterclockwise by hand and set it on a clean engine oil dipstick cleaning towel.
- Pull the dipstick upward by hand, wipe it with a clean towel and reinstall it fully.
- Opening the cap helps the old oil drain smoothly.
Step 3: Access the Drain Plug and Filter
- Put on the ANSI Z87.1 safety glasses and nitrile mechanic gloves.
- If an access panel blocks the oil pan, remove its 10mm fasteners with the 10mm socket, 3/8-inch-drive extension and 3/8-inch-drive ratchet.
- Release any plastic retainers with the flat-blade trim-clip tool. A trim-clip tool lifts plastic fasteners without damaging them.
- Locate the drain plug at the bottom of the metal engine oil pan and the filter near the front passenger side of the engine.
Step 4: Drain the Old Engine Oil
- Position the 6-quart oil drain pan beneath and slightly behind the drain plug because the oil initially flows outward.
- Use the 14mm six-point socket and 3/8-inch-drive ratchet to loosen the drain plug counterclockwise.
- Finish removing the plug carefully by hand and allow the oil to drain into the pan for at least five minutes.
- Use an engine oil dipstick cleaning towel to clean the drain plug and inspect its threads.
Step 5: Install the Drain Plug
- Remove the old crush washer from the drain plug by hand and install the new washer with its flat face seated against the plug flange.
- Use an engine oil dipstick cleaning towel to wipe the oil-pan sealing surface clean.
- Thread the plug clockwise by hand until seated. Stop if it does not turn easily because cross-threading can damage the oil pan.
- Use the 14mm six-point socket and 3/8-inch-drive torque wrench to tighten the plug to 34 Nm (25 ft-lbs).
Step 6: Remove the Old Oil Filter
- Move the 6-quart oil drain pan directly beneath the oil filter.
- Fit the 65mm 14-flute oil filter wrench over the filter and turn it counterclockwise with the 3/8-inch-drive ratchet.
- Finish unscrewing the filter by hand while keeping its open end upright.
- Confirm the old rubber filter gasket came off with the filter. A gasket left on the engine can cause a major leak.
- Clean the engine's filter mounting surface with an engine oil dipstick cleaning towel.
Step 7: Install the New Oil Filter
- Apply a thin coating of fresh 0W-20 oil to the new filter's rubber gasket using a clean gloved fingertip.
- Thread the new filter clockwise by hand until its gasket first contacts the mounting surface.
- Tighten the filter by hand an additional approximately two-thirds of a turn. Do not use the filter wrench for final tightening.
- A lubricated gasket seals evenly and removes more easily.
Step 8: Refit the Access Panel
- Clean spilled oil from the oil pan and filter area with engine oil dipstick cleaning towels.
- Reposition the access panel and press its retainers into place by hand.
- Install the panel fasteners with the 10mm socket, 3/8-inch-drive extension and 3/8-inch-drive ratchet
Step 9: Add Fresh Engine Oil
- Place the long-neck automotive funnel into the oil-fill opening.
- Pour in approximately 4.5 US quarts (4.3 liters) of 0W-20 oil, then remove the funnel.
- Install the oil-fill cap clockwise by hand until secure.
- Use an engine oil dipstick cleaning towel to wipe away any spilled oil.
Step 10: Lower the Vehicle and Check the Level
- Remove all tools and the 6-quart oil drain pan from beneath your Altima.
- Start the engine and verify that the red oil-pressure warning light goes out within a few seconds. Shut the engine off immediately if it stays illuminated.
- Release the parking brake and slowly reverse off the 2-ton vehicle ramps onto level ground.
- Shift into Park, apply the parking brake and shut off the engine. Wait at least five minutes.
- Remove the dipstick by hand, wipe it with an engine oil dipstick cleaning towel, reinstall it fully and check it again.
- Add small amounts through the long-neck automotive funnel until the level reaches the upper mark without exceeding it. Total capacity is approximately 4.9 US quarts (4.6 liters).
Step 11: Reset the Oil Maintenance Reminder
- Switch the ignition on without starting the engine.
- Use the steering-wheel display controls to select Settings > Maintenance > Oil and Filter > Reset.
- Select the reset confirmation with the steering-wheel control and verify that the displayed oil-service interval restarts.
- If your display uses a distance setting instead of a confirmation screen, set the desired service interval specified by your maintenance schedule.
✅ After Repair
- 🔍 Run the engine for about one minute and inspect the drain plug and filter for fresh oil leakage.
- 🛢️ Shut the engine off, wait five minutes and verify the dipstick level one final time on level ground.
- 🧽 Clean any oil residue and make sure the oil-fill cap and dipstick are fully seated.
- ♻️ Pour the used oil into a sealed container and take it with the old filter to an authorized recycling facility.
- 📅 Recheck the oil level and inspect for leaks after your first short drive.
💰 DIY vs Shop Cost
Shop Cost: ₹6,000-₹11,000 (parts + labor)
DIY Cost: ₹4,000-₹7,000 (parts only)
You Save: ₹2,000-₹4,000 by doing it yourself!
Local labor and imported-part prices vary. This repair takes a shop approximately 0.5-0.8 hour.
🎯 Ready to get started?
HowToo makes it easy: same-day/2-day shipping on every part, plus all the tools and specialty tools you need! Check out the parts and tools sections below to add everything to your cart.