


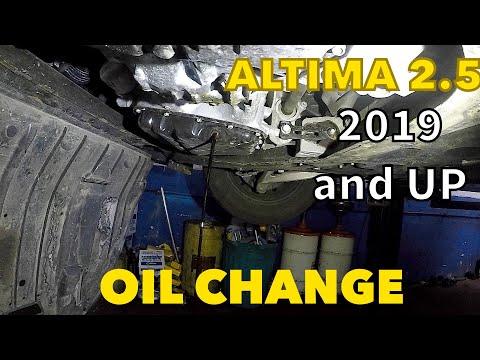






How to Change the Oil and Filter on a 2002-2024 Nissan Altima 2.0L Turbo (Engine: Inline 4 2.0L)
Step-by-step DIY guide with tools, oil capacity, torque specs, safety tips, and reset instructions for 2002, 2003, 2004, 2005, 2006, 2007, 2008, 2009, 2010, 2011, 2012, 2013, 2014, 2015, 2016, 2019, 2020, 2021, 2022, 2023, 2024
How to Change the Oil and Filter on a 2002-2024 Nissan Altima 2.0L Turbo (Engine: Inline 4 2.0L)
Step-by-step DIY guide with tools, oil capacity, torque specs, safety tips, and reset instructions for 2002, 2003, 2004, 2005, 2006, 2007, 2008, 2009, 2010, 2011, 2012, 2013, 2014, 2015, 2016, 2019, 2020, 2021, 2022, 2023, 2024


🔧 Altima - Engine Oil and Filter Replacement
This is a very manageable first DIY service. Your Altima’s turbo engine takes approximately 4.7 L (5 US qt) of SAE 5W-30 synthetic oil with a new filter. Nissan specifies Genuine Nissan Ester 5W-30 SN or an equivalent synthetic 5W-30 oil. owners.nissanusa.com)
Difficulty Level: Beginner | Estimated Time: 45-75 minutes
Assumption: The factory drain plug and underbody shield hardware are installed.
⚠️ Safety & Precautions
- ⚠️ Never work beneath your Altima while it’s supported only by a jack.
- ⚠️ Use level, solid ground and support both front sides with jack stands.
- ⚠️ Warm oil drains better, but hot oil and exhaust parts can burn you.
- ⚠️ Wear gloves because repeated contact with used engine oil is harmful.
- ⚠️ Keep the engine off and the key away from the start button.
- ⚠️ Battery disconnection isn’t required for this service.
🔧 Required Tools
You'll need the following tools for this repair:
- 14mm six-point socket
- 3/8-inch drive ratchet
- 3/8-inch drive torque wrench rated 10-80 ft-lbs
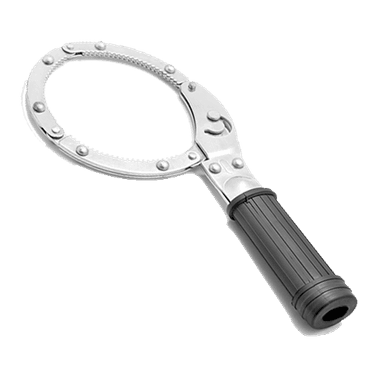
- Spin-on oil filter wrench (specialty)
- Plastic trim-clip removal tool
- Floor jack rated 2-ton minimum
- Jack stands rated 2-ton minimum
- Wheel chocks
- Oil drain pan rated 8-quart minimum
- Long-neck oil funnel
- Shop towels
- Nitrile mechanic gloves
- Safety glasses
🔩 Required Parts
HowToo sells all the parts you need for this repair:
- SAE 5W-30 full-synthetic engine oil - Qty: 5 US quarts
- Vehicle-matched spin-on engine oil filter - Qty: 1
- Engine oil drain-plug crush washer - Qty: 1
Always replace the crush washer. Reusing a flattened washer to save pocket change is how driveways acquire oil stains.
📋 Before You Begin
- Park your Altima on level pavement and apply the parking brake.
- Run the engine until warm, switch it off, and wait approximately 15 minutes.
- Chock both rear wheels with the wheel chocks.
- Open the hood and identify the oil filler cap and dipstick.
- Check that the new filter’s rubber sealing gasket is present and undamaged.
- Keep all five quarts available, but don’t pour everything in without checking the dipstick.
🔨 Step-by-Step Instructions
Follow these steps in order:
Step 1: Raise and Support the Front
- Use the 2-ton floor jack at the approved front lifting point.
- Position the 2-ton jack stands beneath the reinforced front support points.
- Lower the vehicle onto the stands and gently push the body to verify stability.
- Never trust hydraulics with your ribs.
Step 2: Remove the Lower Access Shield
- Put on the safety glasses before working underneath.
- Use the plastic trim-clip removal tool to release the necessary shield retainers.
- Remove or lower the access section without forcing the plastic clips.
- Set the clips aside where they can’t roll away.
Step 3: Open the Oil Filler
- Use your hand to loosen and remove the oil filler cap.
- Leave the dipstick fully inserted. Nissan warns this helps prevent oil from escaping the dipstick tube during filling. owners.nissanusa.com
- Place the cap somewhere clean and visible.
Step 4: Drain the Old Oil
- Place the 8-quart drain pan beneath the engine oil drain plug.
- Use the 14mm six-point socket and 3/8-inch ratchet to loosen the plug counterclockwise.
- Finish removing the plug by hand while holding it against the pan until the final thread releases.
- Allow the oil to drain until it slows to an occasional drip.
- Remove the old crush washer from the drain plug.
Step 5: Install the Drain Plug
- Clean the drain plug and oil-pan sealing surface with shop towels.
- Fit one new crush washer onto the drain plug.
- Thread the plug into the pan by hand until fully seated.
- Use the 3/8-inch torque wrench and 14mm socket to tighten it to 29-39 Nm (22-28 ft-lbs). Aim near the middle of that specified range. owners.nissanusa.com
Step 6: Remove the Old Oil Filter
- Move the 8-quart drain pan beneath the oil filter.
- Use the spin-on oil filter wrench to loosen the filter counterclockwise.
- A spin-on filter is the metal canister that screws directly onto the engine.
- Unscrew it by hand while keeping its open end upright.
- Confirm the old rubber gasket came off with the filter.
Step 7: Install the New Oil Filter
- Clean the filter mounting surface with a fresh shop towel.
- Apply a thin film of clean 5W-30 oil to the new filter’s rubber gasket.
- Thread the filter clockwise by hand until its gasket contacts the mounting surface.
- Tighten it by hand at least another two-thirds turn.
- If using the 3/8-inch torque wrench with the correct filter attachment, tighten to 14.7-20.6 Nm (11-15 ft-lbs). owners.nissanusa.com
- Don’t overtighten it. The rubber gasket makes the seal, not brute force.
Step 8: Add New Engine Oil
- Place the long-neck funnel in the oil filler opening.
- Pour in approximately 4.4 L (4.6 US qt) of 5W-30 oil.
- Wait one minute, remove the funnel, and install the filler cap by hand.
- Don’t pour past the dipstick’s high mark.
Step 9: Check for Leaks
- Make sure no tools remain beneath the vehicle.
- Start the engine and let it idle for approximately 30 seconds.
- Confirm the red oil-pressure warning light turns off promptly.
- Switch the engine off immediately if the warning light remains illuminated.
- Use the safety glasses and inspect the drain plug and filter for fresh oil.
Step 10: Reinstall the Shield and Lower the Vehicle
- Use the plastic trim-clip removal tool as needed to reinstall the lower shield and retainers.
- Use the 2-ton floor jack to lift the vehicle slightly from the stands.
- Remove both 2-ton jack stands and lower the vehicle slowly.
Step 11: Set the Final Oil Level
- Leave the vehicle level with the engine off for at least 15 minutes.
- Remove the dipstick and wipe it with a clean shop towel.
- Reinsert it fully, remove it again, and read the level.
- Add small amounts through the long-neck funnel until the level approaches the high mark.
- The published capacity with a new filter is approximately 4.7 L (5 US qt), but Nissan says the dipstick is the final authority. owners.nissanusa.com)
Step 12: Reset the Oil Displays
- Press the ignition button twice without pressing the brake pedal.
- Use the steering-wheel controls to open Settings > Maintenance > Oil Control System.
- Press OK and follow the displayed reset instructions.
- Also open Settings > Maintenance > Oil and Filter and reset that reminder if it remains active. owners.nissanusa.com
✅ After Repair
- Start the engine and confirm there’s no oil warning or leak.
- Check the drain plug and filter again after the first short drive.
- Recheck the dipstick the following morning on level ground.
- Record the mileage and service date.
- Nissan lists a maximum interval of 7,500 miles or 12 months for the 2.0L turbo engine. Sonīpat’s dust, heat, congestion, and short trips can justify changing it sooner. nissanusa.com
- Take the used oil and filter to an approved recycling or collection facility. Never pour oil onto the ground or into a drain.
💰 DIY vs Shop Cost
Shop Cost: $90-$170 (parts + labor)
DIY Cost: $40-$75 (oil, filter, and washer)
You Save: $50-$95 by doing it yourself!
Shop labor rates vary but typically run $100-$150/hour. This repair takes a shop approximately 0.4-0.7 hours.
🎯 Ready to get started?
HowToo makes it easy: same-day/2-day shipping on every part, plus all the tools and specialty tools you need! Check out the parts and tools sections below to add everything to your cart.
