







How to Change the Engine Oil and Oil Filter on a 2018 Toyota Prius (Engine: Inline 4 1.8L)
Step-by-step DIY guide with tools, 0W-20 oil capacity, torque specs, and safety tips for 2018
How to Change the Engine Oil and Oil Filter on a 2018 Toyota Prius (Engine: Inline 4 1.8L)
Step-by-step DIY guide with tools, 0W-20 oil capacity, torque specs, and safety tips for 2018


🔧 Prius - Engine Oil and Oil Filter Replacement
Your Prius uses a replaceable cartridge-style oil filter beneath the engine. Drain the old oil, replace the filter element and sealing rings, refill with SAE 0W-20 full-synthetic oil, and reset the maintenance reminder.
Difficulty Level: Beginner | Estimated Time: 45-75 minutes
⚠️ Safety & Precautions
- ⚠️ Make sure the green READY indicator is off. The gasoline engine can start automatically whenever the hybrid system is active.
- 🔑 Keep the key fob away from your Prius while working underneath it.
- 🌡️ Allow a hot engine and exhaust system to cool before beginning.
- 🛑 Never work beneath a vehicle supported only by a floor jack. Always use jack stands on the designated front support points.
- 🧤 Used engine oil can irritate skin. Wear nitrile gloves and safety glasses.
- 🔋 The 12-volt battery does not need to be disconnected.
- ⚡ Do not touch orange high-voltage cables or connectors.
🔧 Required Tools
You'll need the following tools for this repair:
- 14mm six-point socket
- 10mm socket
- 3/8-inch-drive ratchet
- 3/8-inch-drive extension
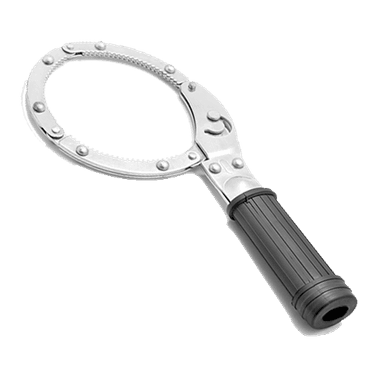
- 64mm 14-flute oil-filter housing wrench (specialty)
- 3/8-inch-drive torque wrench rated 10-80 Nm
- Flat-blade trim-clip tool
- Oil drain pan rated 8-quart minimum
- Automotive funnel with narrow spout
- Floor jack rated 2-ton minimum
- Jack stands rated 2-ton minimum
- Rubber wheel chocks
- Mechanic’s creeper or padded work mat
- Shop towels
- Nitrile mechanic gloves
- ANSI-rated safety glasses
🔩 Required Parts
HowToo sells all the parts you need for this repair:
- SAE 0W-20 full-synthetic engine oil - Qty: 4.2 liters
- Cartridge engine oil filter element - Qty: 1
- Oil-filter housing O-ring - Qty: 1
- Oil-filter housing drain-plug O-ring - Qty: 1
- Engine oil drain-plug gasket - Qty: 1
📋 Before You Begin
- 🚗 Park your Prius on firm, level ground and apply the parking brake.
- 🔥 If the engine is cold, place the vehicle in READY mode for two to three minutes. Switch it completely off before raising it.
- 🛞 Place rubber wheel chocks firmly behind both rear wheels.
- 🔑 Remove the key fob from the vehicle and keep it several metres away.
- ♻️ Prepare a sealed container for transporting used oil to an authorized recycling or collection facility.
🔨 Step-by-Step Instructions
Follow these steps in order:
Step 1: Open the Hood and Remove the Oil Cap
- Pull the hood release inside your Prius, release the secondary latch, and support the hood.
- Turn the engine oil filler cap counterclockwise by hand and set it on a clean shop towel.
- Use a shop towel to clean around the filler opening so dirt cannot enter the engine.
Step 2: Raise and Support the Front
- Place the floor jack beneath the reinforced front-center jacking point on the front crossmember.
- Raise your Prius high enough to position both jack stands beneath the reinforced side pinch-weld support points.
- Lower the vehicle carefully onto the jack stands, then gently push the body to verify that it is stable.
- A pinch weld is the reinforced metal seam running along the lower edge of the body.
Step 3: Open the Lower Access Area
- Put on safety glasses and nitrile gloves.
- Use the flat-blade trim-clip tool and 10mm socket to release the fasteners around the engine oil service opening in the lower splash shield.
- Move the service flap aside without sharply bending it.
- Keep each removed fastener organized for reinstallation.
Step 4: Drain the Engine Oil
- Position the 8-quart drain pan beneath the engine oil-pan drain plug.
- Use the 14mm six-point socket, extension, and ratchet to loosen the drain plug counterclockwise.
- Finish removing the plug by hand while pressing it toward the oil pan, then pull it away quickly.
- Allow the oil to drain until only an occasional drip remains, normally about 10 minutes.
- Remove the old drain-plug gasket and wipe the plug clean with a shop towel.
- Warm oil drains faster but can burn skin.
Step 5: Replace the Oil Filter
- Move the drain pan beneath the oil-filter housing.
- Use the 64mm 14-flute oil-filter housing wrench with the 3/8-inch-drive ratchet to turn the housing counterclockwise.
- Unscrew the housing slowly and allow the trapped oil to drain into the pan.
- Remove the used filter element from the housing by hand.
- Remove the old large O-ring from the housing with your fingers. Do not scratch the housing’s sealing surface.
- If the housing has a small center drain plug, replace its small O-ring and tighten the plug with the filter wrench to 13 Nm (10 ft-lbs).
- Lightly coat the new large O-ring with fresh 0W-20 oil and install it in the specified groove near the housing threads. Do not place it against the housing flange.
- Push the new cartridge filter element fully into the housing.
- Thread the housing into the engine by hand to prevent cross-threading.
- Use the 64mm 14-flute oil-filter housing wrench and torque wrench to tighten the housing to 25 Nm (18 ft-lbs).
- Never tighten the plastic housing with an impact tool.
Step 6: Reinstall the Drain Plug
- Install the new drain-plug gasket onto the cleaned drain plug.
- Wipe the oil-pan sealing surface clean with a shop towel.
- Thread the drain plug in by hand until seated.
- Use the 14mm six-point socket and torque wrench to tighten it to 37 Nm (27 ft-lbs).
Step 7: Refit the Lower Shield
- Use the flat-blade trim-clip tool and 10mm socket to reinstall the service flap and all removed fasteners.
- Make sure the flap sits above adjacent shield edges and does not hang downward.
- Move the drain pan and every tool out from beneath your Prius.
Step 8: Lower the Vehicle
- Use the floor jack to raise the front slightly above the jack stands.
- Remove both jack stands, then lower your Prius slowly onto level ground.
- Remove the rubber wheel chocks after the vehicle is fully supported by its tires.
Step 9: Add Fresh Engine Oil
- Place the narrow-spout funnel in the oil filler opening.
- Pour in approximately 4.0 liters of SAE 0W-20 full-synthetic oil.
- Remove the funnel and install the oil filler cap by hand.
- Wait two minutes, remove the dipstick, and wipe it clean with a shop towel.
- Insert the dipstick fully, remove it again, and check the level.
- Add oil in small amounts until the level approaches the upper mark. The approximate capacity with a filter change is 4.2 liters (4.4 US quarts).
- Do not fill above the upper dipstick mark.
Step 10: Run the Engine and Check for Leaks
- With the hood open and all tools clear, press the brake pedal and start your Prius so the READY indicator appears.
- If the gasoline engine does not immediately run, that is normal. Do not reach into the engine compartment because it can start automatically.
- Inspect beneath the drain plug and filter housing using a flashlight or careful visual inspection. Do not crawl underneath the unsupported vehicle.
- Switch the hybrid system off after approximately two minutes.
- Wait five minutes and use the dipstick and shop towel to check the oil level again.
- Add 0W-20 oil through the funnel only if necessary, then reinstall the filler cap and dipstick securely.
Step 11: Reset the Maintenance Reminder
- Switch your Prius to ignition-on mode without entering READY mode.
- Use the steering-wheel controls to select Settings > Vehicle Settings > Scheduled Maintenance on the multi-information display.
- Select Yes when asked to reset the maintenance data.
- If an oil-maintenance option appears separately, select Settings > Vehicle Settings > Oil Maintenance > Yes.
- Confirm that the display reports the reset as complete, then switch the ignition off.
✅ After Repair
- ✅ Confirm that the red oil-pressure warning goes out after the hybrid system starts. Switch off immediately if it remains illuminated.
- 🔍 Recheck the oil-filter housing and drain-plug areas for leakage after a short drive.
- 📏 Check the oil level again on level ground after waiting at least five minutes.
- 🧾 Record the date, distance reading, oil viscosity, and filter replacement.
- ♻️ Take the used oil and filter to an authorized recycling or hazardous-waste collection point. Never pour oil onto the ground or into a drain.
💰 DIY vs Shop Cost
Shop Cost: ₹5,500-₹9,000 (parts + labor)
DIY Cost: ₹3,500-₹5,500 (parts only)
You Save: ₹2,000-₹3,500 by doing it yourself!
Sonīpat labor and imported Prius-part prices vary. This repair takes a shop approximately 0.5-1.0 hour.
🎯 Ready to get started?
HowToo makes it easy: same-day/2-day shipping on every part, plus all the tools and specialty tools you need! Check out the parts and tools sections below to add everything to your cart.