


How to Change the Engine Oil and Oil Filter on a 2012 GMC Sierra 1500
Step-by-step oil change guide with tools, parts, torque specs, and safety tips for 2007, 2010, 2011, 2012, 2013
How to Change the Engine Oil and Oil Filter on a 2012 GMC Sierra 1500
Step-by-step oil change guide with tools, parts, torque specs, and safety tips for 2007, 2010, 2011, 2012, 2013
🔧 Engine Oil & Filter - Oil Change
Changing the oil and filter on your Sierra helps protect the engine, especially if the oil is dirty or overdue. This job is straightforward and a good first DIY repair if you have basic hand tools and a drain pan.
Difficulty Level: Beginner | Estimated Time: 1-1.5 hours
⚠️ Safety & Precautions
- Work only with the engine off and cool enough to touch.
- Use jack stands if you raise the truck; never rely on a jack alone.
- Keep hands clear of hot exhaust and oil that may still be warm.
- Have a drain pan ready before loosening the drain plug.
- Dispose of used oil and the old filter properly.
🔧 Required Tools
You'll need the following tools for this repair:
- 15mm socket
- Ratchet
- Drain pan
- Oil filter wrench
- Funnel
- Floor jack (rated 3-ton minimum)
- Jack stands
- Wheel chocks
- Gloves
- Safety glasses
- Shop rags
- Torque wrench
🔩 Required Parts
HowToo sells all the parts you need for this repair:
- Engine oil (5W-30 full synthetic) - Qty: 6 quarts
- Oil filter - Qty: 1
- Drain plug gasket - Qty: 1
📋 Before You Begin
- Park on level ground and set the parking brake.
- Let the engine cool down before draining the oil.
- If the truck is lifted, support it securely on jack stands.
- Have the new oil and filter ready before opening the drain plug.
🔨 Step-by-Step Instructions
Follow these steps in order:
Step 1: Lift and secure the truck
- Use a floor jack to raise the front of the truck if needed.
- Place jack stands under the frame and lower the truck onto them.
- Chock the rear wheels with wheel chocks.
- Never work under a truck on a jack alone.
Step 2: Remove the oil fill cap and loosen the dipstick
- Open the hood and remove the oil fill cap from the engine.
- Pull the dipstick up slightly to help the oil drain faster.
- This helps the crankcase vent while the oil drains.
Step 3: Drain the old oil
- Position the drain pan under the oil pan drain plug.
- Use a 15mm socket and ratchet to remove the drain plug.
- Let the oil drain fully.
- Install a new drain plug gasket if your plug uses one.
- Reinstall the drain plug with the 15mm socket.
- Torque to 25 Nm (18 ft-lbs).
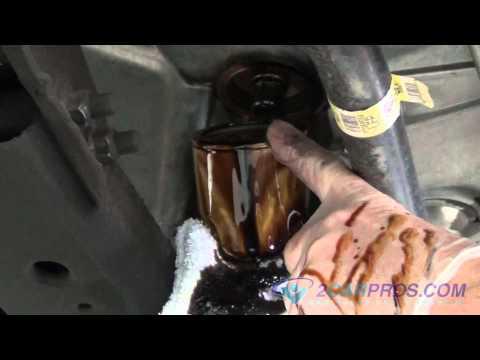
Step 4: Remove the old oil filter
- Move the drain pan under the oil filter.
- Use an oil filter wrench to loosen the filter.
- Spin it off by hand and keep it upright to reduce spills.
- Check that the old filter gasket came off with the filter.
Step 5: Prepare and install the new oil filter
- Wipe the filter mounting surface clean with a shop rag.
- Lightly coat the new filter gasket with fresh engine oil.
- Spin on the new oil filter by hand until the gasket touches.
- Then tighten it another 3/4 turn by hand.
- Do not use a wrench to overtighten.
Step 6: Refill with fresh oil
- Place a funnel in the oil fill opening.
- Add about 5.5 quarts of 5W-30 full synthetic engine oil first.
- Install the fill cap.
- Start the engine and let it run for 30 seconds.
- Shut it off and wait 5 minutes for the oil to settle.
Step 7: Check the oil level
- Pull the dipstick, wipe it clean with a shop rag, then reinsert it fully.
- Pull it back out and check the level.
- Add oil a little at a time with the funnel until it reaches the full mark.
- Total capacity is typically about 6 quarts with filter.
Step 8: Inspect for leaks
- Look under the truck for leaks at the drain plug and filter.
- If you see seepage, stop the engine and correct it before driving.
✅ After Repair
- Start the engine and verify the oil pressure light goes out quickly.
- Check the dipstick again after a short drive and top off if needed.
- Reset the oil life monitor if your dash shows one.
- Write down the mileage and date for your next oil change.
💰 DIY vs Shop Cost
Shop Cost: $85-$150 (parts + labor)
DIY Cost: $35-$70 (parts only)
You Save: $50-$80 by doing it yourself!
Shop labor rates vary but typically run $100-$150/hour. This repair takes a shop approximately 0.5-1 hour.
🎯 Ready to get started?
HowToo makes it easy: same-day/2-day shipping on every part, plus all the tools and specialty tools you need! Check out the parts and tools sections below to add everything to your cart.
