

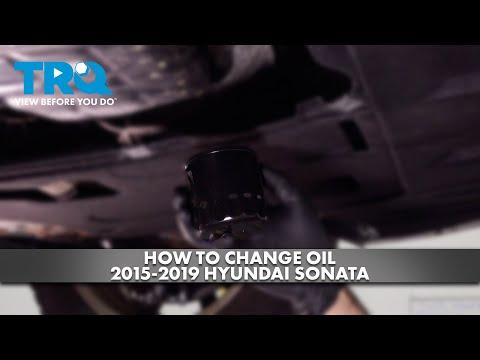





How to Change Oil and Oil Filter on a 2006-2019 Hyundai Sonata 2.4L (Engine: Inline 4 2.4L)
Step-by-step DIY guide with tools, oil capacity, torque specs, and safety tips for 2006, 2007, 2008, 2009, 2010, 2011, 2012, 2013, 2014, 2015, 2016, 2017, 2018, 2019
How to Change Oil and Oil Filter on a 2006-2019 Hyundai Sonata 2.4L (Engine: Inline 4 2.4L)
Step-by-step DIY guide with tools, oil capacity, torque specs, and safety tips for 2006, 2007, 2008, 2009, 2010, 2011, 2012, 2013, 2014, 2015, 2016, 2017, 2018, 2019


🔧 Sonata - Engine Oil and Oil Filter Change
This service drains the old engine oil, replaces the spin-on oil filter, and refills your Sonata with fresh oil. Regular oil changes protect the 2.4L engine’s bearings, timing components, and internal oil passages.
Difficulty Level: Beginner | Estimated Time: 45-60 minutes
Assumption: Specifications below apply to the stock U.S.-market 2.4L gasoline engine.
⚠️ Safety & Precautions
- Work on firm, level pavement and keep the transmission in Park.
- Never work beneath a vehicle supported only by a floor jack. Always use jack stands.
- Allow hot exhaust parts to cool before reaching beneath the engine.
- Used engine oil can irritate skin. Wear nitrile gloves and safety glasses.
- Do not overtighten the drain plug. The aluminum oil pan can be damaged.
- Battery disconnection is not required.
🔧 Required Tools
You'll need the following tools for this repair:
- 17mm six-point socket
- 3/8-inch-drive ratchet
- 3/8-inch-drive torque wrench rated 10-80 ft-lbs
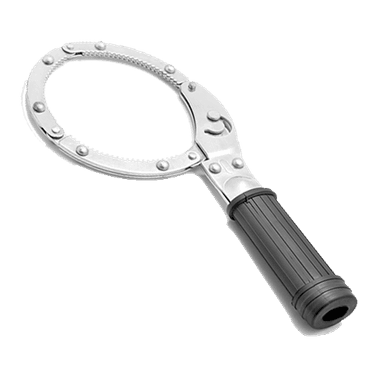
- Adjustable oil filter wrench (specialty)
- 10mm socket
- Flat-blade trim tool
- Oil drain pan rated 8-quart minimum
- Oil funnel with 1-quart minimum capacity
- Floor jack rated 2-ton minimum
- Jack stands rated 2-ton minimum
- Wheel chocks
- Mechanic’s creeper
- Shop towels
- Nitrile gloves
- Safety glasses
🔩 Required Parts
HowToo sells all the parts you need for this repair:
- SAE 5W-20 full-synthetic engine oil - Qty: 6 U.S. quarts
- Spin-on engine oil filter - Qty: 1
- Oil drain plug crush washer - Qty: 1
The approximate refill capacity with a new filter is 5.1 U.S. quarts (4.8 liters). Always use the dipstick to establish the final level.
📋 Before You Begin
- Park your Sonata on level pavement, shift into Park, and apply the parking brake.
- Run the engine for three to five minutes, then switch it off. Warm oil drains more easily, but it should not be painfully hot.
- Open the hood and remove the oil filler cap. This allows air to enter while the oil drains.
- Place wheel chocks firmly behind both rear tires.
- Keep the vehicle level while checking the final oil level.
🔨 Step-by-Step Instructions
Follow these steps in order:
Step 1: Raise and support the front of the vehicle
- Position the 2-ton floor jack beneath the front-center subframe lifting point and raise the front of your Sonata.
- Place the 2-ton jack stands beneath the reinforced left and right front support points. A jack stand is a fixed support that safely holds the vehicle after lifting.
- Lower the vehicle gently onto both stands, then push lightly on the body to confirm it is stable.
- Use the mechanic’s creeper only after confirming the vehicle is securely supported.
Step 2: Open the lower service area
- Locate the engine-oil service opening in the lower splash shield.
- If access is blocked, use the 10mm socket and 3/8-inch-drive ratchet to remove the nearby shield fasteners.
- Use the flat-blade trim tool to release any plastic retainers without pulling on the shield.
- Place the removed fasteners where they cannot roll away.
Step 3: Drain the old engine oil
- Put on the nitrile gloves and safety glasses.
- Position the 8-quart drain pan beneath the oil-pan drain plug. Offset the pan slightly because the oil initially flows outward.
- Use the 17mm six-point socket and 3/8-inch-drive ratchet to loosen the drain plug counterclockwise.
- Finish removing the plug by hand while pressing it gently against the pan. Pull it away quickly when the threads release.
- Allow the oil to drain until it slows to an occasional drip.
- Keep firm pressure on the plug while unscrewing.
Step 4: Reinstall the drain plug
- Use a shop towel to clean the drain plug and the sealing surface on the oil pan.
- Remove the old crush washer and fit one new oil drain plug crush washer. The crush washer is a soft metal seal designed for one-time use.
- Start the drain plug by hand for several turns. Stop if it does not turn easily, because crossed threads can damage the oil pan.
- Use the 17mm socket and 3/8-inch-drive torque wrench to tighten the plug to 40 Nm (30 ft-lbs).
Step 5: Remove the old oil filter
- Move the 8-quart drain pan beneath the oil filter at the lower front area of the engine.
- Use the adjustable oil filter wrench to loosen the filter counterclockwise. This wrench grips the filter’s metal housing when it is too tight to turn by hand.
- Unscrew the filter by hand and keep it upright as it comes off.
- Confirm the old rubber sealing gasket came off with the filter. A gasket left on the engine can cause a major leak.
- Use a shop towel to wipe the filter mounting surface clean.
Step 6: Install the new oil filter
- Pour a small amount of fresh oil onto a clean shop towel, then lightly coat the new filter’s rubber gasket.
- Thread the new filter clockwise by hand until its gasket contacts the mounting surface.
- Tighten the filter by hand an additional three-quarters of a turn. Do not use the filter wrench to tighten it.
- Write the mileage and date on the filter.
Step 7: Reinstall the lower shield
- Use the 10mm socket and 3/8-inch-drive ratchet to reinstall the lower shield fasteners until snug.
- Use the flat-blade trim tool to guide reusable plastic retainers into position, then press their centers until flush.
- Do not overtighten the small shield fasteners; they thread into light-duty clips.
Step 8: Lower the vehicle
- Use the 2-ton floor jack to raise the front slightly off the jack stands.
- Remove both 2-ton jack stands, then lower your Sonata slowly onto level ground.
- Remove the rear wheel chocks.
Step 9: Add fresh engine oil
- Insert the oil funnel into the oil filler opening.
- Add approximately 4.8 U.S. quarts of SAE 5W-20 oil, saving the remaining oil for final adjustment.
- Remove the funnel and install the oil filler cap securely by hand.
- Use a shop towel to remove the dipstick, wipe it clean, reinstall it fully, and pull it out again.
- Add oil through the oil funnel in small amounts until the dipstick level is near the upper mark. Do not fill above that mark.
Step 10: Run the engine and inspect for leaks
- Start the engine and confirm the red oil-pressure warning lamp turns off within a few seconds.
- Switch the engine off immediately if the warning lamp remains illuminated.
- Let the engine idle for approximately 30 seconds, then switch it off.
- Use the safety glasses and shop towels while checking beneath the engine for leakage around the drain plug and filter.
Step 11: Perform the final oil-level check
- Wait at least five minutes with your Sonata parked on level ground.
- Use a shop towel to wipe and recheck the dipstick.
- If needed, use the oil funnel to add small amounts until the oil reaches the upper dipstick mark.
- Reinstall the dipstick and filler cap completely.
Step 12: Reset the service reminder if displayed
- Switch the ignition on without starting the engine.
- Use the steering-wheel cluster controls to open User Settings > Service Interval.
- Select Reset, then confirm the reset when prompted.
- If no Service Interval option is shown, your Sonata’s cluster does not have an enabled reminder to reset.
✅ After Repair
- Check beneath your Sonata again after the first drive and look for fresh oil droplets.
- Recheck the dipstick the following morning while the vehicle is on level ground.
- Record the date, mileage, oil viscosity, and filter replacement.
- Place the used oil and filter in sealed containers. Take them to an authorized recycling center or local workshop; never pour oil onto the ground or into a drain.
- For routine service, follow Hyundai’s mileage and time interval, shortening it when the vehicle regularly experiences heavy traffic, dusty roads, short trips, or prolonged idling.
💰 DIY vs Shop Cost
Shop Cost: ₹3,500-₹7,000 (parts + labor)
DIY Cost: ₹2,500-₹5,000 (parts only)
You Save: ₹1,000-₹2,000 by doing it yourself!
Local labor and imported U.S.-spec filter prices vary. This repair takes a shop approximately 0.5-1.0 hour.
🎯 Ready to get started?
HowToo makes it easy: same-day/2-day shipping on every part, plus all the tools and specialty tools you need! Check out the parts and tools sections below to add everything to your cart.