

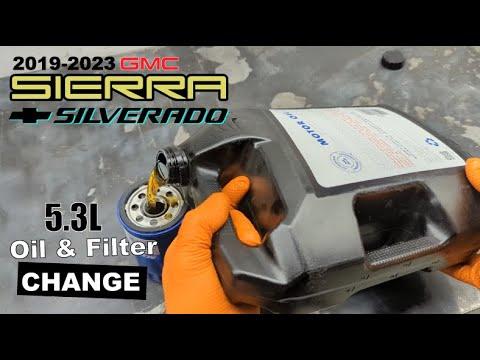






How to Change Oil and Filter on a 2018-2021 Chevrolet Silverado 1500 5.3L (Trim: LT | Engine: V8 5.3L)
Step-by-step DIY guide with tools, 0W-20 oil capacity, torque specs, and oil-life reset for 2018, 2019, 2020, 2021
How to Change Oil and Filter on a 2018-2021 Chevrolet Silverado 1500 5.3L (Trim: LT | Engine: V8 5.3L)
Step-by-step DIY guide with tools, 0W-20 oil capacity, torque specs, and oil-life reset for 2018, 2019, 2020, 2021


🔧 Silverado 1500 - Engine Oil and Filter Change
This is a very manageable first service. You’ll drain the old oil, replace the spin-on filter, refill the engine, check for leaks, and reset the oil-life monitor.
Assumption: These specifications apply to the stock 5.3L gasoline engine. Use 8 quarts of SAE 0W-20 full-synthetic oil meeting GM dexos1 specifications, including the filter.
Difficulty Level: Beginner | Estimated Time: 45-75 minutes
⚠️ Safety & Precautions
- ⚠️ Never work under your Silverado while it’s supported only by a jack.
- 🛑 Use level, solid ground and place the transmission in Park.
- 🌡️ Warm oil drains better, but hot oil and exhaust parts can cause serious burns.
- 🔑 Shut the engine off and keep the key away from the vehicle while underneath.
- 🧤 Wear gloves and safety glasses. Used engine oil can irritate your skin.
- ♻️ Collect every drop and take the used oil and filter to an approved recycling location.
- 🔋 Battery disconnection isn’t required.
🔧 Required Tools
You'll need the following tools for this repair:
- 15mm six-point socket
- 3/8-inch-drive ratchet
- 3/8-inch-drive torque wrench rated 10-80 ft-lbs
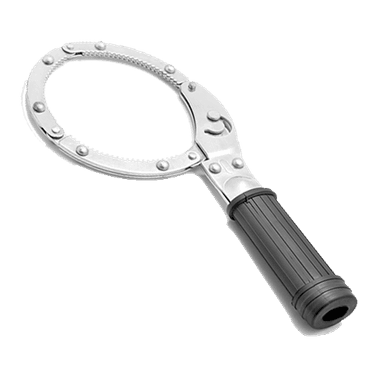
- Adjustable oil-filter wrench
- Oil drain pan rated 10-quart minimum
- Long-neck oil funnel
- Vehicle ramps rated 3-ton minimum
- Rubber wheel chocks
- Mechanic’s nitrile gloves
- Safety glasses
- Shop towels
🔩 Required Parts
HowToo sells all the parts you need for this repair:
- SAE 0W-20 full-synthetic GM dexos1 engine oil - Qty: 8 quarts
- Wix WL10255 premium spin-on engine oil filter - Qty: 1
- Oil drain-plug sealing washer - Qty: 1 if damaged or leaking
The Wix filter is my pick. Its silicone anti-drainback valve helps retain oil inside the filter after shutdown. A good filter costs less than cleaning oil off the driveway.
📋 Before You Begin
- 📍 Park your Silverado on level, solid ground.
- 🌡️ Run the engine for three to five minutes, then shut it off and wait five minutes.
- 🚗 Drive the front wheels onto the ramps slowly and center both tires.
- 🛑 Place the transmission in Park, apply the parking brake, and shut off the engine.
- 🧱 Place rubber wheel chocks tightly behind both rear tires.
- 🔓 Open the hood, remove the oil-filler cap, and pull the dipstick partly out.
- 🧰 Confirm the drain pan holds at least 10 quarts before opening the drain.
🔨 Step-by-Step Instructions
Follow these steps in order:
Step 1: Position the drain pan
- Put on the mechanic’s nitrile gloves and safety glasses.
- Slide the 10-quart drain pan beneath the oil-pan drain plug.
- Position the pan slightly behind the plug because the oil initially flows outward.
- Oil travels farther than you expect.
Step 2: Remove the drain plug
- Use the 15mm six-point socket and 3/8-inch-drive ratchet to loosen the drain plug counterclockwise.
- Finish removing it by hand while pressing it lightly toward the oil pan.
- Pull the plug away quickly and allow the oil to drain without touching the stream.
- Let the oil drain until it slows to an occasional drip, usually 10-15 minutes.
Step 3: Inspect and reinstall the drain plug
- Use shop towels to clean the drain plug and the sealing surface around its hole.
- Inspect the plug threads and sealing washer. Replace the washer if it’s crushed, split, or distorted.
- Thread the plug clockwise by hand until fully seated. It should turn easily without binding.
- Use the 15mm socket and torque wrench to tighten it to 25 Nm (18 ft-lbs).
- Don’t overtighten it. The oil pan loses every argument with a long ratchet.
Step 4: Remove the old oil filter
- Move the drain pan beneath the spin-on oil filter.
- Use the adjustable oil-filter wrench to turn the old filter counterclockwise.
- An oil-filter wrench grips the filter can when it’s too tight to remove by hand.
- Once loose, turn the filter by hand while keeping it upright.
- Check that the old rubber gasket came off with the filter.
- If the gasket stayed on the engine, remove it carefully by hand.
Step 5: Install the new oil filter
- Use shop towels to clean the engine’s filter-mounting surface.
- Apply a thin film of clean 0W-20 oil to the new Wix filter’s rubber gasket.
- Thread the filter clockwise by hand until the gasket contacts the mounting surface.
- Tighten it by hand approximately three-quarters of a turn beyond gasket contact.
- Don’t use the filter wrench for final tightening unless the filter instructions specifically require it.
- Hand-tight is enough here.
Step 6: Lower the truck before filling
- Remove the tools, drain pan, and shop towels from beneath your Silverado.
- Remove the rear wheel chocks temporarily.
- Start the engine only long enough to back slowly off the ramps, then shut it off.
- Park on level ground, apply the parking brake, and reinstall the wheel chocks.
- Checking the dipstick while the truck is tilted can give a misleading reading.
Step 7: Add fresh engine oil
- Place the long-neck funnel into the oil-filler opening.
- Pour in approximately 7.5 quarts of SAE 0W-20 full-synthetic dexos1 oil.
- Remove the funnel, install the oil-filler cap, and fully seat the dipstick.
- Keep the remaining oil available for the final level adjustment.
Step 8: Build oil pressure and inspect for leaks
- Start the engine and watch the instrument panel.
- The oil-pressure warning should turn off within a few seconds.
- Shut the engine off immediately if the warning remains on or you hear abnormal knocking.
- Let the engine idle for about 30 seconds, then shut it off.
- Use the safety glasses and a flashlight to inspect the drain plug and filter for fresh oil.
- Don’t crawl underneath unless your Silverado is safely raised and supported again.
Step 9: Set the final oil level
- Wait at least five minutes with your Silverado on level ground.
- Remove the dipstick and wipe it clean with a shop towel.
- Insert it fully, remove it again, and read the level.
- Add the remaining oil through the long-neck funnel in small amounts until the level reaches the full mark.
- The total capacity with a new filter is approximately 8 quarts.
- Don’t fill above the dipstick’s full mark.
Step 10: Reset the engine-oil life
- Switch the ignition on without starting the engine.
- Use the steering-wheel controls to display the Driver Information Center > Info > Oil Life screen.
- Press and hold the check-mark button until the display resets to 100%.
- If that screen isn’t available, switch the ignition on without starting and press the accelerator pedal fully three times within five seconds.
- Switch the ignition off, restart the engine, and confirm the oil-life display shows 100%.
✅ After Repair
- ✅ Confirm the dipstick level is at the full mark without exceeding it.
- 🔍 Recheck the filter and drain-plug areas after the first drive.
- 🧼 Clean any spilled oil from the frame, splash shield, and driveway.
- ♻️ Pour the used oil into a sealed container and recycle it with the old filter.
- 📏 Check the oil level again after roughly 50 miles or 80 kilometers.
- 📝 Follow the oil-life monitor, but check the dipstick regularly between services.
💰 DIY vs Shop Cost
Shop Cost: $90-$160 (parts + labor)
DIY Cost: $45-$85 (parts only)
You Save: $45-$75 by doing it yourself!
Shop labor rates vary but typically run $100-$150/hour. This repair takes a shop approximately 0.4-0.7 hours.
🎯 Ready to get started?
HowToo makes it easy: same-day/2-day shipping on every part, plus all the tools and specialty tools you need! Check out the parts and tools sections below to add everything to your cart.