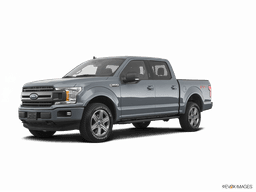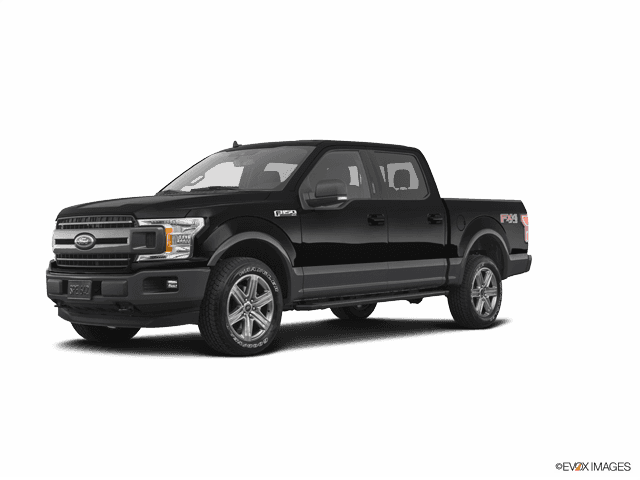

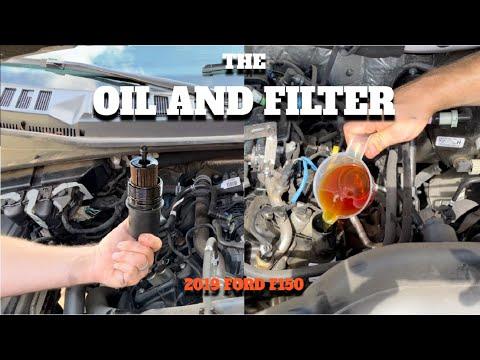







How to Change Oil and Filter on a 2017-2025 Ford F-150 3.5L EcoBoost (Trim: Limited | Engine: V6 3.5L)
Step-by-step DIY guide with tools, parts, oil capacity, safety tips, and oil-life reset for 2017, 2018, 2019, 2020, 2021, 2022, 2023, 2024, 2025
How to Change Oil and Filter on a 2017-2025 Ford F-150 3.5L EcoBoost (Trim: Limited | Engine: V6 3.5L)
Step-by-step DIY guide with tools, parts, oil capacity, safety tips, and oil-life reset for 2017, 2018, 2019, 2020, 2021, 2022, 2023, 2024, 2025


🔧 F-150 - Engine Oil and Filter Change
This is a very manageable first DIY service. Drain the warm oil, replace the filter, refill with 6.0 qt (5.7 L) of SAE 5W-30, then verify the dipstick level and reset the oil-life monitor. Ford specifies oil meeting WSS-M2C946-B1 for this model year. media.ford.com)
Difficulty Level: Beginner | Estimated Time: 45-75 minutes
⚠️ Safety & Precautions
- ⚠️ Work on level, solid ground. Never crawl under a truck supported only by a jack.
- 🧤 Let the engine cool for about 15 minutes. Warm oil drains well, but hot oil burns.
- 🛑 Shift into Park, apply the parking brake, and chock both rear wheels.
- 🔑 Keep the key away from the truck so nobody accidentally starts it.
- 🔋 Battery disconnection is not required.
- ♻️ Collect every drop and take the used oil and filter to an approved recycling facility.
🔧 Required Tools
You'll need the following tools for this repair:
- Floor jack rated 3-ton minimum
- Jack stands rated 3-ton minimum
- Wheel chocks
- 8mm socket
- 1/4-inch-drive ratchet
- Oil-filter strap wrench sized 3 to 4 inches
- Drain pan rated 10-quart minimum
- 6-quart graduated oil jug
- Long-neck oil funnel
- Trim-clip removal tool
- LED work light
- Nitrile mechanic gloves
- Safety glasses
- Shop towels
🔩 Required Parts
HowToo sells all the parts you need for this repair:
- SAE 5W-30 full-synthetic engine oil meeting Ford WSS-M2C946-B1 - Qty: 6 quarts
- Spin-on engine oil filter matched to the 3.5L EcoBoost - Qty: 1
- Plastic oil-pan drain plug with sealing O-ring - Qty: 1 recommended
The correct oil-change aisle is open in the parts sidebar. Ignore the catch cans and oil coolers shown there. Those aren't routine oil-change parts. Nobody needs a race-car oil tank for a Saturday service.
📋 Before You Begin
- 🚙 Park your F-150 on level pavement and run the engine for three to five minutes.
- 🛑 Switch the engine off, apply the parking brake, and chock both rear wheels.
- 📖 Open the hood and loosen the oil-filler cap. Leave it sitting over the opening to keep debris out.
- ⬆️ If you need more room, lift the front at a designated frame lifting point and place both front frame rails securely on jack stands.
- 🛡️ Push the truck firmly from the side before going underneath. Any movement means you must reposition the stands.
- 📌 This procedure assumes the original composite oil pan and quarter-turn plastic drain plug remain installed.
🔨 Step-by-Step Instructions
Follow these steps in order:
Step 1: Open the service access area
- Put on the safety glasses and nitrile mechanic gloves.
- Use the LED work light to locate the lower access panel beneath the engine.
- Use the 8mm socket and 1/4-inch-drive ratchet to remove any screws blocking access to the drain plug or oil filter.
- Use the trim-clip removal tool for any push-pin retainers. Lift the center pin first, then remove the complete clip.
Step 2: Position the drain pan
- Slide the 10-quart drain pan below the oil-pan drain plug.
- Place the pan slightly rearward of the plug because the oil initially exits with some force.
- Keep shop towels nearby. The wide Ford oil stream has a talent for finding clean concrete.
Step 3: Drain the old engine oil
- Turn the factory plastic drain plug counterclockwise by hand about one-quarter turn.
- Pull the plug straight out while keeping your hand above the oil stream.
- Allow the oil to drain for at least 10 minutes, until it slows to an occasional drip.
- Inspect the plug and O-ring. Replace the plug if either is cut, flattened, swollen, or damaged.
- Do not use pliers on the plastic plug.
Step 4: Replace the drain plug
- Wipe the drain opening with a shop towel. Do not push dirt into the oil pan.
- Insert the plastic drain plug by hand and turn it clockwise until it reaches its locked stop.
- Do not apply a conventional bolt torque to the factory quarter-turn plastic plug.
- Gently tug the installed plug to confirm it is fully seated and locked.
Step 5: Remove the old oil filter
- Reposition the 10-quart drain pan beneath the oil filter.
- Turn the filter counterclockwise by hand. If it is stuck, loosen it with the 3-to-4-inch oil-filter strap wrench.
- Once loose, remove the filter by hand and keep its open end upright.
- Check the engine sealing surface and confirm the old rubber filter gasket came off with the filter.
- Two filter gaskets cause a major leak.
Step 6: Install the new oil filter
- Pour a small amount of fresh SAE 5W-30 engine oil onto a clean fingertip.
- Coat the new filter's rubber sealing gasket with a thin film of oil.
- Thread the filter clockwise by hand until its gasket touches the mounting surface.
- Tighten it approximately three-quarters of a turn beyond gasket contact, or follow the turn specification printed on the filter.
- Do not tighten the new filter with the strap wrench.
Step 7: Reinstall the lower panel
- Wipe spilled oil from the oil pan, filter area, chassis, and lower panel with shop towels.
- Reinstall the panel and push clips using the trim-clip removal tool by hand.
- Install its screws with the 8mm socket and 1/4-inch-drive ratchet.
- Tighten the small panel screws only until snug. Do not crush the panel or strip its retainers.
Step 8: Lower the truck
- Remove all tools and the drain pan from beneath your F-150.
- Use the 3-ton floor jack to lift the frame slightly.
- Remove both 3-ton jack stands, then lower the truck slowly and completely.
Step 9: Add fresh engine oil
- Remove the oil-filler cap and install the long-neck oil funnel.
- Measure and add approximately 5.5 qt (5.2 L) of SAE 5W-30 using the graduated oil jug.
- Wait two minutes, then remove, wipe, reinsert, and remove the dipstick.
- Add oil gradually until the level approaches the upper mark. The total refill with filter is 6.0 qt (5.7 L). media.ford.com)
- Do not automatically pour extra oil after all six quarts are added.
- Remove the funnel and turn the filler cap clockwise until firmly seated.
Step 10: Start the engine and check for leaks
- Start the engine and confirm the oil-pressure warning light switches off within a few seconds.
- Switch the engine off immediately if the warning light remains illuminated.
- Let the engine idle for about 30 seconds while inspecting underneath with the LED work light.
- Check the filter and drain plug areas for active dripping.
- Switch the engine off and wait 10 to 15 minutes on level ground.
Step 11: Set the final oil level
- Remove the dipstick, wipe it with a shop towel, reinstall it fully, and remove it again.
- The oil should sit within the marked operating range, preferably close to the upper mark without exceeding it.
- Add small amounts through the long-neck oil funnel only if needed.
- Reinstall the dipstick and oil-filler cap fully.
Step 12: Reset the oil-life monitor
- Switch the ignition on without starting the engine.
- Use the steering-wheel arrow and OK controls to select Settings > Convenience > Oil Life Reset.
- Select Hold OK to Reset and hold OK until Reset Successful appears.
- Confirm that the oil-life display reads 100%. fordservicecontent.com
✅ After Repair
- ✅ Drive for five to ten minutes, then park on level ground and inspect underneath again.
- 🔍 Recheck the dipstick after waiting about 15 minutes.
- 🧽 Clean any residue so a future leak is easy to identify.
- ♻️ Pour the used oil into a sealed container and recycle it with the old filter.
- 📝 Record the date and odometer reading for your maintenance history.
- ⚠️ If oil drips from the filter, shut the engine off and check for a doubled gasket or loose filter.
💰 DIY vs Shop Cost
Shop Cost: $90-$180 equivalent, depending on local oil and labor pricing
DIY Cost: $45-$85 equivalent for quality oil, filter, and drain plug
You Save: $45-$95 by doing it yourself!
Labor rates vary widely by region. This service normally takes a shop approximately 0.4-0.7 hour.
🎯 Ready to get started?
HowToo makes it easy: same-day/2-day shipping on every part, plus all the tools and specialty tools you need! Check out the parts and tools sections below to add everything to your cart.