

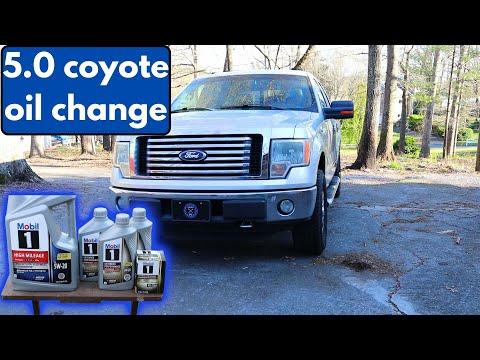






How to Change Oil and Filter on a 2011-2014 Ford F-150 5.0L V8 (Engine: V8 5.0L)
Step-by-step DIY guide with tools, oil capacity, torque specs, safety tips, and oil-life reset for 2011, 2012, 2013, 2014
How to Change Oil and Filter on a 2011-2014 Ford F-150 5.0L V8 (Engine: V8 5.0L)
Step-by-step DIY guide with tools, oil capacity, torque specs, safety tips, and oil-life reset for 2011, 2012, 2013, 2014


🔧 F-150 - Engine Oil and Oil Filter Change
Changing the oil removes contaminated lubricant that can accelerate engine wear. Your F-150’s 5.0L V8 uses approximately 7.7 US quarts (7.3 liters) of SAE 5W-20 oil when the filter is replaced.
Difficulty Level: Beginner | Estimated Time: 45-60 minutes
⚠️ Safety & Precautions
- ⚠️ Let the engine cool until the oil is warm, not hot.
- ⚠️ Work on firm, level ground and engage the parking brake.
- ⚠️ Never get under your F-150 while it is supported only by a jack.
- ⚠️ Keep your hands away from the exhaust system and cooling fan.
- ⚠️ Do not overtighten the drain plug; the aluminum oil pan can be damaged.
- ⚠️ Battery disconnection is not required.
🔧 Required Tools
You'll need the following tools for this repair:
- 15mm socket
- 3/8-inch-drive ratchet
- 3/8-inch-drive torque wrench rated 10-80 ft-lbs
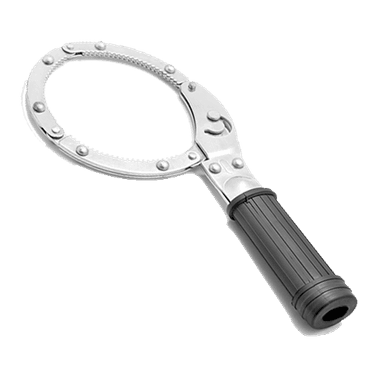
- Oil-filter cap wrench sized for replacement filter
- Oil drain pan rated 10-quart minimum
- 6-inch funnel
- Floor jack rated 3-ton minimum
- Jack stands rated 3-ton minimum
- Wheel chocks
- Mechanic’s creeper
- Shop towels
- Nitrile gloves
- Safety glasses
🔩 Required Parts
HowToo sells all the parts you need for this repair:
- SAE 5W-20 full-synthetic engine oil meeting Ford WSS-M2C945-A - Qty: 8 US quarts
- Spin-on engine oil filter with sealing gasket - Qty: 1
- Engine oil drain-plug sealing washer - Qty: 1
📋 Before You Begin
- 🚙 Park your F-150 on level pavement, select Park, apply the parking brake, and chock the rear wheels.
- 🌡️ Run the engine for three to five minutes, then switch it off and wait five minutes.
- 📏 Verify that the replacement filter’s gasket diameter and thread match the removed filter before installation.
- ♻️ Prepare a sealed container for recycling the used oil and filter at an authorized collection center in Panipat.
- 🛢️ Do not add all eight quarts. The specified refill is approximately 7.7 US quarts (7.3 liters), followed by a dipstick check.
🔨 Step-by-Step Instructions
Follow these steps in order:
Step 1: Open the hood and remove the oil cap
- Pull the hood release, open the hood, and secure it.
- Turn the engine oil filler cap counterclockwise by hand and remove it.
- Pull out the dipstick by hand, wipe it with a shop towel, and leave it slightly raised so the crankcase drains freely.
Step 2: Raise and support the truck if necessary
- Your FX4 may have enough clearance without lifting. If you cannot reach the drain plug safely, use the 3-ton floor jack at the front crossmember.
- Place the 3-ton jack stands beneath the specified front frame support points, lower your F-150 onto them, and gently verify stability.
- A jack stand is a rigid support that safely holds the vehicle after lifting.
- Keep the floor jack lightly positioned beneath the crossmember as secondary support.
Step 3: Position the drain pan
- Put on nitrile gloves and safety glasses.
- Slide the 10-quart drain pan beneath the oil-pan drain plug. Position it slightly toward the rear because the oil initially exits in an arc.
- Identify the engine-oil pan carefully. Do not loosen a plug on the transmission.
Step 4: Drain the old engine oil
- Use the 15mm socket and 3/8-inch-drive ratchet to loosen the drain plug counterclockwise.
- Finish removing the plug by hand while pressing inward, then pull it away quickly.
- Allow the oil to drain until it slows to an occasional drip, usually 10-15 minutes.
- Clean the plug with a shop towel and install a new sealing washer.
- Keep upward pressure on the plug while unscrewing.
Step 5: Reinstall the drain plug
- Wipe the drain opening with a shop towel.
- Start the drain plug clockwise by hand for several turns. Stop if it does not turn easily.
- Use the 15mm socket and 3/8-inch-drive torque wrench to torque the drain plug to 26 Nm (19 ft-lbs).
Step 6: Remove the old oil filter
- Move the 10-quart drain pan beneath the oil filter at the lower front area of the engine.
- Use the correctly sized oil-filter cap wrench and 3/8-inch-drive ratchet to turn the filter counterclockwise.
- An oil-filter cap wrench fits over the end of a stubborn filter to provide grip.
- Finish unscrewing the filter by hand and lower it with the open end facing upward.
- Use a shop towel to confirm that the old rubber gasket came off with the filter.
- Remove any old gasket stuck to the engine. Two stacked gaskets will cause a major leak.
Step 7: Install the new oil filter
- Use a clean, gloved fingertip to coat the new filter’s rubber gasket with fresh 5W-20 oil.
- Thread the filter clockwise by hand until its gasket first touches the mounting surface.
- Tighten it by hand another 3/4 turn after gasket contact. Do not tighten it with the oil-filter cap wrench unless the filter manufacturer specifically requires a torque setting.
- Write the mileage and date on the filter.
Step 8: Lower the truck
- Use the 3-ton floor jack to lift your F-150 slightly off the jack stands.
- Remove the 3-ton jack stands, then lower the truck slowly with the floor jack.
- Leave the wheel chocks in place until the repair is complete.
Step 9: Add fresh engine oil
- Place the 6-inch funnel in the oil filler opening.
- Pour in approximately 7.0 US quarts (6.6 liters) of SAE 5W-20 oil first.
- Remove the funnel, install the filler cap by hand, and fully seat the dipstick.
Step 10: Start the engine and check for leaks
- Start the engine and confirm that the oil-pressure warning light switches off within a few seconds.
- Switch the engine off immediately if the warning remains illuminated.
- Using a shop towel and safety glasses, inspect around the drain plug and oil filter for fresh oil. Do not reach near moving or hot components.
- Run the engine for approximately 30 seconds, then switch it off and wait five minutes.
Step 11: Set the final oil level
- Pull the dipstick out by hand and wipe it clean with a shop towel.
- Fully insert it, remove it again, and read both sides.
- Add small amounts through the 6-inch funnel until the level reaches the upper operating mark without exceeding it.
- The total refill should be close to 7.7 US quarts (7.3 liters), but the dipstick is the final authority.
- Install the filler cap and dipstick securely by hand.
Step 12: Reset the Intelligent Oil-Life Monitor
- Turn the ignition to ON without starting the engine.
- For a steering-wheel control cluster, use the arrow and OK buttons to select Settings > Vehicle > Oil Life Reset, then hold OK until it displays 100%.
- For a cluster with SETUP and RESET buttons, press SETUP until Oil Life appears, then hold RESET until it displays 100%.
- Switch the ignition off after confirming the reset.
✅ After Repair
- ✅ Start the engine once more and confirm there is no oil warning or visible leak.
- ✅ Recheck the dipstick after a short drive and several minutes on level ground.
- ✅ Inspect the drain plug and filter again the next morning.
- ✅ Pour the used oil into a sealed container and take it with the used filter to an authorized recycling or service center.
- ✅ Record the date, mileage, oil viscosity, and filter replacement.
💰 DIY vs Shop Cost
Shop Cost: ₹5,500-₹9,000 (parts + labor)
DIY Cost: ₹3,500-₹6,500 (parts only)
You Save: ₹2,000-₹3,500 by doing it yourself!
Local labor and imported oil-filter pricing vary. This repair takes a shop approximately 0.5-1.0 hour.
🎯 Ready to get started?
HowToo makes it easy: same-day/2-day shipping on every part, plus all the tools and specialty tools you need! Check out the parts and tools sections below to add everything to your cart.