








How to Change Manual Transmission Fluid in a 1996-2026 Honda Civic (Engine: Inline 4 1.5L)
Step-by-step drain-and-fill guide with Honda MTF capacity, tools, torque specs, and safety tips for 1996, 1997, 1998, 1999, 2000
How to Change Manual Transmission Fluid in a 1996-2026 Honda Civic (Engine: Inline 4 1.5L)
Step-by-step drain-and-fill guide with Honda MTF capacity, tools, torque specs, and safety tips for 1996, 1997, 1998, 1999, 2000


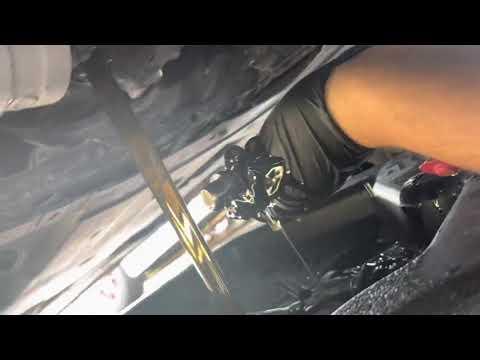
🔧 Civic - Manual Transmission Fluid Change
This one’s very manageable: drain the old manual transmission fluid, replace both sealing washers, then refill until fresh fluid reaches the bottom of the fill opening. Your Civic takes Honda Manual Transmission Fluid, with a drain-and-fill capacity of approximately 2.0 US quarts (1.9 liters). Do not use CVT or automatic-transmission fluid. techinfo.honda.com)
Difficulty Level: Beginner | Estimated Time: 1-1.5 hours
Assumption: Torque values below apply to the stock six-speed manual transmission.
⚠️ Safety & Precautions
- ⚠️ Support your Civic with four properly rated jack stands. Never work underneath a vehicle supported only by a jack.
- 🧤 Let the exhaust cool before reaching around the transmission.
- 📏 Keep the vehicle level while filling. Raising only the front gives an inaccurate fluid level.
- 🚫 Remove the fill plug before draining. If it won’t come out, stop before emptying the transmission.
- 🛢️ Don’t use CVT fluid, ATF, additives, or gear oil. Honda specifies Honda MTF for this manual transmission. techinfo.honda.com)
- 🔋 Battery disconnection isn’t required.
🔧 Required Tools
You'll need the following tools for this repair:
- Floor jack rated 2-ton minimum
- Four jack stands rated 2-ton minimum
- Wheel chocks
- 3/8-inch drive ratchet
- 3/8-inch drive extension
- 17mm socket
- Torque wrench rated 10-80 ft-lbs
- Phillips screwdriver
- Flat-blade trim tool
- Fluid transfer pump with flexible hose
- Drain pan rated 8-quart minimum
- Level measuring tool
- Safety glasses
- Nitrile gloves
- Shop towels
🔩 Required Parts
HowToo sells all the parts you need for this repair:
- Honda-specification manual transmission fluid - Qty: 2 US quarts
- Transmission drain-plug sealing washer - Qty: 1
- Transmission fill-plug sealing washer - Qty: 1
The transmission-fluid aisle is open in the parts sidebar. For the safest shift quality, I’d use genuine Honda MTF rather than a universal fluid. Synchronizers are picky little customers.
📋 Before You Begin
- 🚗 Drive for approximately 10 minutes so the transmission fluid becomes warm, not dangerously hot.
- 🅿️ Park on solid, level ground. Shift into first gear, engage the parking brake, and chock the wheels before lifting.
- 📐 Raise all four corners evenly and place the vehicle securely on four jack stands.
- 🧪 Confirm you have two full quarts of the correct manual transmission fluid and both new sealing washers.
- 📱 No scan tool, clutch bleeding, coding, or battery registration is required.
🔨 Step-by-Step Instructions
Follow these steps in order:
Step 1: Raise and level the vehicle
- Place the wheel chocks securely before lifting.
- Use the 2-ton floor jack at the approved lifting points.
- Lower the vehicle onto four 2-ton jack stands.
- Use the level measuring tool along the rocker panel to confirm the vehicle is approximately level.
- Push the body lightly before going underneath. It shouldn’t shift on the stands.
Step 2: Remove the lower splash shield
- Put on safety glasses and nitrile gloves.
- Use the Phillips screwdriver and flat-blade trim tool to remove the lower shield fasteners.
- Support the shield with one hand while removing its final fastener.
- Set the fasteners aside in their removal order.
Step 3: Remove the fill plug first
- Locate the fill plug on the front-facing side of the manual transmission case, above the drain plug.
- Position the 8-quart drain pan underneath because a small amount of fluid may escape.
- Use the 17mm socket, 3/8-inch extension, and 3/8-inch ratchet to loosen and remove the fill plug.
- Remove the old sealing washer from the plug.
- Fill plug first. Always.
Step 4: Drain the old transmission fluid
- Reposition the 8-quart drain pan directly below the drain plug.
- Insert the 3/8-inch ratchet square drive directly into the drain plug and loosen it counterclockwise.
- Finish removing the plug carefully by hand and let the fluid drain completely.
- Allow at least 10 minutes for draining.
- Check the magnetic drain plug. A thin gray paste is normal, but metal chips or needle-like pieces need professional inspection.
Step 5: Install the drain plug
- Clean the drain plug and surrounding transmission case with shop towels.
- Install a new drain-plug sealing washer with its flat face seated against the plug flange.
- Thread the plug in by hand first to prevent cross-threading.
- Use the torque wrench with the square-drive connection to tighten the drain plug to 39 Nm (29 ft-lbs).
- Do not reuse the old crushed washer.
Step 6: Fill the transmission
- Insert the fluid transfer pump hose securely into the fill opening.
- Pump Honda-specification manual transmission fluid into the transmission slowly.
- The published drain-and-fill capacity is approximately 2.0 US quarts (1.9 liters). techinfo.honda.com
- Stop when fluid begins to form a slow, steady dribble from the bottom edge of the fill opening.
- Wait about two minutes. Add a little more if the fluid level drops below the opening.
- Do not force in extra fluid once the level stabilizes at the opening.
Step 7: Install the fill plug
- Remove the fluid transfer pump hose and wipe the opening with shop towels.
- Fit a new sealing washer to the fill plug.
- Thread the plug in completely by hand.
- Use the 17mm socket and torque wrench to tighten the fill plug to 44 Nm (33 ft-lbs).
- Wipe both plugs and the surrounding case completely dry.
Step 8: Reinstall the splash shield
- Position the lower shield and start every fastener by hand.
- Use the Phillips screwdriver and flat-blade trim tool to secure the shield.
- Do not overtighten plastic clips or small shield screws.
Step 9: Lower the vehicle
- Use the 2-ton floor jack to lift each support point slightly.
- Remove all four 2-ton jack stands.
- Lower the vehicle slowly and remove the wheel chocks.
✅ After Repair
- ✅ With the engine running, press the clutch fully and shift slowly through every gear while stationary.
- 🛣️ Take a gentle 10-minute drive. Check for normal engagement and smooth shifting.
- 🔍 Park on clean pavement and inspect beneath the transmission for leaks.
- 🧻 If possible, recheck the drain and fill plug areas with a light after the road test.
- 📊 Reset Maintenance Minder sub-item 3 only if the transmission-fluid service was shown as due. Use the steering-wheel controls to enter the maintenance information screen, hold the selector until reset mode appears, select item 3, and confirm the reset.
- ♻️ Pour the used fluid into a sealed container and take it to an automotive-fluid recycling facility.
💰 DIY vs Shop Cost
Shop Cost: $150-$250 equivalent, depending on local labor and fluid pricing
DIY Cost: $40-$80 equivalent for fluid and sealing washers
You Save: Approximately $90-$180 by doing it yourself!
Shop labor rates vary. This repair takes a shop approximately 0.5-1.0 hour.
🎯 Ready to get started?
HowToo makes it easy: same-day/2-day shipping on every part, plus all the tools and specialty tools you need! Check out the parts and tools sections below to add everything to your cart.