


How to Change Engine Oil and Oil Filter on a 2016 INFINITI Q50 (DIY Guide)
Step-by-step oil & filter service with tools, oil specs, capacities, torque specs, and safety tips for 2014, 2015, 2016, 2017, 2018
How to Change Engine Oil and Oil Filter on a 2016 INFINITI Q50 (DIY Guide)
Step-by-step oil & filter service with tools, oil specs, capacities, torque specs, and safety tips for 2014, 2015, 2016, 2017, 2018
🔧 Q50 - Engine Oil & Oil Filter Change
You’ll drain the old engine oil, replace the oil filter, and refill with the correct full-synthetic oil. Fresh oil protects your turbo engine from wear and sludge, and the new filter keeps grit from circulating.
Difficulty Level: Beginner | Estimated Time: 1.0-1.5 hours
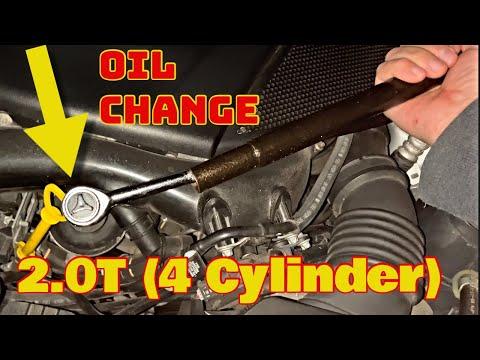
Assumption: your Q50 2.0t uses the cartridge-style oil filter housing.
⚠️ Safety & Precautions
- ⚠️ Work on level ground and support the car with jack stands—never rely on a jack alone.
- ⚠️ Let the engine cool 10–20 minutes; hot oil can burn you.
- ⚠️ Keep oil off the serpentine belt and exhaust—wipe spills immediately.
- ⚠️ Wear nitrile gloves and safety glasses.
🔧 Required Tools
You'll need the following tools for this repair:
- Floor jack (rated 3-ton minimum)
- Jack stands (rated 3-ton minimum)
- Wheel chocks
- Oil drain pan (at least 10-quart)
- Funnel
- Metric socket set
- 14mm socket
- 27mm socket
- Ratchet
- Torque wrench (10–80 Nm range)
- Trim clip removal tool
- Flat-blade screwdriver
- Oil filter cap wrench (27mm) (specialty)
- Nitrile gloves
- Safety glasses
- Shop rags
🔩 Required Parts
HowToo sells all the parts you need for this repair:
- Engine oil (full synthetic, MB 229.5, typically 0W-40) - Qty: 7 quarts
- Oil filter cartridge - Qty: 1
- Oil filter housing O-ring set - Qty: 1
- Oil drain plug crush washer - Qty: 1
📋 Before You Begin
- Park your Q50 on level ground, set the parking brake, and place wheel chocks behind the rear tires.
- Warm the engine for 2–3 minutes, then shut it off. This helps the oil drain faster.
- Open the hood and remove the oil fill cap (this helps oil drain smoothly).
- Lift the front with a floor jack and support with jack stands at the proper lift points.
🔨 Step-by-Step Instructions
Follow these steps in order:
Step 1: Remove the lower splash shield (undercover)
- Place your oil drain pan under the engine area.
- Use a trim clip removal tool and flat-blade screwdriver to remove the plastic clips/fasteners holding the front undercover.
- Use a metric socket set with a ratchet to remove any bolts, then lower the panel and set it aside.
- Tip: Keep clips in a cup.
Step 2: Drain the engine oil
- Locate the oil pan drain plug at the bottom of the oil pan.
- Use a 14mm socket with a ratchet to loosen the drain plug, then finish removing it by hand.
- Let the oil drain until it’s down to a slow drip (typically 10–15 minutes).
- Replace the drain plug washer with a new crush washer (it’s a soft ring that seals the plug).
- Reinstall the drain plug by hand first (prevents cross-threading), then tighten with a torque wrench: Torque to 30 Nm (22 ft-lbs).
Step 3: Replace the oil filter (cartridge style)
- Find the oil filter housing cap on top/front area of the engine.
- Place shop rags around the housing to catch drips.
- Use a 27mm socket (or oil filter cap wrench (27mm)) with a ratchet to loosen the housing cap.
- Lift the cap straight up—there will be oil on it.
- Pull the old filter cartridge off the cap (it snaps on).
- Remove the old O-ring(s) from the cap using a flat-blade screwdriver carefully (don’t scratch the plastic).
- Install the new O-ring(s) and lightly coat them with fresh engine oil (this prevents tearing and leaks).
- Snap the new filter cartridge onto the cap, then reinstall the cap by hand.
- Tighten with a torque wrench: Torque to 25 Nm (18 ft-lbs).
- Tip: Hand-start threads every time.
Step 4: Refill with new engine oil
- Insert a funnel into the oil fill opening.
- Pour in 6.5 quarts first (don’t dump all 7 at once).
- Reinstall the oil fill cap.
Step 5: Start, check for leaks, then set final oil level
- Start the engine and let it idle 30–60 seconds.
- Shut the engine off and wait 5 minutes for oil to settle.
- Inspect underneath with a flashlight and shop rags: check the drain plug and filter housing for leaks.
- Top off slowly as needed (usually ends up close to ~7.0 quarts total with filter), then recheck.
Step 6: Reinstall the undercover and lower the car
- Reinstall the splash shield using the metric socket set, ratchet, and the clips with the trim clip removal tool.
- Raise the car slightly with the floor jack, remove the jack stands, and lower the car.
✅ After Repair
- Recheck the oil level after a short 5–10 minute drive and top off if needed.
- Reset the oil maintenance reminder on the center display: Menu > Settings > Maintenance > Oil and Filter > Reset.
- Dispose of used oil and the old filter at a recycling center/parts store—never dump oil on the ground.
💰 DIY vs Shop Cost
Shop Cost: $120-$220 (parts + labor)
DIY Cost: $45-$90 (parts only)
You Save: $75-$130 by doing it yourself!
Shop labor rates vary but typically run $100-$150/hour. This repair takes a shop approximately 1.0-1.5 hours.
🎯 Ready to get started?
HowToo makes it easy: same-day/2-day shipping on every part, plus all the tools and specialty tools you need! Check out the parts and tools sections below to add everything to your cart.
