

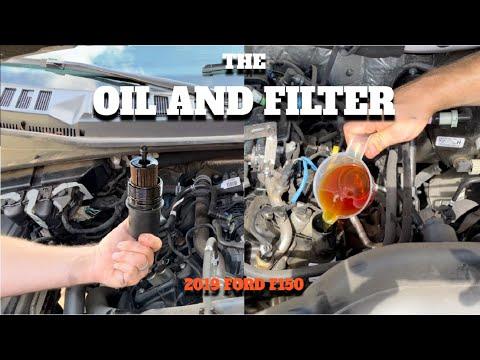






How to Change Engine Oil and Filter on a 2017-2025 Ford F-150 2.7L EcoBoost (Trim: Lariat | Engine: V6 2.7L)
Step-by-step oil change guide with 5W-30 oil, filter, tools, torque specs, and reset tips for 2017, 2018, 2019, 2020, 2021, 2022, 2023, 2024, 2025
How to Change Engine Oil and Filter on a 2017-2025 Ford F-150 2.7L EcoBoost (Trim: Lariat | Engine: V6 2.7L)
Step-by-step oil change guide with 5W-30 oil, filter, tools, torque specs, and reset tips for 2017, 2018, 2019, 2020, 2021, 2022, 2023, 2024, 2025


🔧 F-150 - Engine Oil & Oil Filter Replacement
This repair replaces the used engine oil and oil filter in your F-150’s 2.7L EcoBoost engine. Fresh oil protects the turbochargers, timing components, and internal engine parts from wear.
Difficulty Level: Beginner | Estimated Time: 45-75 minutes
⚠️ Safety & Precautions
- ⚠️ Let the engine cool until it is warm, not hot. Hot oil can burn skin.
- ⚠️ Support the truck with jack stands if lifting it. Never work under a vehicle supported only by a jack.
- ⚠️ Wear nitrile gloves and safety glasses to protect your skin and eyes from used oil.
- ⚠️ Used engine oil is hazardous waste. Drain it into a sealed container and recycle it properly.
- ⚠️ Do not overtighten the plastic drain plug or oil filter cap. Plastic parts can crack.
🔧 Required Tools
You'll need the following tools for this repair:
- Floor jack rated 3-ton minimum
- Jack stands rated 3-ton minimum
- Wheel chocks
- 8mm socket
- 10mm socket
- Ratchet wrench 3/8-inch drive
- 27mm socket
- Torque wrench 3/8-inch drive
- Flat-blade screwdriver
- Oil drain pan 10-quart minimum
- Clean funnel
- Shop towels
- Nitrile gloves
- Safety glasses
🔩 Required Parts
HowToo sells all the parts you need for this repair:
- Engine oil 5W-30 full synthetic - Qty: 6 quarts
- Engine oil filter cartridge with cap O-ring - Qty: 1
- Engine oil drain plug - Qty: 1 recommended
📋 Before You Begin
- Park your F-150 on level ground and set the parking brake.
- Place wheel chocks behind the rear wheels so the truck cannot roll.
- Warm the engine for 2-3 minutes, then shut it off. Warm oil drains more completely.
- Open the hood and remove the oil fill cap. This helps the oil drain faster.
- A torque wrench is a tool that tightens bolts to an exact tightness, which helps prevent leaks or broken parts.
- An O-ring is a round rubber seal that prevents oil leaks at the filter cap.
🔨 Step-by-Step Instructions
Follow these steps in order:
Step 1: Raise and Secure the Front
- Use the floor jack rated 3-ton minimum at a proper front frame lift point if extra clearance is needed.
- Set the truck onto jack stands rated 3-ton minimum under the frame.
- Gently rock the truck by hand to confirm it is stable before going underneath.
- Never trust a jack alone.
Step 2: Remove the Lower Access Panel
- Use an 8mm socket or 10mm socket with the ratchet wrench 3/8-inch drive to remove the fasteners from the lower engine cover or access panel, if equipped.
- Set the fasteners aside in a small cup so they do not get lost.
Step 3: Position the Drain Pan
- Place the oil drain pan 10-quart minimum under the engine oil drain plug.
- The 2.7L EcoBoost commonly uses a yellow plastic quarter-turn drain plug on the oil pan.
- Keep your face and hands away from the drain path because the oil may come out quickly.
Step 4: Drain the Engine Oil
- Use a flat-blade screwdriver or your fingers to rotate the plastic drain plug counterclockwise until it releases.
- Pull the drain plug straight out and let the oil drain fully into the oil drain pan 10-quart minimum.
- Allow the oil to drain until it slows to an occasional drip.
- Give it time to drain fully.
Step 5: Reinstall the Drain Plug
- Inspect the drain plug seal. Replace the engine oil drain plug if the seal is damaged, flattened, cut, or loose.
- Push the drain plug into the oil pan and rotate it clockwise until fully locked.
- For the factory plastic quarter-turn drain plug, do not use a torque wrench; it locks by rotation.
- Wipe the area clean with shop towels.
Step 6: Remove the Oil Filter Cap
- Move to the top of the engine bay.
- Use a 27mm socket with the ratchet wrench 3/8-inch drive to loosen the oil filter cap.
- Lift the cap and old cartridge filter out carefully so oil does not drip onto the engine.
- Use shop towels to catch any drips.
Step 7: Replace the Oil Filter Cartridge and O-Ring
- Pull the old filter cartridge off the cap by hand.
- Remove the old cap O-ring carefully by hand or with a flat-blade screwdriver. Do not scratch the plastic cap.
- Lightly coat the new O-ring with fresh engine oil 5W-30 full synthetic.
- Install the new O-ring into the same groove on the cap.
- Push the new engine oil filter cartridge with cap O-ring onto the cap until it seats fully.
Step 8: Reinstall the Oil Filter Cap
- Thread the filter cap in by hand first to avoid cross-threading.
- Use the 27mm socket and torque wrench 3/8-inch drive to tighten the cap.
- Torque to 25 Nm (18 ft-lbs).
- Hand-start threads every time.
Step 9: Add New Engine Oil
- Place a clean funnel into the oil fill opening.
- Pour in about 5.5 quarts of engine oil 5W-30 full synthetic.
- Reinstall the oil fill cap by hand.
- Do not add all 6 quarts immediately. Final level is checked after running the engine.
Step 10: Start the Engine and Check for Leaks
- Start the engine and let it idle for 30-60 seconds.
- Use safety glasses and look under the truck for leaks at the drain plug.
- Use shop towels to check around the oil filter cap area for seepage.
- Shut the engine off.
Step 11: Check and Set the Oil Level
- Wait 5 minutes so oil can drain back into the oil pan.
- Pull the dipstick, wipe it clean with shop towels, reinstall it fully, then pull it again.
- Add oil through the clean funnel as needed until the level reaches the full mark.
- Total refill is typically about 6 quarts with filter replacement.
- Reinstall the dipstick and oil fill cap securely by hand.
Step 12: Reinstall the Lower Access Panel
- Raise the panel into position by hand.
- Use the 8mm socket or 10mm socket with the ratchet wrench 3/8-inch drive to reinstall the fasteners.
- Tighten the small cover fasteners snug only. Do not overtighten plastic or splash shield fasteners.
Step 13: Lower the Truck
- Use the floor jack rated 3-ton minimum to lift the truck slightly off the jack stands rated 3-ton minimum.
- Remove the jack stands.
- Lower the truck slowly to the ground with the floor jack.
Step 14: Reset the Oil Life Monitor
- Turn the ignition on without starting the engine.
- Use the steering wheel controls to go to Settings > Vehicle > Oil Life Reset.
- Press and hold OK until the display shows the oil life has reset to 100%.
- If your screen layout differs, use Settings > Advanced Settings > Vehicle > Oil Life Reset.
✅ After Repair
- ✅ Drive your F-150 for 5-10 minutes, then park on level ground and shut it off.
- ✅ Wait 5 minutes and recheck the dipstick level. Top off if needed.
- ✅ Check again for leaks around the oil drain plug and oil filter cap.
- ✅ Make sure the oil life monitor shows 100%.
- ✅ Pour the used oil into sealed containers and recycle the oil and old filter at an approved recycling location.
💰 DIY vs Shop Cost
Shop Cost: $90-$160 parts + labor
DIY Cost: $45-$80 parts only
You Save: $45-$80 by doing it yourself!
Shop labor rates vary but typically run $100-$150/hour. This repair takes a shop approximately 0.5-0.8 hours.
🎯 Ready to get started?
HowToo makes it easy: same-day/2-day shipping on every part, plus all the tools and specialty tools you need! Check out the parts and tools sections below to add everything to your cart.