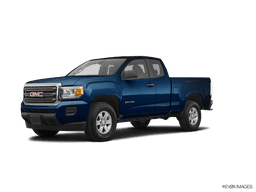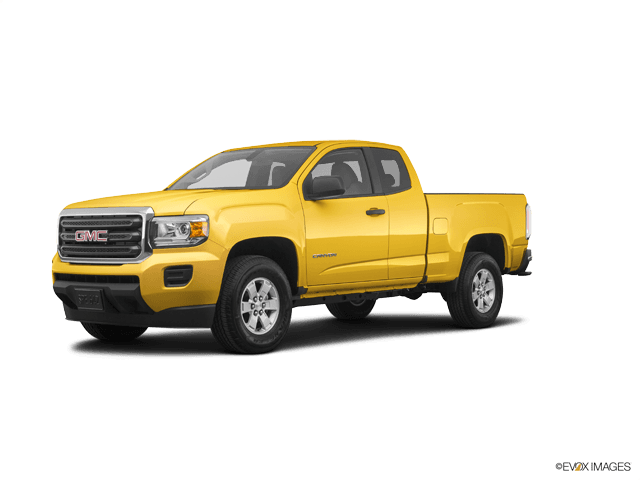

![[HOW TO] Change Engine Oil on a 2015-2022 V6 Chevy Colorado / GMC Canyon (The Best on YT)](/_next/image?url=https%3A%2F%2Fimg.youtube.com%2Fvi%2FlmRcVkH6mp0%2Fhqdefault.jpg&w=3840&q=75)






How to Change Engine Oil and Filter on a 2017-2021 GMC Canyon 3.6L V6 (Engine: Inline 4 2.5L)
Step-by-step DIY guide with oil capacity, tools, parts, torque specs, and reset steps for 2017, 2018, 2019, 2020, 2021
How to Change Engine Oil and Filter on a 2017-2021 GMC Canyon 3.6L V6 (Engine: Inline 4 2.5L)
Step-by-step DIY guide with oil capacity, tools, parts, torque specs, and reset steps for 2017, 2018, 2019, 2020, 2021


🔧 Canyon - Engine Oil & Oil Filter Change
This job drains the old engine oil, replaces the oil filter, and refills your Canyon with fresh oil. Regular oil changes protect the 3.6L V6 from wear, overheating, sludge, and timing-chain-related problems caused by dirty oil.
Difficulty Level: Beginner | Estimated Time: 45-75 minutes
⚠️ Safety & Precautions
- ⚠️ Work on a level surface so the oil drains correctly and the truck stays stable.
- ⚠️ Let the engine cool until it is warm, not hot. Hot oil can burn skin.
- ⚠️ Never crawl under your Canyon supported only by a jack. Use jack stands if lifting is needed.
- ⚠️ Wear safety glasses and nitrile gloves because used engine oil is irritating to skin and eyes.
- ⚠️ Keep oil off the drive belt, exhaust, and electrical connectors.
- ⚠️ Battery disconnect is not required for this repair.
🔧 Required Tools
You'll need the following tools for this repair:
- 15mm socket
- 3/8-inch drive ratchet
- 24mm socket
- 3/8-inch drive torque wrench
- Oil drain pan, 8-quart minimum
- Plastic trim removal tool
- Flat-blade screwdriver
- Funnel
- Clean shop towels
- Floor jack, rated 3-ton minimum
- Jack stands, rated 3-ton minimum
- Wheel chocks
- Nitrile gloves
- Safety glasses
🔩 Required Parts
HowToo sells all the parts you need for this repair:
- Engine oil, SAE 5W-30 dexos1 full synthetic - Qty: 6 quarts
- Engine oil filter cartridge with cap O-ring - Qty: 1
- Engine oil drain plug seal - Qty: 1
📋 Before You Begin
- Park your Canyon on level ground and set the parking brake.
- Place wheel chocks behind the rear wheels.
- If you need more space, lift the front using a floor jack and support it with jack stands.
- Run the engine for 2-3 minutes, then shut it off. Warm oil drains faster.
- Open the hood and remove the oil fill cap to help the oil drain smoothly.
- Use oil that meets dexos1. Dexos1 is GM’s required oil quality standard for this engine.
🔨 Step-by-Step Instructions
Follow these steps in order:
Step 1: Secure the Truck
- Put on safety glasses and nitrile gloves.
- Use wheel chocks behind the rear tires.
- If lifting is needed, use a floor jack, rated 3-ton minimum, then support the truck with jack stands, rated 3-ton minimum.
- Gently shake the truck by hand before going underneath to make sure it is stable.
Step 2: Remove the Lower Splash Shield if Equipped
- Look under the front of your Canyon for the lower engine splash shield.
- Use a plastic trim removal tool or flat-blade screwdriver to remove push clips if fitted.
- Set the shield and clips aside in order so they go back in the same spots.
- Keep clips organized in a cup.
Step 3: Position the Drain Pan
- Slide the oil drain pan, 8-quart minimum, under the engine oil drain plug.
- The drain plug is at the bottom of the engine oil pan.
- Make sure the pan is slightly offset toward the direction the oil will shoot out at first.
Step 4: Drain the Engine Oil
- Use a 15mm socket and 3/8-inch drive ratchet to loosen the oil drain plug.
- Finish removing the plug by hand while pushing inward slightly. This helps prevent dropping it into the drain pan.
- Let the oil drain until it slows to occasional drips.
- Wipe the drain plug area with clean shop towels.
Step 5: Reinstall the Drain Plug
- Install a new engine oil drain plug seal on the drain plug.
- Thread the drain plug in by hand first to avoid cross-threading. Cross-threading means the plug is going in crooked and can damage the oil pan.
- Use a 15mm socket and 3/8-inch drive torque wrench to tighten the drain plug.
- Torque to 25 Nm (18 ft-lbs).
- Wipe the area clean with clean shop towels so leaks are easier to spot later.
Step 6: Remove the Oil Filter Cap
- Move to the top of the engine bay.
- Find the oil filter housing cap near the front/top area of the 3.6L V6 engine.
- Use a 24mm socket and 3/8-inch drive ratchet to loosen the oil filter cap.
- Lift the cap and filter cartridge straight up slowly to reduce dripping.
- Use clean shop towels to catch oil drips around the housing.
Step 7: Replace the Filter and O-Ring
- Pull the old filter cartridge off the cap by hand.
- Remove the old cap O-ring by hand or carefully with a flat-blade screwdriver.
- Do not scratch the plastic filter cap.
- Lightly coat the new O-ring with fresh SAE 5W-30 dexos1 full synthetic oil.
- Install the new O-ring into the same groove where the old one sat.
- Push the new engine oil filter cartridge onto the cap until it seats fully.
- Oil the O-ring before installing.
Step 8: Reinstall the Oil Filter Cap
- Start the oil filter cap by hand to avoid damaging the threads.
- Use a 24mm socket and 3/8-inch drive torque wrench to tighten the cap.
- Torque to 25 Nm (18 ft-lbs).
- Wipe the housing area clean with clean shop towels.
Step 9: Refill the Engine Oil
- Place a funnel in the oil fill opening.
- Add 5.5 quarts of SAE 5W-30 dexos1 full synthetic oil first.
- Reinstall the oil fill cap by hand.
- Start the engine and let it idle for 30-60 seconds.
- Shut the engine off and wait 2-3 minutes for oil to settle.
Step 10: Check and Top Off the Oil Level
- Pull the dipstick out and wipe it with clean shop towels.
- Reinsert the dipstick fully, then pull it out again to read the level.
- Add oil through the funnel in small amounts until the level reaches the full mark.
- Total refill is about 6 quarts with filter replacement.
- Do not overfill. Too much oil can cause engine damage.
Step 11: Check for Leaks
- Use a flashlight if available and inspect the drain plug area and oil filter cap area.
- Use clean shop towels to wipe any residue and check again.
- If you see fresh oil forming, shut the engine off and recheck the drain plug and filter cap torque with the 3/8-inch drive torque wrench.
Step 12: Reinstall the Splash Shield
- Raise the splash shield into place by hand.
- Use a plastic trim removal tool or flat-blade screwdriver to reinstall the push clips if equipped.
- Make sure the shield is secure and not hanging down.
Step 13: Reset the Oil Life Monitor
- Turn the ignition to ON without starting the engine.
- Use the steering wheel controls to find the oil life screen in the Driver Information Center.
- When Remaining Oil Life is displayed, press and hold the checkmark/select button until it resets to 100%.
- If prompted, confirm the reset using the steering wheel select/checkmark button.
- Start the engine and confirm the oil life remains at 100%.
✅ After Repair
- ✅ Let the engine idle for 1 minute and confirm the oil pressure warning light turns off quickly.
- ✅ Recheck oil level after the first short drive and top off if needed.
- ✅ Look under your Canyon after parking to make sure there are no oil drips.
- ✅ Dispose of used oil and the old filter at a recycling center or auto parts store.
- ✅ Record the mileage and date of the oil change.
💰 DIY vs Shop Cost
Shop Cost: $90-$160 (parts + labor)
DIY Cost: $45-$80 (parts only)
You Save: $45-$80 by doing it yourself!
Shop labor rates vary but typically run $100-$150/hour. This repair takes a shop approximately 0.4-0.7 hours.
🎯 Ready to get started?
HowToo makes it easy: same-day/2-day shipping on every part, plus all the tools and specialty tools you need! Check out the parts and tools sections below to add everything to your cart.