

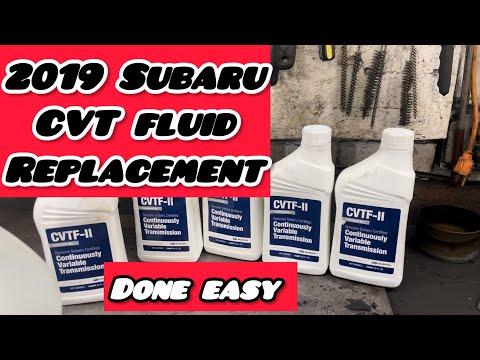




How to Change CVT Transmission Fluid on a 2014-2021 Subaru Forester (Engine: Flat 4 2.5L)
Step-by-step drain and refill guide with tools, Subaru CVT fluid, torque specs, and safety tips for 2014, 2015, 2016, 2017, 2018, 2019, 2020, 2021
How to Change CVT Transmission Fluid on a 2014-2021 Subaru Forester (Engine: Flat 4 2.5L)
Step-by-step drain and refill guide with tools, Subaru CVT fluid, torque specs, and safety tips for 2014, 2015, 2016, 2017, 2018, 2019, 2020, 2021


🔧 Forester - CVT Fluid Change
This job drains and refills the Lineartronic CVT fluid in your Forester. The CVT does not use regular automatic transmission fluid, and the final fluid level must be set at the correct fluid temperature, so accuracy matters.
Difficulty Level: Intermediate | Estimated Time: 1.5-2.5 hours
⚠️ Safety & Precautions
- ⚠️ Use only Subaru-approved CVT fluid. The wrong fluid can damage the transmission.
- ⚠️ Keep the Forester level during filling and level checking. A tilted vehicle gives a false fluid level.
- ⚠️ CVT fluid can be hot enough to burn skin. Wear gloves and safety glasses.
- ⚠️ Never remove the wrong plug. The front differential and CVT have separate fluids and separate drain/fill plugs.
- ⚠️ Do not run the engine with low CVT fluid.
- ⚠️ A scan tool that can read Subaru CVT fluid temperature is strongly recommended. Guessing the temperature can overfill or underfill the CVT.
🔧 Required Tools
You'll need the following tools for this repair:
- 10mm socket
- 14mm socket
- 17mm socket
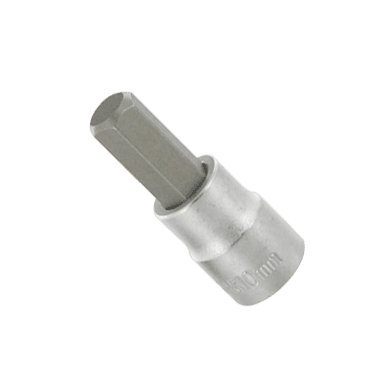
- 8mm hex bit socket
- 3/8-inch ratchet
- 1/2-inch ratchet
- 3/8-inch torque wrench
- 1/2-inch torque wrench
- Fluid transfer pump (specialty)
- Scan tool with Subaru CVT temperature data (specialty)
- Drain pan 10-quart capacity
- Measuring container 5-quart minimum
- Floor jack rated 3-ton minimum
- Jack stands rated 3-ton minimum
- Wheel chocks
- Nitrile gloves
- Safety glasses
- Shop towels
- Infrared thermometer
🔩 Required Parts
HowToo sells all the parts you need for this repair:
- Subaru Lineartronic CVT fluid - Qty: 5-6 quarts
- CVT drain plug crush washer - Qty: 1
- CVT fill/check plug gasket - Qty: 1
- Underbody splash shield clips - Qty: As needed
📋 Before You Begin
- 🚗 Park your Forester on a flat, level surface.
- 🅿️ Set the parking brake and place wheel chocks behind the rear wheels.
- 🌡️ Start with the CVT fluid warm, not hot. A short 5-10 minute drive is enough.
- 📟 Connect a scan tool and select the live data item for CVT fluid temperature. A scan tool is a handheld device that reads vehicle computer data.
- 📏 Measure the fluid you drain out. This helps you know the first refill amount.
- 🔋 Battery disconnect is not required for this repair.
🔨 Step-by-Step Instructions
Follow these steps in order:
Step 1: Lift and Level the Forester
- Use a floor jack rated 3-ton minimum to lift your Forester at the proper front and rear lift points.
- Support it securely with jack stands rated 3-ton minimum.
- Use a measuring container or level surface check to make sure the vehicle sits level front-to-back and side-to-side.
- Never work under only a jack.
Step 2: Remove the Lower Splash Shield
- Put on safety glasses and nitrile gloves.
- Use a 10mm socket to remove the splash shield bolts.
- Use a shop towel to wipe away dirt around the CVT plugs so no debris enters the transmission.
Step 3: Identify the Correct CVT Plugs
- Use a shop towel to clean the CVT drain plug and CVT fill/check plug areas.
- The CVT drain plug is on the CVT pan area. The fill/check plug is on the side of the CVT case.
- Do not remove the front differential drain plug. The front differential is a separate gear oil compartment near the front of the transmission.
- If unsure, stop before removing plugs.
Step 4: Remove the Fill/Check Plug First
- Use an 8mm hex bit socket with a 3/8-inch ratchet to carefully loosen the CVT fill/check plug.
- Remove this plug before draining. This confirms you can refill the CVT after draining it.
- If fluid dribbles out, let it drain into the drain pan 10-quart capacity.
Step 5: Drain the CVT Fluid
- Place the drain pan 10-quart capacity under the CVT drain plug.
- Use the correct socket or hex bit for the drain plug, commonly a 14mm socket, 17mm socket, or 8mm hex bit socket depending on plug style.
- Remove the drain plug slowly and allow the fluid to drain completely.
- Use a measuring container 5-quart minimum to measure the drained fluid amount.
- Inspect the fluid. A small amount of fine gray material is normal; metal chunks are not normal.
Step 6: Reinstall the Drain Plug
- Install a new CVT drain plug crush washer. A crush washer is a soft sealing washer that compresses once and should not be reused.
- Thread the drain plug in by hand first to avoid cross-threading.
- Use a torque wrench with the correct socket or hex bit to tighten the drain plug to Torque to 31 Nm (23 ft-lbs).
Step 7: Pump New CVT Fluid In
- Insert the hose from the fluid transfer pump into the CVT fill/check opening.
- Pump in the same amount of Subaru Lineartronic CVT fluid that came out, then add about 0.5 quart extra.
- Install the fill/check plug finger-tight for now using the 8mm hex bit socket.
- Use only the correct CVT fluid.
Step 8: Warm the Fluid and Cycle the Shifter
- Connect the scan tool with Subaru CVT temperature data.
- Start the engine and keep your foot firmly on the brake pedal.
- Move the shifter slowly through P, R, N, D, then back to P, pausing 3 seconds in each position.
- Watch the CVT fluid temperature on the scan tool.
- The final level check should be done at approximately 35-45°C (95-113°F).
Step 9: Set the Final CVT Fluid Level
- Keep the engine running with your Forester level and the shifter in Park.
- Use the 8mm hex bit socket to remove the fill/check plug.
- If no fluid comes out, use the fluid transfer pump to add CVT fluid until it begins to flow from the fill/check hole.
- Let the fluid drain until it becomes a thin steady trickle.
- Install a new CVT fill/check plug gasket.
- Use the 8mm hex bit socket and 3/8-inch torque wrench to tighten the fill/check plug to Torque to 50 Nm (37 ft-lbs).
Step 10: Reinstall the Splash Shield
- Shut the engine off.
- Use shop towels to clean any spilled fluid from the CVT case.
- Reinstall the lower splash shield using a 10mm socket.
- Tighten the splash shield bolts snugly. Do not overtighten small plastic or sheet-metal fasteners.
Step 11: Lower the Forester
- Use the floor jack rated 3-ton minimum to lift slightly off the jack stands.
- Remove the jack stands rated 3-ton minimum.
- Lower your Forester slowly and remove the wheel chocks.
✅ After Repair
- ✅ Test drive your Forester gently for 10-15 minutes.
- ✅ Check for leaks around the drain plug and fill/check plug.
- ✅ Confirm normal shifting feel and no warning lights.
- ✅ Recheck underneath after the first drive using safety glasses and shop towels.
- ✅ Dispose of used CVT fluid at an approved recycling center. In Panipat, use a local authorized oil recycler or service station that accepts used automotive fluids.
💰 DIY vs Shop Cost
Shop Cost: $250-$450 USD equivalent (parts + labor)
DIY Cost: $90-$170 USD equivalent (parts only)
You Save: $160-$280 USD equivalent by doing it yourself!
Shop labor rates vary but typically run $100-$150/hour. This repair takes a shop approximately 1.0-1.5 hours.
🎯 Ready to get started?
HowToo makes it easy: same-day/2-day shipping on every part, plus all the tools and specialty tools you need! Check out the parts and tools sections below to add everything to your cart.