

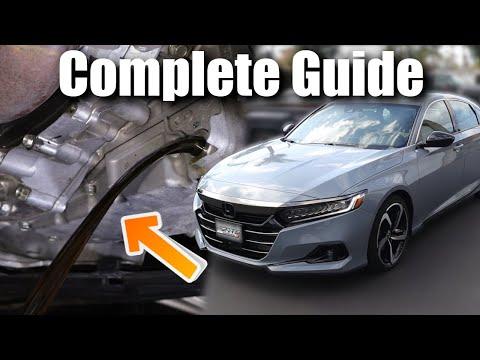






How to Change CVT Transmission Fluid on a 2013-2025 Honda Accord
Step-by-step drain-and-fill guide with Honda HCF-2 fluid, tools, parts, and torque specs for 2013, 2014, 2015, 2016, 2017, 2018, 2019, 2020, 2021, 2022, 2023, 2024, 2025
How to Change CVT Transmission Fluid on a 2013-2025 Honda Accord
Step-by-step drain-and-fill guide with Honda HCF-2 fluid, tools, parts, and torque specs for 2013, 2014, 2015, 2016, 2017, 2018, 2019, 2020, 2021, 2022, 2023, 2024, 2025


🔧 Accord - CVT Transmission Fluid Change
This service replaces the Honda HCF-2 CVT fluid in your Accord to help keep the continuously variable transmission shifting smoothly and running cool. This is a drain-and-fill service, not a flush.
Difficulty Level: Beginner | Estimated Time: 1-2 hours
⚠️ Safety & Precautions
- ⚠️ Work on a level surface so the transmission drains and fills correctly.
- ⚠️ Use jack stands if lifting the vehicle. Never rely on a floor jack alone.
- ⚠️ Transmission fluid can be hot. Let the Accord cool until it is safe to touch.
- ⚠️ Do not flush this CVT. Honda CVTs use a drain-and-fill service only.
- ⚠️ Use only Honda HCF-2 CVT fluid or an equivalent specifically labeled for Honda HCF-2. Wrong fluid can damage the CVT.
- ⚠️ Battery disconnect is not required for this repair.
🔧 Required Tools
You'll need the following tools for this repair:
- 3/8-inch drive ratchet
- 10mm socket
- 17mm socket
- Torque wrench 10-80 ft-lb range
- Fluid transfer pump (specialty)
- Long-neck funnel
- Drain pan 8-quart minimum
- Measuring jug 5-quart minimum
- Flat trim clip remover
- Floor jack 2-ton minimum
- Jack stands 2-ton minimum
- Wheel chocks
- Nitrile gloves
- Safety glasses
- Shop towels
🔩 Required Parts
HowToo sells all the parts you need for this repair:
- Honda HCF-2 CVT transmission fluid - Qty: 4 quarts
- CVT drain plug sealing washer - Qty: 1
- Underbody splash shield clips - Qty: As needed
📋 Before You Begin
- 📋 Park your Accord on level ground and set the parking brake.
- 📋 Place wheel chocks behind the rear wheels. Wheel chocks are wedges that stop the car from rolling.
- 📋 Drive the car for 5-10 minutes if possible, then let it sit a few minutes. Warm fluid drains better, but it should not be burning hot.
- 📋 Keep the vehicle level during filling. If you lift the front, support the rear to match height if needed.
- 📋 No infotainment menu setting is required for this CVT fluid change.
- 📋 A scan tool is not required for a normal drain-and-fill service.
🔨 Step-by-Step Instructions
Follow these steps in order:
Step 1: Raise and Secure the Accord
- Use wheel chocks behind the rear wheels.
- Use a floor jack 2-ton minimum to lift the front of the car at the front center jacking point.
- Place jack stands 2-ton minimum under the proper front support points.
- Lower the car gently onto the stands and shake the car lightly by hand to confirm it is stable.
- Never crawl under a car on a jack.
Step 2: Remove the Lower Splash Shield
- Put on safety glasses and nitrile gloves.
- Use a 10mm socket to remove the splash shield bolts.
- Use a flat trim clip remover to remove any plastic clips holding the shield.
- Set the shield, bolts, and clips aside in order.
Step 3: Find the CVT Drain Plug
- Look at the bottom of the transmission case, on the driver-side area of the powertrain.
- The CVT drain plug is a bolt-style plug at the lowest part of the transmission case.
- Place a drain pan 8-quart minimum directly under the plug.
Step 4: Drain the Old CVT Fluid
- Use a 17mm socket and 3/8-inch drive ratchet to loosen the drain plug.
- Remove the plug by hand once loose and let the fluid drain fully.
- Allow it to drip until it slows to an occasional drip.
- Use shop towels to clean fluid from the area.
- Measure what came out before refilling.
Step 5: Measure the Drained Fluid
- Carefully pour the old fluid from the drain pan into a measuring jug 5-quart minimum.
- Note the amount removed. A typical drain-and-fill is about 3.5-4 quarts.
- If much less came out, check for leaks before refilling.
Step 6: Install the Drain Plug with New Washer
- Remove the old sealing washer from the drain plug.
- Install the new CVT drain plug sealing washer onto the plug.
- Thread the plug in by hand first to avoid cross-threading. Cross-threading means the threads are not lined up and can be damaged.
- Use a torque wrench 10-80 ft-lb range with a 17mm socket to tighten the drain plug to Torque to 49 Nm (36 ft-lbs).
Step 7: Access the CVT Fill Area
- Open the hood and locate the CVT fill plug or fill port on top of the transmission case.
- Use a long-neck funnel if filling from the top fill port.
- If access is tight, use a fluid transfer pump. A fluid transfer pump is a hand pump that moves new fluid from the bottle into the transmission.
Step 8: Refill with Honda HCF-2 CVT Fluid
- Add the same amount of new Honda HCF-2 CVT transmission fluid as the amount drained.
- Use the long-neck funnel or fluid transfer pump to pour slowly and avoid spills.
- Do not overfill. Add fluid in small amounts as you approach the measured drain amount.
- Wrong CVT fluid can ruin the transmission.
Step 9: Check for Leaks
- Use shop towels to wipe the drain plug and surrounding area clean.
- Start the engine with the vehicle still safely supported and level.
- Press the brake pedal and move the shifter slowly through P, R, N, D, and back to P.
- Let the engine idle for about 1 minute.
- Use a safety glasses and visually check under the car for leaks at the drain plug.
Step 10: Reinstall the Splash Shield
- Turn the engine off.
- Use a flat trim clip remover by hand to align the splash shield clips.
- Use a 10mm socket to reinstall the splash shield bolts.
- Tighten the small splash shield bolts snugly by hand with the ratchet. Do not overtighten plastic shield hardware.
Step 11: Lower the Vehicle
- Use a floor jack 2-ton minimum to raise the Accord slightly off the jack stands.
- Remove the jack stands 2-ton minimum.
- Lower the vehicle slowly to the ground with the floor jack.
- Remove the wheel chocks.
✅ After Repair
- ✅ Test drive gently for 10-15 minutes. The CVT should feel smooth with no slipping, shuddering, or warning lights.
- ✅ Recheck underneath for leaks after the test drive.
- ✅ Dispose of the used CVT fluid at an approved recycling center or parts store that accepts waste oil.
- ✅ If the Maintenance Minder is showing transmission service, reset only the transmission fluid maintenance item through the gauge cluster maintenance menu.
- ✅ Do not perform a high-pressure transmission flush on your Accord.
💰 DIY vs Shop Cost
Shop Cost: $180-$320 (parts + labor)
DIY Cost: $45-$90 (parts only)
You Save: $135-$230 by doing it yourself!
Shop labor rates vary but typically run $100-$150/hour. This repair takes a shop approximately 0.8-1.2 hours.
🎯 Ready to get started?
HowToo makes it easy: same-day/2-day shipping on every part, plus all the tools and specialty tools you need! Check out the parts and tools sections below to add everything to your cart.