

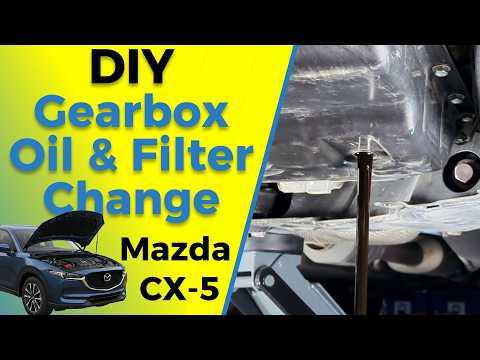






How to Change Automatic Transmission Fluid on a 2019 Mazda CX-5
Step-by-step ATF-FZ drain-and-refill guide with tools, torque specs, level checks, and safety tips
How to Change Automatic Transmission Fluid on a 2019 Mazda CX-5
Step-by-step ATF-FZ drain-and-refill guide with tools, torque specs, level checks, and safety tips


🔧 CX-5 - Automatic Transmission Fluid Change
Do a simple drain-and-refill, not a pressurized flush. You’ll drain roughly 3.5–4.9 liters, refill through the transmission dipstick opening, then set the level with the fluid at the correct temperature. Mazda specifies Mazda Genuine ATF-FZ; the transmission’s total dry capacity is approximately 7.8–8.0 liters, but a normal drain does not remove it all. mcx5.org
Difficulty Level: Intermediate | Estimated Time: 1.5–2.5 hours
Assumption: This procedure covers a routine drain-and-refill without removing the transmission oil pan or filter.
⚠️ Safety & Precautions
- ⚠️ Let the transmission cool before removing the drain plug. Hot ATF can cause severe burns. Haryana heat can keep it hot longer than expected. mcx5.org
- ⚠️ Keep your CX-5 completely level while draining and checking the final level.
- ⚠️ Support all four corners with properly positioned jack stands. Never work under a vehicle supported only by a jack.
- ⚠️ Use only Mazda ATF-FZ. Do not use Dexron VI, Mercon LV, additives, or a generic “universal” fluid unless it explicitly carries Mazda ATF-FZ approval. mazdausa.com)
- ⚠️ Do not overfill. Mazda warns that an incorrect level can damage the transmission or cause leakage. mcx5.org
- ⚠️ Battery disconnection is not required for this drain-and-refill.
🔧 Required Tools
You'll need the following tools for this repair:
- Hydraulic floor jack rated 2-ton minimum
- Four jack stands rated 2-ton minimum
- Wheel chocks
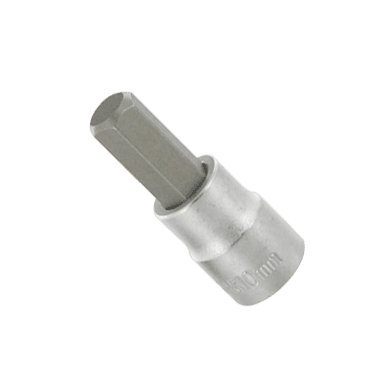
- 8mm hex-bit socket
- 10mm socket
- 3/8-inch ratchet
- 3/8-inch torque wrench rated 8–60 Nm
- Socket extension set
- Trim-clip removal tool
- Low-profile drain pan rated 10-liter minimum
- Graduated measuring container rated 5-liter minimum
- Long-neck transmission funnel
- OBD-II scan tool with transmission-fluid temperature display
- Nylon shop towels
- Nitrile gloves
- Safety glasses
🔩 Required Parts
HowToo sells all the parts you need for this repair:
- Mazda Genuine ATF-FZ automatic transmission fluid - Qty: 5 liters
- Transmission drain-plug sealing washer - Qty: 1
The transmission-fluid aisle is open beside this guide. None of the generic fluids or additives should be substituted unless the container specifically confirms Mazda ATF-FZ approval. This gearbox is picky, and this isn’t the place for cocktail hour.
📋 Before You Begin
- Park your CX-5 on a firm, completely level surface.
- Set the parking brake, place the selector in Park, and chock the wheels.
- If raising the vehicle, lift and support all four corners at equal height so it remains level.
- Remove the engine appearance cover if it blocks access to the transmission dipstick area.
- Locate the small transmission dipstick below the air-intake area. It is secured by a bolt rather than designed for routine owner checks.
- Connect the OBD-II scan tool and confirm that it can display transmission-fluid temperature before draining anything. Mazda’s final adjustment window is 45–55°C, with 50°C as the target. mcx5.org
- Keep every container, funnel, and tool perfectly clean. Small debris can cause hydraulic-control problems.
🔨 Step-by-Step Instructions
Follow these steps in order:
Step 1: Raise and level the vehicle
- Use the hydraulic floor jack at the approved lifting points.
- Position the four jack stands under the approved support points.
- Gently shake the vehicle before going underneath. It must remain solid and level.
Step 2: Remove the front lower cover
- Put on safety glasses before working underneath.
- Use the 10mm socket and trim-clip removal tool to remove the necessary fasteners from front under-cover No. 2.
- Keep the bolts and clips arranged by location for easier installation.
- Photograph the fasteners before removal.
Step 3: Open the fill point
- Before draining, make certain the transmission dipstick can be removed. Never drain a unit you cannot refill.
- Use the 10mm socket and socket extension to remove the dipstick retaining bolt.
- Pull the dipstick straight out and wipe it with a clean nylon shop towel.
- Cover the opening loosely with a clean towel so dirt cannot enter.
Step 4: Drain the old fluid
- Position the 10-liter drain pan beneath the transmission drain plug.
- Use the 8mm hex-bit socket and 3/8-inch ratchet to loosen the drain plug carefully.
- Remove the plug by hand and allow the fluid to drain completely.
- Mazda lists approximately 3.5–4.9 liters as the drain-plug refill range. mcx5.org
- Inspect the drained fluid. Fine dark residue is common, but metallic flakes, burnt odor, or heavy debris can indicate internal wear.
Step 5: Measure the drained fluid
- Transfer the old fluid into the graduated measuring container.
- Record exactly how much came out.
- Use that quantity as your initial refill amount, provided the transmission was not already leaking or incorrectly filled.
Step 6: Install the drain plug
- Remove the old sealing washer and install a new transmission drain-plug sealing washer.
- Clean the drain-plug seating surface with a nylon shop towel.
- Start the drain plug by hand to avoid cross-threading.
- Use the 3/8-inch torque wrench and 8mm hex-bit socket to tighten it to 30–41 Nm (23–30 ft-lbs). mcx5.org
Step 7: Refill with ATF-FZ
- Insert the clean long-neck transmission funnel into the dipstick opening.
- Add the same measured quantity of Mazda Genuine ATF-FZ that was drained.
- Pour slowly to prevent fluid from backing up and spilling.
- Do not pour in the full 7.8–8.0-liter total capacity. Much of the old fluid remains in the torque converter and internal passages. mazdausa.com)
Step 8: Circulate the new fluid
- Temporarily insert the dipstick to keep debris out.
- Lower your CX-5 if necessary, but keep it on a level surface.
- Start the engine and hold the brake pedal firmly.
- Move the selector slowly through P, R, N, D and M, pausing approximately three seconds in each position.
- Return the selector to Park and leave the engine idling.
- Check underneath for leakage around the drain plug.
Step 9: Bring the fluid to checking temperature
- Use the OBD-II scan tool to monitor transmission-fluid temperature.
- Allow the fluid to reach 45–55°C. Aim for 50°C. mcx5.org
- Keep the engine idling, the selector in Park, and the vehicle level during the check.
- Do not substitute coolant temperature for transmission-fluid temperature.
Step 10: Check and adjust the level
- Use the 10mm socket to remove the dipstick retaining bolt if it was reinstalled.
- With the engine still idling, pull the dipstick and wipe it using a clean nylon shop towel.
- Fully insert the dipstick, remove it again, and inspect both sides.
- The fluid should reach the center marker area and remain between the L and F marks at the specified temperature. mcx5.org)
- If low, use the long-neck transmission funnel to add approximately 100 milliliters at a time.
- Wait briefly, then recheck with the engine idling.
- If overfilled, remove fluid through the dipstick opening with a suitable extraction pump before driving.
Step 11: Secure the dipstick
- Insert the dipstick fully.
- Start its retaining bolt by hand.
- Use the 3/8-inch torque wrench, 10mm socket, and socket extension to tighten it to 8–11 Nm (71–97 in-lbs). mcx5.org
Step 12: Reinstall the lower cover
- Switch off the engine and let the exhaust cool if necessary.
- Use the 10mm socket and trim-clip removal tool to reinstall front under-cover No. 2.
- Confirm that every clip and bolt is secure and that the cover does not hang down.
- Use the hydraulic floor jack to remove the four jack stands and lower the vehicle safely.
✅ After Repair
- ✅ Take a gentle 10–15 minute test drive and verify that every shift is smooth.
- ✅ Avoid hard acceleration until normal shifting has been confirmed.
- ✅ Park on clean, level ground and inspect the drain-plug area for leaks.
- ✅ If the transmission slips, delays engagement, bangs into gear, or produces a 3–4 shift chirp, stop driving and diagnose the fault rather than adding fluid blindly.
- ✅ Recycle the used ATF through an authorized oil-recycling or hazardous-waste facility.
- ✅ Do not add transmission additives after the service.
💰 DIY vs Shop Cost
Shop Cost: ₹12,000–₹25,000 (parts + labor)
DIY Cost: ₹6,000–₹12,000 (fluid and sealing washer)
You Save: ₹6,000–₹13,000 by doing it yourself!
Local pricing varies considerably with genuine ATF-FZ availability. A routine drain-and-refill generally takes a shop approximately 1–1.5 hours.
🎯 Ready to get started?
HowToo makes it easy: same-day/2-day shipping on every part, plus all the tools and specialty tools you need! Check out the parts and tools sections below to add everything to your cart.