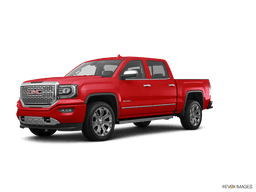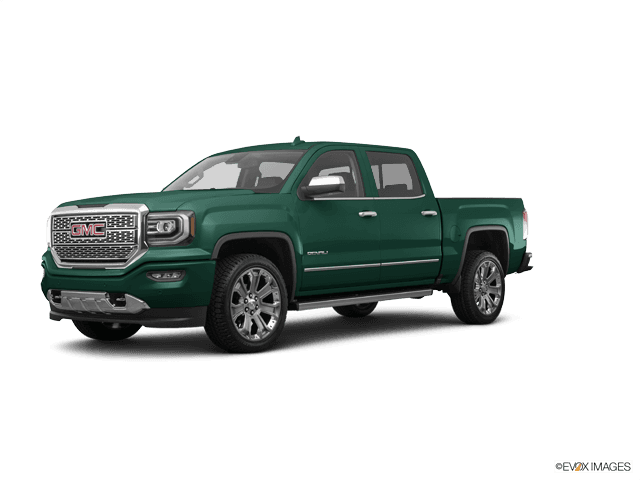








How to Change 2015-2026 GMC Sierra 1500 8L90 Transmission Fluid and Filter (Trim: Denali)
Step-by-step DEXRON-HP service guide with tools, parts, torque specs, and fluid-level procedure for 2015, 2016, 2017, 2018, 2019, 2020, 2021
How to Change 2015-2026 GMC Sierra 1500 8L90 Transmission Fluid and Filter (Trim: Denali)
Step-by-step DEXRON-HP service guide with tools, parts, torque specs, and fluid-level procedure for 2015, 2016, 2017, 2018, 2019, 2020, 2021


🔧 Sierra 1500 - Transmission Fluid and Filter Change
Your Sierra 1500 uses the GM 8L90 eight-speed automatic transmission. This service drains the old fluid, removes the pan, replaces the filter, and sets the fluid level at a specific temperature with the engine running.
Difficulty Level: Advanced | Estimated Time: 3-5 hours
Assumption: This procedure applies to the factory-installed 8L90 transmission.
⚠️ Safety & Precautions
- ⚠️ Keep your Sierra 1500 level and securely supported on four jack stands. An incorrect vehicle angle causes an incorrect fluid level.
- ⚠️ Never work beneath a vehicle supported only by a floor jack.
- ⚠️ The final level check is performed with the engine running. Keep hands, clothing, and tools away from the exhaust and rotating components.
- ⚠️ Automatic transmission fluid can cause burns. Wear gloves and safety glasses.
- ⚠️ Do not use DEXRON-VI. The 8L90 requires approved DEXRON-HP fluid.
- ⚠️ Do not perform a pressurized transmission flush. A pan drain and filter replacement is the appropriate DIY service.
- ⚠️ The transmission pan may be difficult to remove around the exhaust. Do not force it against wiring, cooler lines, or the valve body.
- ⚠️ Battery disconnection is not required.
🔧 Required Tools
You'll need the following tools for this repair:
- Vehicle ramps rated 3-ton minimum
- Floor jack rated 3-ton minimum
- Four jack stands rated 3-ton minimum
- Wheel chocks rated for light trucks
- Metric socket set, 7mm-15mm
- Metric combination wrench set, 7mm-15mm
- 3/8-inch drive ratchet
- 3/8-inch drive extensions, 3-inch and 6-inch
- Torque wrench, 3/8-inch drive, 5-80 Nm
- Plastic gasket scraper
- Small hooked seal-removal pick
- Rubber mallet, 16-ounce
- Fluid drain pan, 15-quart minimum
- Graduated measuring container, 10-quart minimum
- Fluid transfer pump with threaded adapter (specialty)
- Scan tool with transmission-fluid-temperature data (specialty)
- Digital level, 12-inch minimum
- Shop towels
- Nitrile gloves
- Safety glasses
🔩 Required Parts
HowToo sells all the parts you need for this repair:
- DEXRON-HP approved automatic transmission fluid - Qty: 8 quarts
- 8L90 automatic transmission filter - Qty: 1
- Transmission filter neck seal - Qty: 1
- Transmission pan gasket - Qty: 1
- Transmission drain-plug seal - Qty: 1
- Transmission fill-plug seal - Qty: 1
Purchase fluid marked DEXRON-HP approved, such as the current GM-approved Mobil 1 Synthetic LV ATF HP specification. A pan-and-filter service normally uses approximately 7-8 quarts; the exact amount is established by the level-check procedure.
📋 Before You Begin
- 📋 Drive your Sierra 1500 for 10-15 minutes, then park on a firm, level surface.
- 📋 Shift into Park, apply the parking brake, and place wheel chocks securely around the tires.
- 📋 Connect the scan tool and verify that it can display Transmission Fluid Temperature. This temperature reading is required to set the final level.
- 📋 Allow the exhaust to cool before working underneath it.
- 📋 Raise and support all four corners if additional clearance is needed. Use the digital level on the frame rail to confirm the truck remains level front-to-rear and side-to-side.
- 📋 A fluid-transfer pump moves new fluid from its bottle into the transmission through a hose.
🔨 Step-by-Step Instructions
Follow these steps in order:
Step 1: Confirm the fill plug can be removed
- Place the drain pan beneath the transmission.
- Locate the fill plug on the transmission case. Use the correctly fitting socket from the 7mm-15mm metric socket set and the 3/8-inch ratchet to loosen it.
- Do not drain the transmission until the fill plug loosens. Otherwise, you could drain fluid from a transmission that cannot be refilled.
- Reinstall the fill plug finger-tight while preparing to drain the fluid.
Step 2: Drain the old fluid
- Position the 15-quart drain pan beneath the transmission pan.
- Use the correctly fitting socket from the metric socket set and the 3/8-inch ratchet to remove the transmission drain plug slowly.
- Allow the fluid to drain until it slows to occasional drops.
- Use the graduated measuring container to measure the drained fluid. This provides a safe starting quantity for refilling.
- Inspect the fluid for metal fragments. A light gray paste is normal; shiny flakes, chips, or heavy debris indicate an internal problem.
Step 3: Remove the transmission pan
- Use the metric socket set, extensions, and 3/8-inch ratchet to loosen the transmission pan bolts evenly.
- Leave two bolts loosely installed at opposite corners while the remaining fluid drains.
- Support the pan with one hand. Remove the final bolts using the same socket and ratchet, then lower the pan carefully.
- If the pan contacts the exhaust, do not pry aggressively. Additional exhaust loosening requires replacement exhaust fasteners and application-specific service information.
- Keep the pan level to prevent spills.
Step 4: Remove the old filter and seal
- Pull the transmission filter straight downward by hand. Keep the drain pan beneath it because additional fluid will escape.
- Check whether the filter neck seal remained inside the transmission bore.
- If the old seal remains installed, use the small hooked seal-removal pick carefully. Do not scratch the aluminum bore.
- Do not touch exposed valve-body components with tools or shop towels.
Step 5: Clean and inspect the pan
- Use shop towels to clean the pan and its magnet completely.
- Use the plastic gasket scraper to remove gasket residue without gouging the sealing surface.
- Inspect the pan for cracks, damaged threads, or distortion around the bolt holes.
- Do not apply silicone sealer unless the replacement gasket manufacturer explicitly requires it.
Step 6: Install the new filter
- Lubricate the new filter neck seal with a small amount of fresh DEXRON-HP fluid.
- Press the seal squarely into its bore by hand.
- Align the new filter neck with the seal and push the filter upward firmly by hand until fully seated.
- Confirm the filter sits in the same position as the original filter and cannot fall free.
Step 7: Reinstall the transmission pan
- Position the new pan gasket and transmission pan against the case.
- Start every pan bolt by hand to prevent cross-threading.
- Use the metric socket set and 3/8-inch ratchet to snug the bolts in a crossing pattern.
- Use the 3/8-inch torque wrench and the correct socket to tighten the pan bolts evenly to 10 Nm (89 in-lbs).
- Install the drain plug with its new seal. Use the torque wrench and correct socket to tighten it to 18 Nm (13 ft-lbs).
- Do not overtighten the aluminum transmission case or pan fasteners.
Step 8: Add the initial fluid quantity
- Remove the fill plug using the correct metric socket and 3/8-inch ratchet.
- Use the fluid transfer pump to add the same amount of approved DEXRON-HP fluid that was measured during draining.
- If the quantity cannot be measured, begin with approximately 6 quarts, then add fluid until it reaches the fill opening before starting the engine.
- Install the fill plug finger-tight to control splashing.
Step 9: Circulate the new fluid
- Confirm the parking brake is applied and the service brake is held firmly.
- Start the engine and leave it idling. Do not raise engine speed.
- Use the scan tool to monitor Transmission Fluid Temperature.
- With your foot on the brake, shift slowly through Reverse, Neutral, Drive, and manual ranges. Pause approximately three seconds in each position.
- Return the selector to Park and keep the engine running.
Step 10: Set the final fluid level
- Keep your Sierra 1500 level, the engine idling, and the selector in Park.
- When the scan tool shows 35-45°C (95-113°F), place the drain pan beneath the fill opening.
- Use the correct metric socket and 3/8-inch ratchet to remove the fill plug carefully.
- If no fluid exits, use the fluid transfer pump to add DEXRON-HP fluid until it begins to run from the opening.
- Allow excess fluid to drain until it becomes a thin stream or rapid drip.
- If the fluid temperature exceeds 45°C (113°F), reinstall the plug, switch off the engine, and allow the transmission to cool before repeating the check.
- Install a new fill-plug seal. Use the 3/8-inch torque wrench and correct socket to tighten the fill plug to 20 Nm (15 ft-lbs).
Step 11: Clean and lower the vehicle
- Switch off the engine.
- Use shop towels to clean all spilled fluid from the pan, case, exhaust, and surrounding areas.
- Use the floor jack to raise each support point slightly, remove the jack stands, and lower the truck carefully.
- Remove the wheel chocks only after your Sierra 1500 is fully on the ground.
✅ After Repair
- ✅ Start the engine and inspect the pan, drain plug, and fill plug for leaks.
- ✅ Drive gently for 10-15 minutes. Confirm that all shifts occur normally.
- ✅ Recheck underneath for leaks after the road test.
- ✅ If the old fluid contained metal pieces, smelled severely burned, or the transmission still shudders, slips, or shifts harshly, stop driving and arrange professional diagnosis.
- ✅ A fluid-and-filter change does not replace all fluid held inside the torque converter and cooler. Do not repeatedly flush the transmission to force a complete exchange.
- ✅ Take the used fluid to an authorized automotive-fluid recycling facility. Never pour it onto the ground or into a drain.
💰 DIY vs Shop Cost
Shop Cost: ₹25,000-₹45,000 (parts + labor)
DIY Cost: ₹12,000-₹22,000 (parts only)
You Save: ₹13,000-₹23,000 by doing it yourself!
Local labor and imported DEXRON-HP fluid prices vary. This repair takes a shop approximately 2-3 hours.
🎯 Ready to get started?
HowToo makes it easy: same-day/2-day shipping on every part, plus all the tools and specialty tools you need! Check out the parts and tools sections below to add everything to your cart.