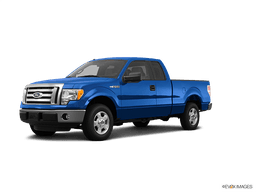

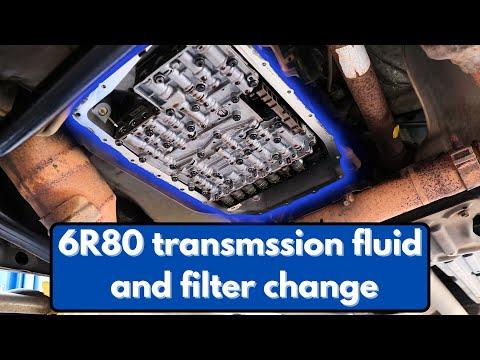







How to Change 2009-2020 Ford F-150 6R80 Transmission Fluid and Filter (Engine: V8 5.0L)
Step-by-step instructions with tools, MERCON LV fluid, torque specs, and safety tips for 2009, 2010
How to Change 2009-2020 Ford F-150 6R80 Transmission Fluid and Filter (Engine: V8 5.0L)
Step-by-step instructions with tools, MERCON LV fluid, torque specs, and safety tips for 2009, 2010


🔧 F-150 - Transmission Fluid and Filter Change
This service drains the 6R80 automatic transmission pan, replaces the filter and pan gasket, then refills it with Ford-specification MERCON LV fluid. A pan service replaces only part of the total fluid; do not perform a power flush on a high-mileage transmission with unknown service history.
Assumption: Your F-150 has its original Ford 6R80 six-speed automatic transmission.
Difficulty Level: Advanced | Estimated Time: 2-3 hours
⚠️ Safety & Precautions
- ⚠️ The transmission fill point is beside the hot passenger-side exhaust. Wear heat-resistant gloves and keep your arms away from the catalytic converter.
- ⚠️ The truck must remain level while raised. Support all four corners with appropriately rated jack stands; never work beneath a vehicle supported only by a floor jack.
- ⚠️ Final fluid adjustment requires the engine to run while the truck is raised. Keep the transmission in Park, apply the parking brake and chock the wheels.
- ⚠️ MERCON LV is required. Do not substitute MERCON V, universal ATF or gear oil.
- ⚠️ Do not start the engine after draining until at least the initial refill has been added.
- Battery disconnection is not required.
🔧 Required Tools
You'll need the following tools for this repair:
- 3-ton floor jack
- 3-ton jack stands, set of four
- Wheel chocks, set of four
- 10mm socket
- 19mm combination wrench
- 3/8-inch-drive ratchet
- 3/8-inch-drive 6-inch extension
- 3/8-inch-drive torque wrench, 10-80 ft-lbs
- 1/4-inch-drive inch-pound torque wrench, 50-150 in-lbs
- 8-quart drain pan
- Hand-operated ATF transfer pump (specialty)
- OBD-II scan tool with transmission-fluid-temperature display (specialty)
- Plastic gasket scraper
- Parts-cleaning brush
- Graduated 8-quart measuring container
- Lint-free shop towels
- Nitrile gloves
- Heat-resistant mechanic gloves
- Safety glasses
🔩 Required Parts
HowToo sells all the parts you need for this repair:
- 6R80 automatic transmission filter - Qty: 1
- 6R80 transmission filter inlet seal - Qty: 1
- Transmission pan gasket - Qty: 1
- MERCON LV automatic transmission fluid - Qty: 8 quarts
- Transmission drain-plug sealing washer - Qty: 1
- Non-chlorinated parts cleaner - Qty: 1 can
📋 Before You Begin
- Park your F-150 on firm, level ground. Apply the parking brake and chock the wheels.
- Drive for about 10 minutes if the transmission operates normally. Warm fluid drains more completely, but allow the exhaust to cool before working nearby.
- Use the 3-ton floor jack to lift the truck, then support all four corners with four 3-ton jack stands at approved frame support points. Keep the truck level.
- Connect the OBD-II scan tool before the final level check. “TFT” means transmission fluid temperature.
- Keep all containers and pump fittings perfectly clean. Small amounts of dirt can damage the transmission.
- No infotainment menu, battery registration or transmission programming is needed.
🔨 Step-by-Step Instructions
Follow these steps in order:
Step 1: Confirm the Fill Plug Will Open
- Put on safety glasses and heat-resistant mechanic gloves.
- Locate the short dipstick and threaded fill cap above the passenger side of the transmission, close to the catalytic converter.
- Use the 19mm combination wrench to loosen the fill cap before draining any fluid.
- Do not drain the transmission if the fill cap cannot be removed.
- Loosen the fill cap before draining anything.
Step 2: Drain and Measure the Old Fluid
- Place the 8-quart drain pan beneath the transmission pan.
- Use the 3/8-inch-drive ratchet and appropriate factory drain-plug fitting to loosen the transmission pan drain plug.
- Remove the plug carefully and allow the fluid to drain until it slows to an occasional drip.
- Transfer the old fluid into the graduated 8-quart measuring container. Record how much came out; this provides a safe starting quantity for refilling.
- Inspect the fluid. Dark fluid is common, but metallic flakes, chunks or a strong burned smell indicate internal wear that should be professionally diagnosed.
Step 3: Remove the Transmission Pan
- Position the 8-quart drain pan beneath the full perimeter of the transmission pan.
- Use the 10mm socket, 6-inch extension and 3/8-inch-drive ratchet to loosen all pan bolts gradually.
- Leave two bolts loosely installed at one end while removing the others. Support the pan by hand, remove the last two bolts and lower it carefully.
- Expect additional fluid to spill when the pan separates.
Step 4: Remove the Old Filter
- Use the 10mm socket and 3/8-inch-drive ratchet to remove the filter retaining fasteners, if fitted to the installed filter design.
- Pull the filter straight downward by hand. More fluid will drain from the filter opening.
- Check that the old filter inlet seal came out with the filter. If it remained in the transmission bore, remove it carefully without scratching the aluminum sealing surface.
- Compare the old and new filters before installation.
Step 5: Clean and Inspect the Pan
- Use non-chlorinated parts cleaner, the parts-cleaning brush and lint-free shop towels to clean the pan and its magnets.
- A thin gray paste on the magnets is normal. Metal chips or needle-like fragments are not normal.
- Use the plastic gasket scraper to remove gasket residue without gouging the pan or transmission surface.
- Do not apply silicone sealant unless the replacement gasket manufacturer specifically requires it.
Step 6: Install the New Filter
- Lightly wet the new filter inlet seal with fresh MERCON LV fluid.
- Press the new filter and seal squarely into the transmission inlet by hand.
- Install the filter retaining fasteners, if fitted, with the 10mm socket and inch-pound torque wrench. Torque to 10 Nm (89 in-lbs).
- Do not force the filter; it must sit flat and fully seated.
Step 7: Reinstall the Transmission Pan
- Position the new pan gasket and hold the pan against the transmission.
- Start every bolt by hand to prevent crossed threads.
- Use the 10mm socket and inch-pound torque wrench to tighten the bolts in a crisscross pattern in two passes. Torque to 12 Nm (106 in-lbs).
- Install the drain plug with a new sealing washer using the torque wrench. Torque to 35 Nm (26 ft-lbs).
- Do not overtighten the pan bolts; the pan rail can distort and leak.
Step 8: Add the Initial Fluid Fill
- Remove the fill cap and dipstick completely using the 19mm combination wrench.
- Use the hand-operated ATF transfer pump to add MERCON LV through the fill opening.
- Initially add approximately the amount measured during draining, but stop about 0.5 quart short. A pan-and-filter service commonly requires roughly 6-7 quarts; actual quantity varies with draining time.
- Install the fill cap finger-tight before starting the engine.
Step 9: Circulate the New Fluid
- Verify that the parking brake is applied, the wheels are chocked and nobody is beneath the truck.
- Start the engine and keep your foot firmly on the brake pedal.
- Move the selector slowly through Reverse, Neutral, Drive and the manual ranges, pausing about five seconds in each position. Return it to Park.
- Leave the engine idling. Do not raise engine speed.
- Use the OBD-II scan tool to monitor transmission fluid temperature.
Step 10: Set the Fluid Level
- With your F-150 level, the engine idling and the selector in Park, wait until the scan tool shows approximately 82-93°C (180-200°F).
- Wear heat-resistant mechanic gloves. Use the 19mm combination wrench to remove the fill cap without touching the catalytic converter.
- Wipe the short dipstick with a lint-free shop towel, reinstall it fully, then remove it and read the level.
- Use the hand-operated ATF transfer pump to add MERCON LV in 0.25-quart increments until the level is within the dipstick’s hot operating range.
- If overfilled, use the hand-operated ATF transfer pump to extract small amounts through the fill opening.
- Repeat the dipstick check after each adjustment. Do not fill above the hot maximum mark.
- Small additions prevent an expensive overfill.
Step 11: Secure the Fill Cap and Inspect
- Install the dipstick and fill cap using the 19mm combination wrench. Torque to 35 Nm (26 ft-lbs).
- Use safety glasses and a clean lint-free shop towel to inspect the pan gasket, drain plug and fill cap for leakage while the engine idles.
- Shut off the engine after confirming there are no leaks.
Step 12: Lower the Truck
- Remove the tools and drain pan from beneath your F-150.
- Use the 3-ton floor jack to raise each end enough to remove the 3-ton jack stands.
- Lower the truck carefully and remove the wheel chocks only when ready for the road test.
✅ After Repair
- Drive gently for 10-15 minutes and verify that all shifts feel normal.
- Park on level ground and inspect the transmission pan, drain plug and fill cap for leaks.
- If the level needs rechecking, raise and support your F-150 level again. Check it with the engine idling in Park and the fluid at 82-93°C (180-200°F).
- Do not add fluid based on a cold reading; the level changes significantly with temperature.
- Dispose of the used fluid through a local authorized oil-recycling facility. Do not pour it onto the ground or into a drain.
- No adaptive reset or transmission programming is normally required after a routine pan-and-filter service.
💰 DIY vs Shop Cost
Shop Cost: $300-$550 (parts + labor)
DIY Cost: $100-$180 (parts only)
You Save: $120-$370 by doing it yourself!
Local labor rates vary. This repair takes a shop approximately 1.5-2.5 hours.
🎯 Ready to get started?
HowToo makes it easy: same-day/2-day shipping on every part, plus all the tools and specialty tools you need! Check out the parts and tools sections below to add everything to your cart.