


2017 GMC Sierra 1500 Repair Guide
Step-by-step repair guide with tools, parts, torque specs, and alignment tips for 2014, 2015, 2016, 2017, 2018
2017 GMC Sierra 1500 Repair Guide
Step-by-step repair guide with tools, parts, torque specs, and alignment tips for 2014, 2015, 2016, 2017, 2018
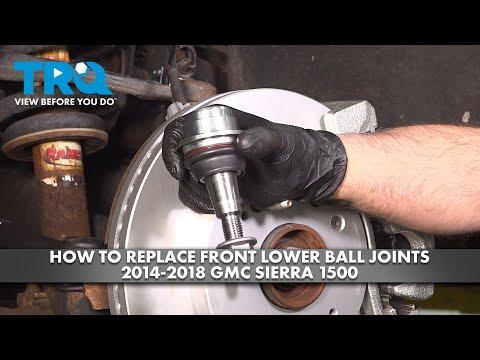
🔧 Ball Joints - Replacement
Assumption: this covers the front suspension ball joints on your Sierra. On this truck, ball joint service typically involves the front control arm assembly or a press-fit joint, so a ball joint press and separator are usually required. Worn ball joints can cause clunks, wandering steering, uneven tire wear, and unsafe handling.
Difficulty Level: Advanced | Estimated Time: 4-8 hours
⚠️ Safety & Precautions
- Support the truck securely on jack stands; never work under a vehicle held only by a jack.
- Use a spring compressor if the suspension must be unloaded in a way that changes coil spring tension.
- Keep hands clear when separating the ball joint taper from the knuckle.
- If equipped with Electronic Parking Brake or any steering/suspension sensor wiring near the work area, avoid damaging connectors and harnesses.
- Battery disconnect is not usually required for this repair.
🔧 Required Tools
You'll need the following tools for this repair:
- Floor jack (rated 3-ton minimum)
- Jack stands (rated 3-ton minimum)
- Wheel chocks
- Lug wrench
- Metric socket set
- Metric wrench set
- Breaker bar
- Torque wrench
- Ball joint separator
- Ball joint press kit (specialty)
- Pickle fork (optional)
- Hammer
- Pry bar
- Needle-nose pliers
- Snap ring pliers
- Penetrating oil
- Safety glasses
- Mechanic gloves
🔩 Required Parts
HowToo sells all the parts you need for this repair:
- Front lower ball joint - Qty: 2
- Front upper ball joint - Qty: 2
- Ball joint retaining hardware kit - Qty: 1
- Cotter pins - Qty: 2
- Front end alignment - Qty: 1
- Replacement grease - Qty: 1
📋 Before You Begin
- Park on level ground, set the parking brake, and chock the rear wheels.
- Break the front lug nuts loose before lifting the truck.
- Raise the front end and support it securely on jack stands under the frame.
- After ball joint replacement, a front alignment is required.
🔨 Step-by-Step Instructions
Follow these steps in order:
Step 1: Remove the front wheel
- Use a lug wrench to loosen the lug nuts, then remove the wheel after lifting the truck.
- Set the wheel aside safely.
Step 2: Open access to the ball joint
- Use the correct metric socket set and metric wrench set to remove any brake hose brackets, ABS wire clips, or splash shield fasteners that block access.
- Keep track of every fastener.
Step 3: Separate the ball joint from the steering knuckle
- Remove the cotter pin with needle-nose pliers, then remove the castle nut with the correct metric socket or metric wrench.
- Use a ball joint separator to break the taper loose from the knuckle.
- If needed, a pickle fork can be used, but it may damage reusable parts.
- Torque on reassembly: follow GM fastener spec for the replacement joint hardware.
Step 4: Remove the ball joint from the control arm
- For a press-fit joint, use a ball joint press kit to press the old joint out of the control arm.
- Remove any snap ring with snap ring pliers before pressing, if equipped.
- Clean the bore with a wire brush before installing the new joint.
Step 5: Install the new ball joint
- Use the ball joint press kit to press the new joint in straight until fully seated.
- Install the snap ring with snap ring pliers if the joint uses one.
- Make sure the joint seats fully and squarely in the arm.
Step 6: Reconnect the steering knuckle
- Insert the ball joint stud into the knuckle by hand.
- Install the new castle nut with the correct metric socket.
- Torque to manufacturer specification.
- Install a new cotter pin with needle-nose pliers.
Step 7: Reinstall removed brackets and wheel
- Reinstall any brake hose or ABS wire brackets using the correct metric socket or metric wrench.
- Put the wheel back on and hand-tighten the lug nuts.
- Lower the truck and use a torque wrench to tighten the lug nuts in a star pattern.
- Torque to 190 Nm (140 ft-lbs).
Step 8: Repeat on the other side if needed
- Replace ball joints in pairs when wear is similar side to side.
- Always inspect both sides closely.
✅ After Repair
- Drive slowly at first and listen for clunks or popping sounds.
- Check that the steering wheel is centered and the truck tracks straight.
- Inspect all fasteners after the first test drive.
- Schedule a professional front-end alignment as soon as possible.
💰 DIY vs Shop Cost
Shop Cost: $600-$1,200 (parts + labor)
DIY Cost: $180-$450 (parts only)
You Save: $420-$750 by doing it yourself!
Shop labor rates vary but typically run $100-$150/hour. This repair takes a shop approximately 4-8 hours.
🎯 Ready to get started?
HowToo makes it easy: same-day/2-day shipping on every part, plus all the tools and specialty tools you need! Check out the parts and tools sections below to add everything to your cart.
