


2016 Acura ILX Timing Belt Replacement? Troubleshoot Timing Chain Rattle, Codes & Oil Issues
Step-by-step checks to confirm chain vs belt, scan for P0016/P0017, inspect oil/leaks, and decide when timing service is needed for 2016, 2017, 2018, 2020, 2021, 2022
2016 Acura ILX Timing Belt Replacement? Troubleshoot Timing Chain Rattle, Codes & Oil Issues
Step-by-step checks to confirm chain vs belt, scan for P0016/P0017, inspect oil/leaks, and decide when timing service is needed for 2016, 2017, 2018, 2020, 2021, 2022
🔧 ILX - Timing System Service (No Timing Belt)
Your ILX does not use a timing belt. The 2.4L engine uses a timing chain, which is designed to last a long time and typically isn’t replaced on a schedule like a belt.
If you’re chasing a noise, check-engine light, or poor running, the right DIY move is to inspect the timing chain system and address common causes (low/dirty oil, leaks, worn tensioner) rather than trying to “replace a belt” that isn’t there.
Difficulty Level: Intermediate | Estimated Time: 0.5-2.0 hours (inspection)
⚠️ Safety & Precautions
- ⚠️ Work on a cool engine; hot parts can burn you.
- ⚠️ Keep hands/clothing away from the belt and fans if the engine is running.
- ⚠️ If you remove any covers near moving parts, shut the engine OFF and remove the key.
- ⚠️ Battery disconnect is not required for basic inspection, but disconnect the negative terminal if you’ll unplug sensors.
🔧 Required Tools
You'll need the following tools for this repair:
- OBD2 scan tool
- Mechanic’s stethoscope
- 10mm socket
- 3/8" drive ratchet
- 3" extension (3/8" drive)
- Trim clip tool
- Flashlight
- Nitrile gloves
- Safety glasses
- Shop towels
🔩 Required Parts
HowToo sells all the parts you need for this repair:
- Engine oil (0W-20 full synthetic) - Qty: 5 quarts
- Oil filter - Qty: 1
- Oil drain plug washer - Qty: 1
- Valve cover gasket set - Qty: 1 (only if you find an oil leak)
📋 Before You Begin
- Park on level ground and set the parking brake.
- Let the engine cool fully so you can safely work around the valve cover area.
- Know what you’re listening for: timing-chain issues are usually a rattle on cold start or a persistent metallic noise near the timing cover.
🔨 Step-by-Step Instructions
Follow these steps in order:
Step 1: Confirm what system you have (chain vs belt)
- Open the hood and locate the plastic engine cover.
- Use a 10mm socket and 3/8" ratchet (if equipped with bolts) or pull up carefully if it’s grommet-mounted.
- You will see an external accessory belt (serpentine belt), but the timing chain is internal behind the timing cover. That’s why there’s no “belt replacement” service.
Step 2: Scan for timing-related trouble codes
- Plug in your OBD2 scan tool and read stored codes.
- Codes like cam/crank correlation (often P0016/P0017-type) can point to timing control problems, but on this engine they’re frequently caused by oil issues or a VTC actuator (cam phaser) concern, not “a belt.”
- Write down codes before clearing anything.
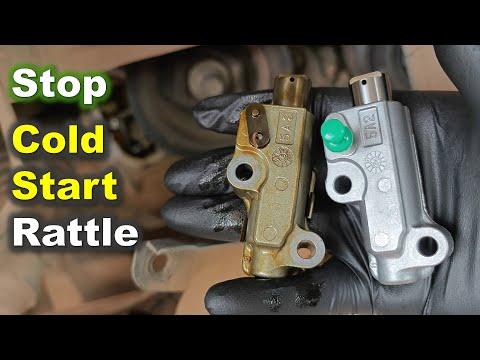
Step 3: Listen for a cold-start timing rattle
- On a true cold start, start the engine and stand at the passenger-side front of the engine bay (timing cover side).
- Use a mechanic’s stethoscope (a listening probe tool) on non-moving metal points near the timing cover area.
- A brief 1–2 second rattle right at start can be a sign of timing chain tensioner/VTC-related wear, especially if oil level/quality is poor.
- Shut the engine OFF before moving the probe anywhere near belts or fans.
Step 4: Check oil level and oil condition (most important on this engine)
- Pull the dipstick, wipe with shop towels, reinsert, then pull again.
- Low oil or very dark/thick oil can cause timing chain tensioner and cam phasing problems.
- If oil is low/dirty, plan an oil change using 0W-20 full synthetic and a new oil filter.
Step 5: Inspect for oil leaks around the valve cover
- Use a flashlight to check around the valve cover edges for wet oil.
- Oil leaks can lower oil level over time and contribute to timing-chain noise.
- If you find a leak, the typical fix is a valve cover gasket set replacement.
Step 6: Know when this becomes a “shop-level” timing chain job
- Timing chain replacement on your ILX is an advanced repair that requires precise cam/crank timing alignment and special procedures.
- If you have repeated correlation codes, persistent rattle, or drivability issues after correcting oil level/quality, the next step is professional diagnosis and likely timing system service.
✅ After Repair
- Clear codes only after repairs, then drive and recheck with the OBD2 scan tool.
- Recheck oil level after your first drive and again over the next week.
- If cold-start rattle persists, avoid hard acceleration until it’s diagnosed.
💰 DIY vs Shop Cost
Shop Cost: $1,200-$2,500 (timing chain system service, if actually needed)
DIY Cost: $40-$90 (oil + filter + washer for first-line fix/inspection support)
You Save: $1,100-$2,400 by doing the basic checks and maintenance first!
Shop labor rates vary but typically run $100-$150/hour. Timing chain work takes a shop approximately 6-12 hours.
🎯 Ready to get started?
HowToo makes it easy: same-day/2-day shipping on every part, plus all the tools and specialty tools you need! Check out the parts and tools sections below to add everything to your cart.
