


2015 Toyota Camry Hybrid No-Charge Fix: Diagnose DC/DC Converter & Replace Inverter Assembly
Step-by-step hybrid charging system troubleshooting with safety tips, tools/parts list, and OEM torque spec notes for 2012, 2013, 2014, 2015
2015 Toyota Camry Hybrid No-Charge Fix: Diagnose DC/DC Converter & Replace Inverter Assembly
Step-by-step hybrid charging system troubleshooting with safety tips, tools/parts list, and OEM torque spec notes for 2012, 2013, 2014, 2015
🔧 Camry - Alternator Replacement
Your Camry Hybrid does not use a conventional belt-driven alternator. It charges the 12V system using a DC/DC converter (built into the inverter with converter assembly), so an “alternator replacement” on this model typically means diagnosing the 12V charging system and, if failed, replacing the inverter-with-converter assembly.
Difficulty Level: Advanced | Estimated Time: 4-7 hours
Assumption: You’re chasing “no charge / 12V battery not charging” and want the hybrid charging unit procedure.
⚠️ Safety & Precautions
- ⚠️ Hybrid high voltage can cause severe injury or death—do not touch orange cables/connectors unless HV is fully disabled.
- ⚠️ Wear Class 0 insulated gloves and remove metal jewelry.
- ⚠️ Disable the hybrid system by removing the service plug grip (traction battery disconnect), then wait the specified time for capacitors to discharge.
- ⚠️ Keep the key fob far from the car so it can’t go READY unexpectedly.
- ⚠️ You’ll open the inverter coolant circuit—hot coolant can burn; work on a cool engine.
- ⚠️ If you are not trained for hybrid HV work, stop and have a qualified hybrid tech perform the replacement.
🔧 Required Tools
You'll need the following tools for this repair:
- Safety glasses
- Nitrile gloves
- Class 0 insulated gloves (1000V rated)
- Insulated hand-tool set (specialty)
- Digital multimeter CAT III 600V minimum
- OBD2 scan tool with Toyota hybrid data (specialty)
- Floor jack (rated 3-ton minimum)
- Jack stands (rated 3-ton minimum)
- Wheel chocks
- 10mm socket
- 12mm socket
- 14mm socket
- 3/8" drive ratchet
- 6" extension
- Trim clip removal tool
- Flat-blade screwdriver
- Torque wrench (10–100 Nm range)
- Drain pan (2-gallon minimum)
- Long-neck funnel
- Pliers
- Hose clamp pliers
🔩 Required Parts
HowToo sells all the parts you need for this repair:
- Inverter with converter assembly - Qty: 1
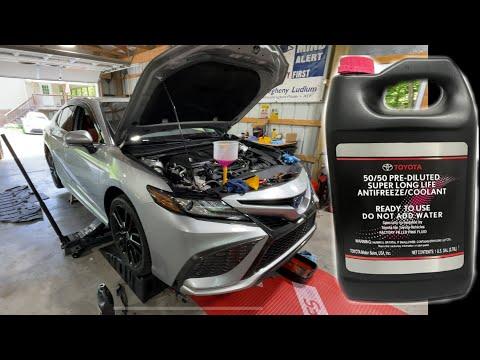
- Inverter coolant (Toyota Super Long Life Coolant equivalent) - Qty: 1-2 gallons
- Inverter coolant hose clamps - Qty: 2-6
- Inverter/converter sealing gaskets or O-rings (as applicable) - Qty: 1 set
- Shop towels - Qty: 1
📋 Before You Begin
- Park on level ground, shift to P, and set the parking brake.
- Let the engine bay cool fully.
- Chock the rear wheels with wheel chocks.
- Open the trunk and keep it accessible (traction battery disconnect is in the rear area).
- Plan for coolant handling: place a drain pan under the front of the car.
🔨 Step-by-Step Instructions
Follow these steps in order:
Step 1: Confirm it’s a charging problem (not the 12V battery)
- Use a digital multimeter CAT III 600V minimum to measure voltage at the 12V battery with the car OFF (typical healthy battery is ~12.4–12.7V).
- Make the car READY and measure again; the DC/DC converter should raise system voltage (commonly ~13.5–14.5V).
- If READY voltage does not rise, use an OBD2 scan tool with Toyota hybrid data (specialty) to check for hybrid control/inverter/DC-DC related codes.
Step 2: Disable the 12V system
- Use a 10mm socket to disconnect the negative (-) terminal at the 12V battery.
- Secure the cable so it can’t spring back to the post.
- Torque to OEM spec (verify in Toyota repair manual)
Step 3: Disable the high-voltage (HV) system
- Put on Class 0 insulated gloves (1000V rated).
- Access the traction battery service disconnect and remove the service plug grip (this is the HV disconnect handle).
- Wait the required discharge time before touching any HV components. Do not skip the waiting period.
Step 4: Remove engine covers and access panels near the inverter
- Use a trim clip removal tool and flat-blade screwdriver to remove plastic clips and covers as needed.
- Use a 10mm socket to remove any small bolts holding the covers.
Step 5: Drain the inverter coolant
- Place a drain pan (2-gallon minimum) under the front of the car.
- Use pliers or hose clamp pliers to release clamps on the inverter coolant hoses (move clamps back on the hose).
- Carefully pull hoses off and let coolant drain into the pan.
Step 6: Disconnect electrical connectors at the inverter
- Use an insulated hand-tool set (specialty) and disconnect the low-voltage connectors and harness plugs at the inverter.
- Keep connectors clean and dry; do not allow coolant into connectors.
Step 7: Disconnect high-voltage cables (orange) only after HV is disabled
- With Class 0 insulated gloves (1000V rated) on, use an insulated hand-tool set (specialty) to remove HV cable covers and fasteners.
- Disconnect the HV cables and immediately protect the ends from dirt/moisture.
- Never probe HV terminals with a test light.
- Torque to OEM spec (verify in Toyota repair manual)
Step 8: Remove the inverter with converter assembly
- Confirm all hoses and connectors are free.
- Use a 12mm socket and 14mm socket with a 3/8" drive ratchet and 6" extension to remove inverter mounting bolts.
- Lift the inverter out carefully (it’s bulky and can spill coolant). Get help lifting if needed.
- Torque to OEM spec (verify in Toyota repair manual)
Step 9: Install the replacement inverter assembly
- Set the replacement unit in place without pinching wiring.
- Hand-start mounting bolts, then tighten using a torque wrench (10–100 Nm range).
- Reconnect HV cables using Class 0 insulated gloves (1000V rated) and an insulated hand-tool set (specialty).
- Reconnect all low-voltage connectors until each lock clicks.
- Reconnect inverter coolant hoses using hose clamp pliers.
- Torque to OEM spec (verify in Toyota repair manual)
Step 10: Refill and bleed the inverter coolant circuit
- Use a long-neck funnel to refill with inverter coolant (Toyota Super Long Life Coolant equivalent).
- Bleed air from the inverter cooling circuit (air pockets can overheat the inverter).
- Use an OBD2 scan tool with Toyota hybrid data (specialty) to command coolant pump operation if supported, or follow the OEM bleed procedure.
- Top off coolant as the level drops.
Step 11: Re-enable HV and 12V power
- Reinstall the traction battery service plug grip fully and lock it.
- Reconnect the 12V negative terminal using a 10mm socket.
- Torque to OEM spec (verify in Toyota repair manual)
Step 12: Clear codes and confirm charging voltage
- Use an OBD2 scan tool with Toyota hybrid data (specialty) to clear stored codes (if present).
- Make the car READY and use a digital multimeter CAT III 600V minimum to confirm the 12V system is charging (voltage rises from resting level).
- Check for coolant leaks around all inverter hoses.
✅ After Repair
- Test drive 10–15 minutes and re-check inverter coolant level after cooldown.
- Re-scan for codes using an OBD2 scan tool with Toyota hybrid data (specialty).
- Verify no warning lights and confirm stable 12V charging in READY.
- Dispose of old coolant properly.
💰 DIY vs Shop Cost
Shop Cost: $1,800-$4,000 (parts + labor)
DIY Cost: $1,200-$3,200 (parts only)
You Save: $600-$800 by doing it yourself!
Shop labor rates vary but typically run $100-$150/hour. This repair takes a shop approximately 4-7 hours.
🎯 Ready to get started?
HowToo makes it easy: same-day/2-day shipping on every part, plus all the tools and specialty tools you need! Check out the parts and tools sections below to add everything to your cart.
