
















How to Replace Wheel Bearings on a 2007-2018 Nissan Altima (Engine: Inline 4 2.5L)
Step-by-step front and rear bearing guide with tools, parts, torque specs, and safety tips for 2007, 2008, 2009, 2010, 2011, 2012, 2013, 2014, 2015, 2016, 2017, 2018
How to Replace Wheel Bearings on a 2007-2018 Nissan Altima (Engine: Inline 4 2.5L)
Step-by-step front and rear bearing guide with tools, parts, torque specs, and safety tips for 2007, 2008, 2009, 2010, 2011, 2012, 2013, 2014, 2015, 2016, 2017, 2018


🔧 Altima - Wheel Bearing Replacement
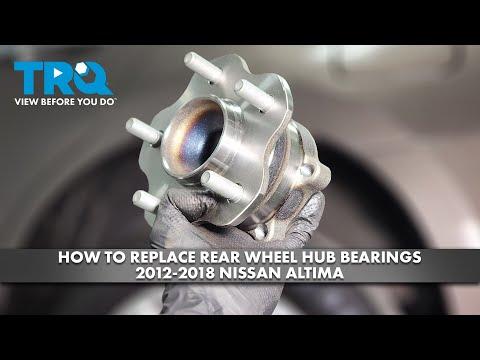
This guide covers replacing the wheel bearing/hub assemblies on your Altima. On this model, the front wheel bearing is pressed into the steering knuckle, while the rear bearing is serviced as a complete bolt-on hub assembly.
Assumption: Because the exact corner was not specified, this includes both front and rear procedures.
Difficulty Level: Advanced for front / Intermediate for rear | Estimated Time: 2-4 hours per wheel
⚠️ Safety & Precautions
- ⚠️ Work on level ground and support your Altima with jack stands before removing any wheel.
- ⚠️ Never rely on a floor jack alone. A floor jack lifts the car; jack stands hold it safely.
- ⚠️ Wear safety glasses and gloves. Brake dust, rust, and metal chips can injure your eyes and hands.
- ⚠️ Do not press the front bearing through the inner race. This can ruin the new bearing immediately.
- ⚠️ Avoid pulling on the front CV axle. A CV axle transfers power to the front wheels and can be damaged if overextended.
- ⚠️ If replacing the rear hub, make sure the ABS wheel speed sensor wiring is not stretched or pinched.
- ⚠️ Battery disconnect is not required for this repair.
🔧 Required Tools
You'll need the following tools for this repair:
- Floor jack (rated 2-ton minimum)
- Jack stands (rated 2-ton minimum)
- Wheel chocks
- Breaker bar 1/2-inch drive
- Torque wrench 1/2-inch drive
- Torque wrench 3/8-inch drive
- 21mm socket
- 32mm axle nut socket
- 19mm socket
- 17mm socket
- 14mm socket
- 12mm socket
- 10mm socket
- Ratchet 1/2-inch drive
- Ratchet 3/8-inch drive
- Combination wrench set 10mm-21mm
- Flat-blade screwdriver
- Needle-nose pliers
- Pry bar 18-inch
- Dead blow hammer
- Ball peen hammer
- Punch set
- Snap ring pliers (specialty)
- Hydraulic shop press 12-ton minimum (specialty)
- Wheel bearing press adapter kit (specialty)
- Hub puller kit (specialty)
- Slide hammer hub puller (specialty)
- Brake caliper hanger
- Wire brush
- Brake cleaner spray
- Anti-seize compound
- Shop rags
- Paint marker
- Safety glasses
- Mechanic gloves
🔩 Required Parts
HowToo sells all the parts you need for this repair:
- Front wheel bearing - Qty: 1 per front wheel
- Front wheel hub - Qty: 1 per front wheel if damaged or worn
- Front axle nut - Qty: 1 per front wheel
- Front wheel bearing snap ring - Qty: 1 per front wheel
- Rear wheel hub and bearing assembly - Qty: 1 per rear wheel
- Rear hub mounting bolts - Qty: 4 per rear wheel if corroded or stretched
- Brake cleaner - Qty: 1 can
- Anti-seize compound - Qty: 1 small tube
📋 Before You Begin
- 🚗 Park your Altima on level ground, shift to Park, and apply the parking brake.
- 🧱 Place wheel chocks behind the wheels that will stay on the ground.
- 🔩 Loosen the lug nuts slightly before lifting the car. Do not remove them yet.
- 📌 If replacing a front bearing, loosen the front axle nut before lifting the vehicle.
- 🛞 If replacing a rear bearing, release the parking brake before removing the rear brake rotor.
- 📏 Mark strut-to-knuckle bolt positions with a paint marker if removing the front knuckle. This helps keep alignment close enough to drive to an alignment shop.
- 🧰 A hydraulic shop press is a machine that uses pressure to push the old bearing out and the new bearing in squarely.
🔨 Step-by-Step Instructions
Follow these steps in order:
Step 1: Loosen the Wheel and Axle Nut
- Use a 21mm socket and breaker bar 1/2-inch drive to loosen the lug nuts one turn.
- For a front bearing, use a flat-blade screwdriver to lift the staked part of the axle nut if it is locked into the axle groove.
- Use a 32mm axle nut socket and breaker bar 1/2-inch drive to loosen the front axle nut while the wheel is still on the ground.
- Loosen first. Lift second.
Step 2: Lift and Support the Vehicle
- Use a floor jack (rated 2-ton minimum) at the proper lift point to raise your Altima.
- Place jack stands (rated 2-ton minimum) under the pinch welds or approved support points.
- Lower the car gently onto the jack stands using the floor jack.
- Use a 21mm socket to remove the lug nuts and wheel.
Step 3: Remove the Brake Caliper and Rotor
- Use a 14mm socket to remove the brake caliper slide pin bolts.
- Lift the caliper off and support it with a brake caliper hanger. Do not let it hang by the rubber brake hose.
- Use a 19mm socket to remove the caliper bracket bolts.
- Remove the caliper bracket and set it aside.
- Pull the brake rotor straight off by hand. If stuck, tap the rotor hat with a dead blow hammer.
- During reassembly, tighten the caliper bracket bolts to Torque to 98 Nm (72 ft-lbs).
- During reassembly, tighten the caliper slide pin bolts to Torque to 34 Nm (25 ft-lbs).
Step 4A: Front Bearing - Remove the Axle Nut and ABS Bracket
- Use a 32mm axle nut socket and ratchet 1/2-inch drive to remove the axle nut completely.
- Use a 10mm socket or 12mm socket to remove any ABS wire brackets attached to the steering knuckle.
- Use a punch set and ball peen hammer to gently push the CV axle inward through the hub splines.
- If the axle is stuck, use a hub puller kit (specialty). Do not hammer directly on the axle threads.
Step 5A: Front Bearing - Remove the Steering Knuckle
- Use a paint marker to mark the position of the strut bolts against the knuckle.
- Use a 19mm socket and combination wrench set 10mm-21mm to remove the two strut-to-knuckle bolts.
- Use a 17mm socket to remove the tie rod end nut if the tie rod blocks knuckle removal.
- Use a ball peen hammer to tap the side of the steering arm until the tie rod end pops free.
- Use a 17mm socket to remove the lower ball joint pinch bolt or retaining nut, depending on the installed joint style.
- Use a pry bar 18-inch to carefully separate the lower control arm from the knuckle.
- Slide the knuckle off the CV axle and remove it from the vehicle.
- During reassembly, tighten the strut-to-knuckle bolts to Torque to 177 Nm (131 ft-lbs).
- During reassembly, tighten the tie rod end nut to Torque to 34 Nm (25 ft-lbs).
- During reassembly, tighten the lower ball joint fastener to Torque to 64 Nm (47 ft-lbs).
Step 6A: Front Bearing - Press Out the Hub and Bearing
- Use a hydraulic shop press 12-ton minimum (specialty) and wheel bearing press adapter kit (specialty) to press the wheel hub out of the bearing.
- Use snap ring pliers (specialty) to remove the bearing snap ring from the knuckle.
- Use a wire brush and brake cleaner spray to clean the snap ring groove and bearing bore.
- Use the hydraulic shop press 12-ton minimum (specialty) to press the old bearing out of the knuckle.
- Support the knuckle evenly.
Step 7A: Front Bearing - Press In the New Bearing
- Use the wheel bearing press adapter kit (specialty) to support the knuckle around the bearing bore.
- Use the hydraulic shop press 12-ton minimum (specialty) to press the new front wheel bearing into the knuckle by the outer race only.
- Use snap ring pliers (specialty) to install the new snap ring fully into the groove.
- Use the hydraulic shop press 12-ton minimum (specialty) to press the hub into the new bearing by supporting the inner race.
- Spin the hub by hand. It should feel smooth with no grinding or wobble.
Step 8A: Front Bearing - Reinstall the Knuckle
- Guide the CV axle through the hub by hand while positioning the knuckle.
- Use a 17mm socket to install the lower ball joint fastener and tighten to Torque to 64 Nm (47 ft-lbs).
- Use a 19mm socket and combination wrench set 10mm-21mm to install the strut-to-knuckle bolts and tighten to Torque to 177 Nm (131 ft-lbs).
- Use a 17mm socket to install the tie rod end nut and tighten to Torque to 34 Nm (25 ft-lbs).
- Use a 10mm socket or 12mm socket to reinstall ABS wire brackets.
- Use a 32mm axle nut socket and torque wrench 1/2-inch drive to tighten the new axle nut to Torque to 177 Nm (131 ft-lbs).
- Use a punch set and ball peen hammer to stake the axle nut into the axle groove if the nut design requires it.
Step 4B: Rear Bearing - Remove the Rear Hub Assembly
- Use a 10mm socket or 12mm socket to remove the ABS wheel speed sensor bracket if it blocks hub removal.
- Use a 14mm socket or 17mm socket to remove the four rear hub mounting bolts from the back side of the knuckle.
- If the hub is rusted in place, use a slide hammer hub puller (specialty) to pull the hub straight out.
- Use a wire brush and brake cleaner spray to clean the mounting surface.
- Clean metal seats better.
Step 5B: Rear Bearing - Install the New Rear Hub Assembly
- Apply a thin film of anti-seize compound to the knuckle hub bore using a shop rag. Keep it off the brakes.
- Slide the new rear wheel hub and bearing assembly into place by hand.
- Use a 14mm socket or 17mm socket to start the four hub mounting bolts by hand.
- Use a torque wrench 3/8-inch drive or torque wrench 1/2-inch drive to tighten the rear hub mounting bolts to Torque to 88 Nm (65 ft-lbs).
- Use a 10mm socket or 12mm socket to reinstall the ABS wire bracket.
Step 9: Reinstall the Brake Rotor and Caliper
- Clean the brake rotor surface with brake cleaner spray and shop rags.
- Install the rotor by hand.
- Use a 19mm socket and torque wrench 1/2-inch drive to install the caliper bracket bolts and tighten to Torque to 98 Nm (72 ft-lbs).
- Install the brake caliper over the rotor by hand.
- Use a 14mm socket and torque wrench 3/8-inch drive to install the caliper slide pin bolts and tighten to Torque to 34 Nm (25 ft-lbs).
Step 10: Reinstall the Wheel
- Install the wheel by hand.
- Use a 21mm socket and ratchet 1/2-inch drive to snug the lug nuts in a star pattern.
- Raise the car slightly with the floor jack (rated 2-ton minimum) and remove the jack stands (rated 2-ton minimum).
- Lower your Altima to the ground.
- Use a 21mm socket and torque wrench 1/2-inch drive to tighten the lug nuts to Torque to 113 Nm (83 ft-lbs).
✅ After Repair
- ✅ Pump the brake pedal until it feels firm before driving. This seats the caliper back against the rotor.
- ✅ Start with a slow test drive in a quiet area. Listen for humming, grinding, clicking, or rubbing.
- ✅ If a front knuckle was removed, get a professional wheel alignment as soon as possible.
- ✅ After 25-50 miles, recheck the lug nut torque with a 21mm socket and torque wrench 1/2-inch drive to Torque to 113 Nm (83 ft-lbs).
- ✅ If the ABS light comes on, inspect the wheel speed sensor wiring and make sure the connector and bracket are secure.
💰 DIY vs Shop Cost
Shop Cost: $350-$650 per front wheel / $300-$550 per rear wheel (parts + labor)
DIY Cost: $70-$180 per front wheel / $90-$220 per rear wheel (parts only)
You Save: $200-$450 per wheel by doing it yourself!
Shop labor rates vary but typically run $100-$150/hour. This repair takes a shop approximately 1.5-3.0 hours per wheel.
🎯 Ready to get started?
HowToo makes it easy: same-day/2-day shipping on every part, plus all the tools and specialty tools you need! Check out the parts and tools sections below to add everything to your cart.