









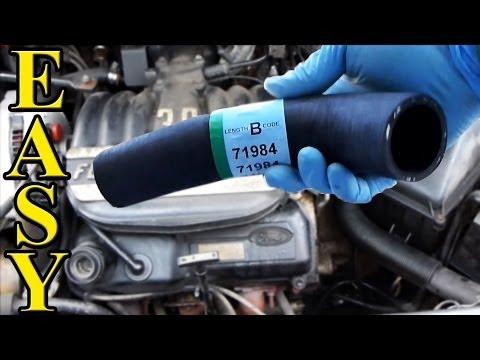







How to Replace Upper or Lower Radiator Hose on a 2019 Honda Insight
Step-by-step cooling system repair with tools, parts list, safety tips, and coolant refill/bleed procedure
How to Replace Upper or Lower Radiator Hose on a 2019 Honda Insight
Step-by-step cooling system repair with tools, parts list, safety tips, and coolant refill/bleed procedure


🔧 Insight - Radiator Hose Replacement
Replacing a radiator hose on your Insight means removing the old hose, installing the correct new hose, and refilling/bleeding the engine coolant so it doesn’t overheat. Most issues come from aged rubber, swelling near the ends, or a slow leak at the clamp.
Difficulty Level: Intermediate | Estimated Time: 1.5-3.0 hours
⚠️ Safety & Precautions
- ⚠️ Never open the radiator cap on a hot engine; hot coolant can spray and burn you.
- ⚠️ Support the car with jack stands; never rely on a floor jack alone.
- ⚠️ Coolant is toxic—keep it away from kids/pets and clean spills immediately.
- ⚠️ Avoid pulling on wiring or orange high-voltage cables (hybrid system).
- ⚠️ Battery disconnect is not required for this repair, but keep the ignition OFF.
🔧 Required Tools
You'll need the following tools for this repair:
- Safety glasses
- Nitrile gloves
- Floor jack (rated 2-ton minimum)
- Jack stands (rated 2-ton minimum)
- Wheel chocks
- 10mm socket
- 3/8" drive ratchet
- 6" extension (3/8" drive)
- Flathead screwdriver (medium)
- Hose clamp pliers (specialty)
- Pick tool (small)
- Slip-joint pliers
- Trim clip removal tool
- Drain pan (at least 10-quart)
- Funnel
- Shop towels
- Flashlight
🔩 Required Parts
HowToo sells all the parts you need for this repair:
- Upper radiator hose - Qty: 1
- Lower radiator hose - Qty: 1
- Radiator hose clamps - Qty: 2-4
- Honda Type 2 coolant (pre-mixed) - Qty: 1-2 gallons
📋 Before You Begin
- Park on level ground, set the parking brake, and place wheel chocks behind the rear tires.
- Let the engine cool fully (best: overnight). The upper radiator hose should feel cool to the touch.
- Decide which hose you’re replacing: upper (radiator to engine) or lower (radiator to engine). If you tell me “upper or lower,” I’ll tailor the steps tighter.
- Position a drain pan under the front of the car to catch coolant.
🔨 Step-by-Step Instructions
Follow these steps in order:
Step 1: Raise the front (if needed for access)
- Use a floor jack to lift the front at the proper front jack point.
- Set the car down onto jack stands and gently rock-check stability.
Step 2: Remove the lower engine cover (undertray) if it blocks access
- Use a trim clip removal tool to remove plastic push-clips.
- Use a 10mm socket with a ratchet (and extension as needed) to remove any 10mm bolts.
- Set the cover and fasteners aside in a small pile so nothing gets lost.
Step 3: Relieve cooling system pressure (cold engine only)
- Place shop towels around the radiator cap area.
- Slowly loosen the cap by hand to the first “stop” to release any leftover pressure, then remove it.
Step 4: Drain enough coolant to get the hose off without a big spill
- Position the drain pan under the radiator drain area.
- If accessible, open the radiator drain cock by hand; if tight, use slip-joint pliers gently (don’t crush it).
- Drain until the coolant level is below the hose you’re replacing, then close the drain cock by hand.
- Save clean coolant only in a clean container.
Step 5: Remove the hose clamps
- If your Insight uses spring clamps: use hose clamp pliers (specialty). (These are pliers designed to squeeze and hold spring clamps open.)
- If your Insight uses screw clamps: loosen with a flathead screwdriver (medium).
- Slide each clamp back on the hose a couple inches so the hose end is free.
Step 6: Break the hose free (don’t pry on the radiator neck)
- Twist the hose by hand to break the seal.
- If it’s stuck, carefully work around the hose end with a pick tool (small) to loosen it.
- Pull the hose straight off and aim it into the drain pan to catch remaining coolant.
Step 7: Clean and inspect the fittings
- Use shop towels to wipe the radiator neck and engine fitting clean.
- Use a flashlight to check for cracks, heavy corrosion, or a broken neck. If you see damage, stop and tell me what you see.
Step 8: Install the new hose (upper or lower)
- Match the new hose shape to the old one before installing.
- Slide the clamps onto the hose first.
- Push the hose fully onto each fitting until it bottoms out against the stop/bead.
- Reposition the clamp near the end of the hose, over the sealing area (not hanging off the edge).
- For spring clamps: release using hose clamp pliers (specialty) and confirm it sits square.
- For screw clamps: tighten with a flathead screwdriver (medium) until snug; do not strip or crush the hose.
Step 9: Refill coolant
- Insert a funnel and refill with Honda Type 2 coolant (pre-mixed) at the radiator fill (and reservoir if needed).
- Fill the overflow reservoir to the MAX line.
Step 10: Bleed air from the cooling system (prevent overheating)
- With the radiator cap still off, start the car and set the heater to HOT (highest temperature) and fan to low/medium.
- Let it idle and watch the coolant level; add coolant using the funnel as it drops.
- Watch for bubbles; when bubbles slow down and the level stabilizes, install the radiator cap securely by hand.
- Keep idling until the radiator fan cycles at least once, then shut the car off.
- Heat inside should get hot.
Step 11: Reinstall the undertray and lower the car
- Reinstall bolts using a 10mm socket and ratchet.
- Reinstall clips using a trim clip removal tool to line them up, then press in by hand.
- Use a floor jack to lift slightly, remove jack stands, then lower the car.
✅ After Repair
- Start your Insight and check for leaks at both ends of the hose with a flashlight.
- After a short drive, recheck the overflow reservoir level and top off with Honda Type 2 coolant (pre-mixed) if needed.
- If the temperature rises higher than normal, or the heater blows cold, shut it down and tell me—there may be air trapped.
- Dispose of old coolant properly (never dump it on the ground).
💰 DIY vs Shop Cost
Shop Cost: $250-$550 (parts + labor)
DIY Cost: $45-$140 (parts only)
You Save: $205-$410 by doing it yourself!
Shop labor rates vary but typically run $100-$150/hour. This repair takes a shop approximately 1.5-2.5 hours.
🎯 Ready to get started?
HowToo makes it easy: same-day/2-day shipping on every part, plus all the tools and specialty tools you need! Check out the parts and tools sections below to add everything to your cart.
Guide for Radiator Coolant Hose replace for these Honda vehicles
| Year Make Model | Sub Model | Engine | Body Style |
|---|