









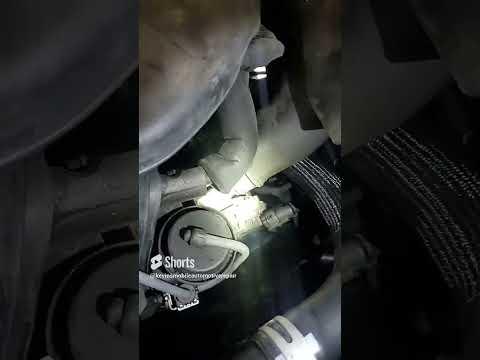







How to Replace Upper or Lower Radiator Hose on a 2014 Hyundai Tucson
Step-by-step coolant hose replacement with tools, parts list, refill/bleed tips, and leak checks
How to Replace Upper or Lower Radiator Hose on a 2014 Hyundai Tucson
Step-by-step coolant hose replacement with tools, parts list, refill/bleed tips, and leak checks


🔧 Tucson - Radiator Hose Replacement
Replacing a radiator hose fixes coolant leaks and helps prevent overheating. On your Tucson, the job is mainly removing the old hose, cleaning the sealing surfaces, and installing the new hose with the clamps positioned correctly.
Difficulty Level: Intermediate | Estimated Time: 1.0-2.5 hours
⚠️ Safety & Precautions
- ⚠️ Never open the radiator cap hot; coolant can spray and burn.
- ⚠️ Support the SUV with jack stands before going underneath; never rely on a jack.
- ⚠️ Keep coolant away from kids/pets; it’s toxic and has a sweet smell.
- ⚠️ Let the engine cool fully (upper hose should feel cool to the touch) before starting.
- Disconnecting the battery is not required for this repair.
🔧 Required Tools
You'll need the following tools for this repair:
- Safety glasses
- Nitrile gloves
- Floor jack (rated 3-ton minimum)
- Jack stands (rated 3-ton minimum)
- Wheel chocks
- Drain pan (at least 10-quart)
- Hose clamp pliers (specialty)
- Channel-lock pliers
- Pick tool (90-degree) (specialty)
- Flat-blade screwdriver (medium)
- Trim clip removal tool
- 10mm socket
- 3/8" ratchet
- 3" extension
- Funnel
- Shop rags
- Work light
🔩 Required Parts
HowToo sells all the parts you need for this repair:
- Upper radiator hose - Qty: 1
- Lower radiator hose - Qty: 1
- Radiator hose clamps - Qty: 2-4
- Engine coolant (Asian vehicle, phosphate-free ethylene glycol) 50/50 premix - Qty: 1-2 gallons
- Distilled water - Qty: 1 gallon
📋 Before You Begin
- Park on level ground, set the parking brake, and use wheel chocks.
- Let the engine cool completely (ideally 2+ hours).
- Decide which hose you’re replacing: upper (radiator to engine) or lower (radiator to lower engine area). If you’re not sure, you can follow both sections below and stop when you reach your hose.
- Know your clamp type: most are spring clamps. Hose clamp pliers are pliers that lock onto spring clamps so you can slide them back safely.
🔨 Step-by-Step Instructions
Follow these steps in order:
Step 1: Confirm the leak is from the hose
- Use a work light to inspect the hose ends where they meet the radiator and engine.
- Wipe the area with shop rags and look for wet coolant trails or white/green crust.
- If it’s leaking at the clamp, still replace the hose.
Step 2: Remove splash shields (only if doing the lower hose)
- Raise the front with a floor jack and support with jack stands.
- Remove clips/fasteners using a trim clip removal tool and 10mm socket with a 3/8" ratchet and 3" extension.
- Set hardware aside in a tray.
Step 3: Drain coolant to below the hose level
- Place a drain pan (at least 10-quart) under the radiator area.
- Slowly loosen the radiator cap (engine cold) by hand to relieve any leftover pressure.
- Drain enough coolant so the radiator level is below the hose you’re removing.
- You don’t always need a full drain.
Step 4: Move the clamp back (upper or lower hose)
- Use hose clamp pliers (specialty) to squeeze the spring clamp and slide it back onto the hose.
- If it’s a worm-gear clamp, loosen it using a flat-blade screwdriver (medium).
- Wipe coolant off with shop rags so your hands don’t slip.
Step 5: Break the hose free without damaging the fitting
- Twist the hose by hand to break the seal.
- If stuck, gently work the edge with a pick tool (90-degree) (specialty) to let air in between the hose and the fitting.
- Pull the hose off while keeping it aligned with the fitting (don’t pry hard sideways).
- Don’t gouge the radiator neck.
Step 6: Compare and prep the new hose
- Match the new hose to the old one (shape, bends, length).
- Clean the radiator/engine hose neck with a shop rag (remove crusty buildup).
- Slide the clamp(s) onto the new hose before installing it.
Step 7: Install the new hose and position clamps correctly
- Push the hose fully onto the fitting until it bottoms out.
- Use hose clamp pliers (specialty) to move the spring clamp back into place.
- Position the clamp behind the bead (raised lip) on the fitting, not on the very edge.
- If using worm-gear clamps, tighten with a flat-blade screwdriver (medium) until snug and the hose can’t rotate by hand.
Step 8: Reinstall shields (lower hose only)
- Reinstall splash shields using a 10mm socket, 3/8" ratchet, and trim clip removal tool.
- Lower the SUV from the jack stands using the floor jack.
Step 9: Refill and bleed air from the cooling system
- Use a funnel to refill with engine coolant (Asian vehicle, phosphate-free ethylene glycol) 50/50 premix.
- Start the engine and set the heater to HOT (fan medium) so coolant flows through the heater core.
- Let the engine warm up while watching the coolant level; add as it drops.
- Once warm, carefully check for leaks at both ends of the replaced hose using a work light.
- Shut the engine off, let it cool, then top off the radiator/overflow bottle as needed.
✅ After Repair
- Recheck the coolant level the next morning (engine cold) and top off if needed.
- Inspect for seepage around the clamps after the first short drive.
- Watch the temperature gauge for the next few trips; stop if it rises abnormally.
- Dispose of old coolant properly (never dump it).
💰 DIY vs Shop Cost
Shop Cost: $250-$500 (parts + labor)
DIY Cost: $40-$140 (parts only)
You Save: $110-$460 by doing it yourself!
Shop labor rates vary but typically run $100-$150/hour. This repair takes a shop approximately 1.0-2.0 hours.
🎯 Ready to get started?
HowToo makes it easy: same-day/2-day shipping on every part, plus all the tools and specialty tools you need! Check out the parts and tools sections below to add everything to your cart.
Guide for replace for these Hyundai vehicles
| Year Make Model | Sub Model | Engine | Body Style |
|---|