









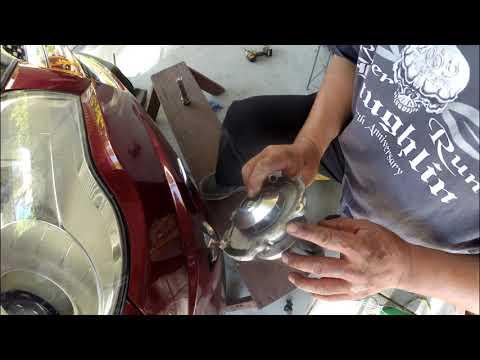






How to Replace the Water Pump on a 2020 Chevy Equinox 1.5L
Step-by-step DIY water pump replacement with tools, parts list, torque specs, safety tips, and bleeding procedure
How to Replace the Water Pump on a 2020 Chevy Equinox 1.5L
Step-by-step DIY water pump replacement with tools, parts list, torque specs, safety tips, and bleeding procedure


🔧 Equinox - Water Pump Replacement
You’ll be draining the coolant, removing the drive belt and old water pump, then installing a new pump and refilling/bleeding the cooling system on your Equinox. The water pump circulates coolant through the engine; when it fails, the engine can quickly overheat.
Difficulty Level: Intermediate | Estimated Time: 3–4 hours
⚠️ Safety & Precautions
- 🔥 Work only on a cold engine. Hot coolant can cause serious burns.
- 🧪 Coolant is poisonous to people and animals; keep it off skin and out of reach of children and pets.
- 🔌 Disconnect the negative battery cable before working near the belt and electrical connectors.
- 🛠️ Always support the front of the vehicle with jack stands; never rely on a jack alone.
- 🌫️ Work in a well-ventilated area; avoid breathing coolant mist or vapors.
- 🧯 Keep rags around the work area to clean spills immediately; coolant is very slippery.
🔧 Required Tools
You'll need the following tools for this repair:
- Floor jack (rated 3-ton minimum)
- Jack stands (rated 3-ton minimum, Qty: 2)
- Wheel chocks
- Ratchet 3/8-inch drive
- Ratchet 1/2-inch drive
- Metric socket set (8mm–19mm)
- Metric deep socket set (8mm–19mm)
- Torx bit set (T15–T40)
- E-Torx socket set (E8–E14)
- Serpentine belt tool or long 3/8-inch breaker bar
- Torque wrench 3/8-inch drive (5–80 ft-lbs range)
- Torque wrench 1/2-inch drive (30–150 ft-lbs range)
- Flathead screwdriver (medium)
- Trim clip removal tool
- Pry bar (small)
- Coolant drain pan (at least 10 liters)
- Funnel with small spout
- Shop towels or rags
- Plastic scraper or gasket scraper
- Nylon brush (small)
- Work light or flashlight
- Gloves (chemical-resistant)
- Safety glasses
🔩 Required Parts
HowToo sells all the parts you need for this repair:
- Engine water pump (with housing, for 1.5L) - Qty: 1
- Water pump gasket or O-ring set - Qty: 1
- Serpentine drive belt - Qty: 1
- Engine coolant (Dex-Cool, premixed 50/50) - Qty: ~2 gallons
- Water pump mounting bolts (if specified as one-time-use) - Qty: set
- Coolant reservoir cap (optional, if old or cracked) - Qty: 1
- Hose clamps (appropriate size, spring or worm-gear) - Qty: 2–4 as needed
- Thread sealant (if specified for any coolant pipe bolts) - Qty: 1
- Anti-seize compound (for pulley bolts, optional) - Qty: 1
- Brake cleaner or parts cleaner spray - Qty: 1
📋 Before You Begin
- Park the Equinox on a flat, level surface; set the parking brake and chock the rear wheels.
- Allow the engine to cool completely; it should be cool to the touch.
- Open the hood and remove the engine cover (it lifts straight up with a firm pull).
- Disconnect the negative battery terminal using a 10mm socket and move the cable away from the post.
- Locate the coolant reservoir and radiator cap; do not open yet, just identify them.
- Check you have enough new coolant on hand before draining the system.
🔨 Step-by-Step Instructions
Follow these steps in order:
Step 1: Raise and secure the front of the vehicle
- Loosen the front right wheel lug nuts a half turn using a 19mm socket and 1/2-inch ratchet while the vehicle is still on the ground.
- Position the floor jack (3-ton) under the front subframe jacking point and raise the front right side high enough to remove the wheel.
- Place jack stands (3-ton) under solid frame or pinch weld points and slowly lower the vehicle onto the stands.
- Remove the front right wheel completely using the 19mm socket.
- Give the vehicle a light push to confirm it's stable.
Step 2: Drain the engine coolant
- Place the coolant drain pan under the radiator area, slightly toward the passenger side.
- Slowly open the coolant reservoir cap to release any residual pressure.
- On the lower part of the radiator, locate the drain plug (petcock). Use a Torx bit or small socket as required by the plug design to carefully open it and let coolant drain into the pan.
- If there is no drain plug, loosen the lower radiator hose clamp using a flathead screwdriver or appropriate socket and pull the hose off to drain.
- Allow coolant to drain fully, then close the drain plug or reinstall the hose and tighten the clamp with the flathead screwdriver.
- Keep track of how much coolant comes out for refill later.
Step 3: Remove the right front splash shield
- In the right front wheel well, locate the plastic splash shield covering the accessory belt area.
- Remove plastic clips using a trim clip removal tool.
- Remove any screws using the correct Torx bit or 10mm socket.
- Pull the splash shield out and set it aside.
Step 4: Release tension and remove the serpentine belt
- Locate the belt routing diagram under the hood or take a clear photo for reference.
- Find the belt tensioner (a spring-loaded pulley that keeps the belt tight).
- Insert your serpentine belt tool or a long 3/8-inch breaker bar into the tensioner square hole or bolt head.
- Rotate the tensioner (usually clockwise) to relieve belt tension, then slide the belt off the water pump pulley with your other hand.
- Slowly release the tensioner back to its rest position.
- Remove the belt from all pulleys and take it out through the wheel well opening.
- Inspect the old belt; replace even if it looks only slightly worn.
Step 5: Access and inspect the water pump
- From the wheel well opening and from above, locate the water pump on the front of the engine. It will have a round pulley and several bolts around its housing.
- Use a work light to clearly see the pump, hoses, and surrounding components.
- Note the orientation of the pump and any hoses or sensors connected to it.
Step 6: Remove components blocking water pump access (if needed)
- On many 1.5L engines, you may need to move a small coolant pipe or bracket.
- Loosen any brackets or small shields in front of the pump using the appropriate 10mm or 13mm socket and 3/8-inch ratchet.
- Gently move hoses aside as needed; if you must disconnect a hose, loosen its clamp with a flathead screwdriver and be ready for a bit of extra coolant to drain into your pan.
Step 7: Remove the old water pump
- Place the drain pan under the water pump area to catch any remaining coolant.
- Remove the water pump pulley bolts (if the pulley must come off separately) using a 10mm or 13mm socket. You may need to hold the pulley from turning by hand or with a small pry bar.
- Once the pulley is off, remove the water pump mounting bolts around the housing using a 10mm socket and 3/8-inch ratchet.
- Keep track of bolt locations and lengths; some may be different.
- Gently tap the pump housing with a plastic handle or small pry bar to break the seal and pull the pump off the engine. Do not pry against soft aluminum surfaces too hard.
- Let any remaining coolant drain out, then remove the old gasket or O-ring.
- Do not reuse the old gasket or O-ring.
Step 8: Clean the sealing surface
- Use a plastic scraper or gasket scraper to carefully remove old gasket material from the engine side where the pump mounted.
- Use a nylon brush and a bit of brake cleaner on a rag to clean the surface thoroughly until it is smooth and free from debris.
- Do not gouge or scratch the aluminum surface.
- The new pump will only seal well on a clean, smooth surface.
Step 9: Prepare the new water pump
- Compare the new pump to the old one to ensure bolt holes, pulley, and hose connections match.
- Install the new gasket or O-ring on the pump as specified by the manufacturer. Some gaskets clip into place; some O-rings sit in a groove.
- If the service info calls for it, apply a thin layer of coolant-safe sealant where indicated (many GM pumps use just the gasket/O-ring with no sealant).
Step 10: Install the new water pump
- Position the new pump against the engine, aligning the bolt holes carefully.
- Start all water pump mounting bolts by hand to avoid cross-threading.
- Tighten the bolts evenly in a crisscross pattern using a 10mm socket and 3/8-inch ratchet until snug.
- Use a 3/8-inch torque wrench and torque the water pump mounting bolts to manufacturer specification (typically about 10–12 Nm / 7–9 ft-lbs). Confirm exact spec in a service manual if available.
- If the pulley was removed, reinstall it now and tighten the pulley bolts using the 10mm or 13mm socket and 3/8-inch torque wrench to manufacturer spec (commonly around 25 Nm / 18 ft-lbs).
Step 11: Reinstall brackets, hoses, and splash shield
- Reinstall any brackets or shields removed earlier using the appropriate 10mm or 13mm socket.
- Tighten bracket bolts to manufacturer spec (usually 20–25 Nm / 15–18 ft-lbs).
- Reconnect any hoses removed and secure them with their clamps using a flathead screwdriver or correct socket. Ensure hoses are fully seated past the bead before tightening.
- Reinstall the wheel well splash shield using the Torx bit, 10mm socket, and trim clip tool as needed.
Step 12: Install the new serpentine belt
- Route the new belt following the factory diagram or the photo you took earlier, leaving the easy-to-reach pulley (often the water pump or alternator) for last.
- Use the serpentine belt tool or 3/8-inch breaker bar to rotate the tensioner again, slip the belt fully into place on all pulleys, then slowly release the tensioner.
- Double-check that the belt is seated correctly in all pulley grooves; it should be centered and fully engaged.
Step 13: Reinstall the wheel and lower the vehicle
- Reinstall the front right wheel and hand-thread the lug nuts.
- Raise the vehicle slightly with the floor jack, remove the jack stands, then lower the vehicle to the ground.
- Tighten the lug nuts in a star pattern using a 19mm socket and 1/2-inch torque wrench to manufacturer spec (commonly about 140 Nm / 103 ft-lbs).
Step 14: Refill the cooling system
- Make sure the radiator drain plug and all hoses you disconnected are fully tightened.
- Using a funnel, slowly fill the coolant reservoir with fresh premixed Dex-Cool 50/50 until it reaches the “COLD” or “FULL COLD” line.
- Squeeze the upper radiator hose by hand a few times to help push air out of the system.
Step 15: Bleed air from the cooling system
- Reconnect the negative battery terminal using a 10mm socket.
- Start the engine and let it idle with the heater set to maximum temperature and fan on low.
- Watch the coolant level in the reservoir; as air bubbles purge, the level may drop. Add coolant as needed to keep it at the correct mark.
- Allow the engine to reach normal operating temperature. The radiator fans should cycle on and off at least once.
- Check for leaks around the water pump, hoses, and drain area while the engine is running. Use a work light and watch carefully.
- Once there are no bubbles and the level stabilizes, shut the engine off and let it cool completely. Recheck the coolant level and top off if needed.
Step 16: Final inspection
- Inspect the belt routing again to confirm everything is still in place.
- Look under the vehicle and around the pump area for any signs of drips or seepage.
- Reinstall the engine cover by pushing it firmly onto its mounting grommets.
- Dispose of old coolant at a proper recycling center; do not pour it on the ground or into drains.
✅ After Repair
- Take the Equinox for a short drive of 10–15 minutes, watching the temperature gauge. It should stay in the normal range.
- Park the vehicle, let it cool fully, then recheck the coolant level and top off to the “COLD” line if needed.
- Inspect under the vehicle and around the water pump area again for any leaks after the test drive.
- Over the next few days of driving, recheck coolant level and the belt visually before trips.
💰 DIY vs Shop Cost
Shop Cost: $550–$800 (parts + labor)
DIY Cost: $150–$250 (parts + coolant)
You Save: $400–$550 by doing it yourself!
Shop labor rates typically run $100–$150/hour. This repair takes a shop approximately 2–3 hours.
🎯 Ready to get started?
HowToo makes it easy: same-day/2-day shipping on every part, plus all the tools and specialty tools you need! Check out the parts and tools sections above to add everything to your cart.
Guide for replace for these Chevrolet vehicles
| Year Make Model | Sub Model | Engine | Body Style |
|---|