


How to Replace the Water Pump on a 2018 Chrysler Pacifica (Mechanical Engine Pump)
Step-by-step DIY instructions with tools/parts list, OAT coolant refill & bleed steps, and torque specs
How to Replace the Water Pump on a 2018 Chrysler Pacifica (Mechanical Engine Pump)
Step-by-step DIY instructions with tools/parts list, OAT coolant refill & bleed steps, and torque specs


🔧 Pacifica - Water Pump Replacement
On your Pacifica, the “water pump” can mean the mechanical engine coolant pump (most common leak) or one of the electric coolant pumps used for the hybrid cooling loops. The steps, parts, and coolant bleed procedure are different, so we’ll target the engine mechanical water pump (driven by the serpentine belt) below.
Difficulty Level: Intermediate | Estimated Time: 3-6 hours
⚠️ Safety & Precautions
- 🛑 Let the engine cool fully before opening the cooling system.
- 🧤 Coolant is toxic and slippery—wear gloves and clean spills immediately.
- ⚡ This is a plug-in hybrid: keep hands/tools away from orange high-voltage cables. You typically do not need to disable the high-voltage system for the engine water pump, but do not disturb HV components.
- 🔑 Keep the key fob away from the van and ensure the vehicle cannot go “READY” while you work.
- 🔋 Battery disconnect is not usually required for this job, but disconnect the 12V negative terminal if you’ll be unplugging electrical connectors near the radiator fan module.
🔧 Required Tools
You'll need the following tools for this repair:
- Safety glasses
- Nitrile gloves
- Floor jack (rated 3-ton minimum)
- Jack stands (rated 3-ton minimum)
- Wheel chocks
- Drain pan (at least 3-gallon)
- Spill-free funnel kit
- Serpentine belt tool (specialty) —a long handled tool to rotate the belt tensioner.
- 3/8" drive ratchet
- 1/4" drive ratchet
- 3/8" drive torque wrench (10–100 ft-lbs range)
- 1/4" drive torque wrench (inch-lb range)
- Socket set: 8mm, 10mm, 13mm, 15mm
- Torx bit set
- Trim clip removal tool
- Hose clamp pliers
- Plastic scraper
- Shop rags
🔩 Required Parts
HowToo sells all the parts you need for this repair:
- Engine water pump - Qty: 1
- Water pump gasket / seal - Qty: 1
- Engine coolant (OAT, 50/50 premix or concentrate + distilled water) - Qty: 2–3 gallons
- Serpentine belt - Qty: 1 (recommended if belt is cracked/glazed)
- Hose clamps - Qty: 1–2 (only if originals are weak/damaged)
📋 Before You Begin
- Park on level ground, set the parking brake, and chock the rear wheels.
- Make sure the van is OFF and cannot go “READY”; keep the key fob at least 15–20 feet away.
- Place a drain pan under the radiator area to catch coolant.
- If you plan to unplug the radiator fan module, disconnect the 12V negative battery terminal using a 10mm socket.
🔨 Step-by-Step Instructions
Follow these steps in order:
Step 1: Depressurize and drain the coolant
- Once fully cool, remove the coolant pressure cap slowly.
- Position the drain pan (at least 3-gallon) under the radiator drain area.
- Open the radiator drain (if accessible) and drain coolant. If your drain isn’t accessible, remove the lower hose using hose clamp pliers and direct flow into the pan.
Step 2: Gain access to the front of the engine
- Raise the front safely using a floor jack (rated 3-ton minimum) and support with jack stands (rated 3-ton minimum).
- Remove any lower splash shield that blocks access using a trim clip removal tool and socket set: 8mm, 10mm.
- If needed for access, remove the air intake ducting with a socket set: 8mm, 10mm.
Step 3: Remove the serpentine belt
- Note the belt routing (take a phone picture).
- Rotate the belt tensioner using a serpentine belt tool (specialty) and slide the belt off a smooth pulley.
- Remove the belt from the water pump area and set it aside.
Step 4: Remove components blocking the water pump
- Depending on build, you may need to move hoses and/or a bracket out of the way.
- Release hose clamps with hose clamp pliers and twist hoses gently to break them free (don’t pry on plastic fittings).
- Remove any brackets using a socket set: 10mm, 13mm.
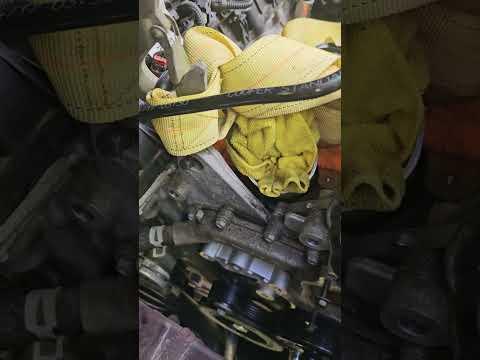
Step 5: Remove the water pump
- Place rags under the pump area using shop rags (more coolant will spill).
- Remove the water pump bolts using a socket set: 10mm and 3/8" drive ratchet.
- Remove the pump from the engine. If it sticks, tap gently and evenly—do not gouge the sealing surface.
Step 6: Clean the sealing surface
- Use a plastic scraper to remove old gasket material from the engine surface.
- Wipe clean with shop rags. The surface must be clean and dry before installing the new pump.
Step 7: Install the new water pump
- Install the new gasket/seal onto the new pump (as supplied).
- Position the new pump and hand-start all bolts to avoid cross-threading.
- Tighten evenly in a crisscross pattern using a 1/4" drive torque wrench (inch-lb range).
- Torque to 12 Nm (106 in-lbs)
Step 8: Reinstall hoses, brackets, and the serpentine belt
- Reinstall brackets with a socket set: 10mm, 13mm and tighten snugly.
- Reinstall hoses and clamps using hose clamp pliers.
- Route the belt correctly and rotate the tensioner using the serpentine belt tool (specialty) to slip the belt back on.
- Double-check belt ribs are fully seated.
Step 9: Refill and bleed the cooling system
- Lower the van to level ground.
- Refill coolant slowly using a spill-free funnel kit with the correct OAT coolant.
- Start the engine and set the front HVAC to MAX HEAT (high fan). Monitor the funnel level and add coolant as needed.
- When the radiator fan cycles and heat is steady, shut the engine off, let it cool, then top off the coolant bottle to the correct mark.
✅ After Repair
- Check for leaks around the pump and hose connections with the engine running.
- Verify the serpentine belt is tracking correctly (no squeal, no wandering).
- After a full cool-down, recheck coolant level and top off if needed.
- If you had overheating or warning lights, scan for codes after the repair.
💰 DIY vs Shop Cost
Shop Cost: $650-$1,150 (parts + labor)
DIY Cost: $120-$280 (parts only)
You Save: $530-$870 by doing it yourself!
Shop labor rates vary but typically run $100-$150/hour. This repair takes a shop approximately 3-5 hours.
🎯 Ready to get started?
HowToo makes it easy: same-day/2-day shipping on every part, plus all the tools and specialty tools you need! Check out the parts and tools sections below to add everything to your cart.
