


How to Replace the Water Pump on a 2016 INFINITI QX50 (Timing Chain-Driven)
Step-by-step instructions with required tools/parts, timing cover removal tips, and coolant refill & bleeding
How to Replace the Water Pump on a 2016 INFINITI QX50 (Timing Chain-Driven)
Step-by-step instructions with required tools/parts, timing cover removal tips, and coolant refill & bleeding
🔧 QX50 - Water Pump Replacement
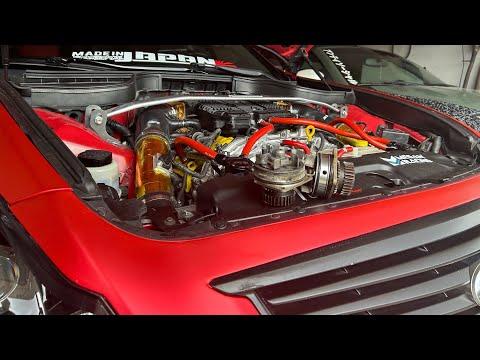
On your QX50, the water pump is driven by the timing chain and sits behind the front timing cover. Replacing it requires draining coolant and removing the front cover and timing components so you can access the pump without causing a timing slip.
Difficulty Level: Advanced | Estimated Time: 8-12 hours
Assumption: your QX50 uses the VQ37VHR internal timing-chain-driven water pump.
⚠️ Safety & Precautions
- ⚠️ Work on a cold engine only; hot coolant can cause severe burns.
- ⚠️ Support the vehicle with jack stands; never rely on a floor jack.
- ⚠️ Keep fingers/tools clear of the radiator fans; they can run unexpectedly.
- ⚠️ This job exposes engine timing components; turning the engine at the wrong time can cause serious damage.
- ⚠️ Disconnect the battery negative terminal to prevent accidental cranking.
🔧 Required Tools
You'll need the following tools for this repair:
- Safety glasses
- Nitrile gloves
- Wheel chocks
- Floor jack (rated 3-ton minimum)
- Jack stands (rated 3-ton minimum)
- Drain pan (at least 10-quart)
- Funnel
- Trim clip removal tool
- Flat-blade screwdriver
- Pliers
- Metric socket set (8mm-22mm)
- 3/8" drive ratchet
- 1/2" drive breaker bar
- Socket extensions (3" and 6")
- Torque wrench (10-250 Nm range)
- Serpentine belt tool (long handle)
- Crank pulley puller (specialty)
- Crank pulley holding tool (specialty)
- Gasket scraper (plastic)
- Razor scraper
- Brake cleaner spray
- Shop towels
- RTV sealant applicator (caulk gun)
- Cooling system vacuum fill tool (specialty)
🔩 Required Parts
HowToo sells all the parts you need for this repair:
- Water pump - Qty: 1
- Water pump O-ring / gasket (if separate) - Qty: 1
- Engine coolant (blue Asian vehicle coolant compatible) - Qty: 2-3 gallons (premix equivalent)
- Timing cover RTV sealant (OEM-spec silicone) - Qty: 1
- Front crankshaft oil seal - Qty: 1
- Accessory drive belt - Qty: 1
- Thermostat housing gasket (recommended) - Qty: 1
📋 Before You Begin
- Park on level ground, set the parking brake, and chock the rear wheels.
- Let the engine cool completely (ideally overnight).
- Use a 10mm socket to disconnect the negative battery terminal and isolate it.
- Raise the front of the vehicle with a floor jack and support it on jack stands at the proper lift points.
- Place a drain pan under the radiator drain area.
🔨 Step-by-Step Instructions
Follow these steps in order:
Step 1: Drain the coolant
- Remove the lower engine undercover using a trim clip removal tool and a metric socket set.
- Slowly open the radiator cap (only when cold).
- Open the radiator drain cock (use pliers if needed) and drain coolant into the drain pan.
- Close the drain cock once flow stops.
Step 2: Remove intake ducting and upper access parts
- Loosen the intake hose clamps using a flat-blade screwdriver.
- Remove the intake duct/air inlet pieces with pliers (for any hose clamps) and set them aside.
- Unplug any connectors you remove by pressing the lock tab first. Don’t pull on wires.
Step 3: Remove the cooling fan/shroud (front clearance)
- Unplug the fan electrical connectors.
- Remove the fan/shroud fasteners using a metric socket set and 3/8" ratchet.
- Lift the fan/shroud straight up and out carefully.
Step 4: Remove the accessory drive belt
- Use a serpentine belt tool to rotate the belt tensioner and relieve tension.
- Slip the belt off the pulleys and remove it.
- Take a photo of belt routing first.
Step 5: Remove the crank pulley
- Use a crank pulley holding tool (this tool locks the pulley so it can’t spin) and a 1/2" breaker bar to loosen the crank bolt.
- Remove the crank bolt with a metric socket set.
- Use a crank pulley puller (a puller presses the pulley off evenly) to remove the crank pulley without prying.
- Reinstall the crank bolt finger-tight afterward to protect the crank threads during the next steps.
Step 6: Remove front cover access items
- Remove any brackets, hoses, and front cover fasteners that block the timing cover using a metric socket set, extensions, and pliers.
- Label connectors/bolts with tape so they go back to the same locations.
Step 7: Set the engine to Top Dead Center (TDC) on cylinder 1
- Use a socket on the crank bolt and rotate the engine clockwise only using a 1/2" breaker bar.
- Align the factory timing marks per the service manual procedure before loosening any timing components.
- If timing marks don’t align, stop and reset.
Step 8: Remove the front timing cover
- Remove all timing cover bolts using a metric socket set and extensions.
- Carefully separate the cover. Use a plastic gasket scraper where needed; do not gouge aluminum.
- Clean RTV from mating surfaces using a gasket scraper, razor scraper (lightly), brake cleaner, and shop towels.
Step 9: Release timing chain tension (controlled)
- Remove or pin the timing chain tensioners as required using a metric socket set.
- Keep the chain and sprockets from slipping off their marks. Zip ties can help hold chain position.
Step 10: Remove and replace the water pump
- Place shop towels below the pump area to catch residual coolant.
- Remove the water pump fasteners using a metric socket set.
- Remove the pump and old O-ring/gasket.
- Clean the sealing surface with a plastic gasket scraper and brake cleaner (no debris allowed).
- Install the new O-ring/gasket and install the new water pump.
- Tighten water pump fasteners in an even pattern using a torque wrench: Torque to OEM specification.
Step 11: Reinstall timing components and verify timing marks
- Reinstall tensioners and any removed guides using a metric socket set.
- Verify all timing marks still align before sealing the front cover.
- Rotate the engine by hand clockwise 2 full revolutions using a breaker bar, then re-check timing marks.
Step 12: Reseal and install the front timing cover
- Install a new front crankshaft oil seal (if removed) using a suitable driver from your socket set (flat and even).
- Apply OEM-spec RTV sealant using an RTV sealant applicator: follow bead size and path exactly (service-manual pattern).
- Install the timing cover and hand-start all bolts.
- Tighten bolts in sequence using a torque wrench: Torque to OEM specification.
- Do not over-tighten aluminum threads.
Step 13: Reinstall crank pulley and accessory belt
- Install the crank pulley.
- Install the crank bolt and tighten using a crank pulley holding tool and torque wrench: Torque to OEM specification.
- Install the accessory belt using a serpentine belt tool and verify it’s centered on every pulley.
Step 14: Reinstall fan/shroud and intake ducting
- Reinstall the fan/shroud and tighten fasteners using a metric socket set: Torque to OEM specification.
- Reconnect fan connectors.
- Reinstall intake ducting and tighten clamps using a flat-blade screwdriver.
Step 15: Refill and bleed the cooling system
- Close any drains.
- Best method: use a cooling system vacuum fill tool (it pulls a vacuum and refills without air pockets) to refill with coolant.
- If filling normally: use a funnel at the radiator/fill point and fill slowly to reduce trapped air.
- Start the engine and set heat to HOT. Let it idle and watch coolant level as the thermostat opens.
- Top off as needed and install the radiator cap once air purging stabilizes.
✅ After Repair
- Recheck coolant level after the first full warm-up and again after an overnight cool-down; top off if needed.
- Inspect for leaks around the timing cover seam, water pump area, and hoses.
- Watch the temperature gauge on the first test drive; shut down if it overheats.
- Check engine oil for a milky look (coolant contamination). If found, do not drive.
💰 DIY vs Shop Cost
Shop Cost: $1,500-$3,000 (parts + labor)
DIY Cost: $250-$600 (parts only)
You Save: $900-$2,400 by doing it yourself!
Shop labor rates vary but typically run $100-$150/hour. This repair takes a shop approximately 8-12 hours.
🎯 Ready to get started?
HowToo makes it easy: same-day/2-day shipping on every part, plus all the tools and specialty tools you need! Check out the parts and tools sections below to add everything to your cart.
