


How to Replace the Water Pump on a 2016 Honda Pilot 3.5L (J35) Timing Belt Engine
Step-by-step DIY instructions with required tools/parts, safety tips, timing mark checks, and torque specs
How to Replace the Water Pump on a 2016 Honda Pilot 3.5L (J35) Timing Belt Engine
Step-by-step DIY instructions with required tools/parts, safety tips, timing mark checks, and torque specs


🔧 Pilot - Water Pump Replacement
On your Pilot, the water pump is driven by the timing belt. Replacing it means draining coolant, removing the timing belt components, swapping the pump, then re-timing and reassembling everything carefully to prevent leaks and engine damage.
Difficulty Level: Advanced | Estimated Time: 4-7 hours
Assumption: J35 3.5L timing-belt engine; torque values may vary slightly by fastener.
⚠️ Safety & Precautions
- ⚠️ Work on a cold engine only; hot coolant can cause severe burns.
- ⚠️ Support the vehicle with jack stands; never rely on a jack.
- ⚠️ You must support the engine before removing the right-side engine mount.
- ⚠️ Keep fingers clear of belt/pulley pinch points.
- ⚠️ If timing marks are set wrong, the engine can be damaged on startup.
- 🔋 Battery disconnect is recommended: remove the negative terminal to prevent accidental cranking.
🔧 Required Tools
You'll need the following tools for this repair:
- Safety glasses
- Nitrile gloves
- Wheel chocks
- Floor jack (rated 3-ton minimum)
- Jack stands (rated 3-ton minimum)
- Drain pan (at least 10-quart)
- Funnel
- Shop rags
- Metric socket set (8mm-22mm)
- 10mm socket
- 12mm socket
- 14mm socket
- 17mm socket
- 19mm socket
- 22mm socket
- 3/8" ratchet
- 1/2" breaker bar (24" minimum)
- Torque wrench (10-250 ft-lbs range)
- Serpentine belt tool or 14mm wrench
- Flat trim clip tool
- Phillips screwdriver
- Pry bar (small)
- Engine support bar (specialty)
- Honda crank pulley holding tool (specialty)
- Harmonic balancer puller (specialty)
- Gasket scraper or plastic razor blade
🔩 Required Parts
HowToo sells all the parts you need for this repair:
- Water pump - Qty: 1
- Water pump gasket/O-ring - Qty: 1
- Timing belt - Qty: 1
- Timing belt tensioner - Qty: 1
- Timing belt idler pulley set - Qty: 1
- Serpentine belt - Qty: 1
- Honda-compatible coolant (Type 2 or equivalent Asian blue) - Qty: 2 gallons
- Radiator drain plug washer (if equipped) - Qty: 1
- RTV silicone (sensor-safe) - Qty: 1
📋 Before You Begin
- Park on level ground, set the parking brake, and chock the rear wheels.
- Let the engine cool completely (at least a few hours).
- Disconnect the battery: use a 10mm socket to remove the negative terminal and isolate it.
- Plan for coolant cleanup: place a drain pan under the radiator area.
- Take photos as you remove parts.
🔨 Step-by-Step Instructions
Follow these steps in order:
Step 1: Raise the front and remove the right front wheel
- Use a 19mm socket to loosen lug nuts slightly on the ground.
- Lift with a floor jack and support with jack stands.
- Remove the wheel with the 19mm socket.
Step 2: Remove the right-side splash shield (fender liner)
- Use a flat trim clip tool and Phillips screwdriver to remove clips/screws.
- Pull the liner back to access the crank pulley and lower timing cover area.
Step 3: Drain the coolant
- Place a drain pan (at least 10-quart) under the radiator.
- Slowly open the radiator cap (cold engine only).
- Open the radiator drain (petcock) and drain coolant into the pan.
- Use a funnel later to refill; store old coolant sealed for proper disposal.
Step 4: Remove the serpentine belt
- Use a serpentine belt tool or 14mm wrench to rotate the belt tensioner and slip the belt off.
- Draw the belt routing first.
Step 5: Support the engine
- Install an engine support bar (specialty) across the fenders and attach it to the engine lift point.
- This holds the engine up when the right engine mount comes off.
- An engine support bar holds the engine from above.
Step 6: Remove the right engine mount and bracket
- Use a 14mm socket and 17mm socket to remove the mount fasteners.
- Use a pry bar (small) gently if needed to free the mount.
- Set the mount and bracket aside in order.
- Torque to 54 Nm (40 ft-lbs) for typical mount bolts on reassembly.
Step 7: Remove the crank pulley (harmonic balancer)
- Install the Honda crank pulley holding tool (specialty) to hold the pulley.
- Use a 22mm socket with a 1/2" breaker bar (24" minimum) to loosen the crank bolt (it is very tight).
- Remove the pulley; if stuck, use a harmonic balancer puller (specialty).
- Torque to 245 Nm (181 ft-lbs) for the crank bolt on reassembly.
- Don’t use the starter bump method.
Step 8: Remove timing belt covers
- Use a 10mm socket to remove upper and lower timing cover bolts.
- Remove covers carefully and set bolts aside by location.
Step 9: Set the engine to Top Dead Center (TDC) on cylinder 1
- Use a 19mm socket on the crank (temporarily thread the crank bolt in a few turns if needed) and rotate clockwise.
- Align the crank and cam timing marks to their reference marks on the engine.
- Only rotate clockwise.
Step 10: Release timing belt tension and remove the timing belt
- Use a 12mm socket or 14mm socket (varies by fastener) to remove the tensioner fasteners.
- Remove the tensioner and slide the belt off the cam and crank sprockets.
- If replacing pulleys, remove them now using the 14mm socket.
- Torque to 22 Nm (16 ft-lbs) for typical tensioner bolts on reassembly.
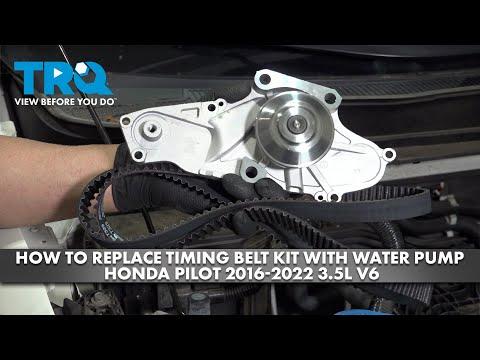
Step 11: Remove the water pump
- Place the drain pan under the pump area; more coolant will spill.
- Use a 10mm socket to remove the water pump bolts.
- Tap the pump loose gently and remove it.
- Torque to 12 Nm (9 ft-lbs) for water pump bolts on reassembly.
Step 12: Clean the sealing surface
- Use a gasket scraper or plastic razor blade to clean the engine mating surface.
- Wipe clean with shop rags. Do not gouge the aluminum.
- Apply a very small amount of RTV silicone (sensor-safe) only if your pump/gasket instructions call for it.
Step 13: Install the new water pump
- Install the new gasket/O-ring onto the new pump.
- Position the pump and hand-start all bolts.
- Use a 10mm socket to snug evenly in a crisscross pattern.
- Final tighten with a torque wrench: Torque to 12 Nm (9 ft-lbs).
Step 14: Install idlers/tensioner and the new timing belt
- Install new idler pulleys using the 14mm socket, then tighten with a torque wrench: Torque to 45 Nm (33 ft-lbs) (typical).
- Install the tensioner using the 12mm socket or 14mm socket, then tighten with a torque wrench: Torque to 22 Nm (16 ft-lbs) (typical).
- Route the new belt in the correct direction, keeping timing marks aligned.
- If the tensioner uses a retaining pin, pull the pin to apply tension after the belt is fully seated.
Step 15: Verify timing marks by rotating the engine
- Use a 19mm socket to rotate the crank clockwise two full turns.
- Re-check that crank and cam timing marks line up exactly.
- If marks do not align, remove the belt and correct it before proceeding.
Step 16: Reinstall timing covers and crank pulley
- Install timing covers using a 10mm socket.
- Reinstall crank pulley and crank bolt.
- Hold with the Honda crank pulley holding tool (specialty) and tighten using a torque wrench: Torque to 245 Nm (181 ft-lbs).
Step 17: Reinstall engine mount, serpentine belt, and splash shield
- Reinstall the right engine mount and bracket using a 14mm socket and 17mm socket.
- Tighten mount fasteners with a torque wrench: Torque to 54 Nm (40 ft-lbs) (typical).
- Install the serpentine belt using a serpentine belt tool or 14mm wrench.
- Reinstall splash shield with the flat trim clip tool and Phillips screwdriver.
Step 18: Refill and bleed the cooling system
- Close the radiator drain.
- Refill coolant using a funnel with Honda-compatible coolant.
- Reconnect the battery negative terminal using a 10mm socket.
- Start the engine and set heat to HOT; let it reach operating temp while watching the coolant level.
- Top off as needed, then install the radiator cap.
✅ After Repair
- Check for leaks around the water pump and under the vehicle with a flashlight.
- Road test 10-15 minutes, then recheck coolant level after it cools.
- Listen for unusual belt noises (squeal/whine). If heard, shut down and recheck belt routing and timing cover fit.
- Dispose of old coolant properly (most parts stores accept it).
💰 DIY vs Shop Cost
Shop Cost: $900-$1,600 (parts + labor)
DIY Cost: $180-$450 (parts only)
You Save: $720-$1,150 by doing it yourself!
Shop labor rates vary but typically run $100-$150/hour. This repair takes a shop approximately 4-7 hours.
🎯 Ready to get started?
HowToo makes it easy: same-day/2-day shipping on every part, plus all the tools and specialty tools you need! Check out the parts and tools sections below to add everything to your cart.