









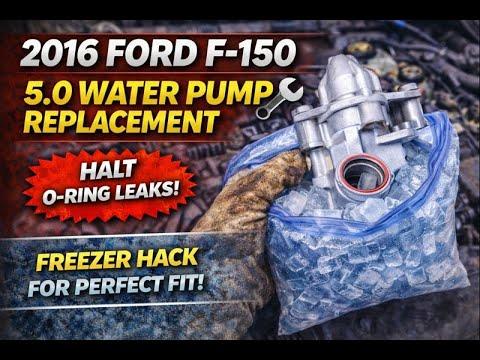






How to Replace the Water Pump on a 2016 Ford F-150 (Step-by-Step DIY Guide)
Tools, parts list, safety tips, and torque specs for a leak/noise/overheating water pump repair for 2011, 2012, 2013, 2014, 2015, 2016, 2017
How to Replace the Water Pump on a 2016 Ford F-150 (Step-by-Step DIY Guide)
Tools, parts list, safety tips, and torque specs for a leak/noise/overheating water pump repair for 2011, 2012, 2013, 2014, 2015, 2016, 2017


🔧 F-150 - Water Pump Replacement
The water pump circulates coolant through your A/C-heater core, radiator, and engine. If it’s leaking, noisy, or causing overheating, replacing it restores proper cooling and prevents engine damage.
Difficulty Level: Intermediate | Estimated Time: 3-5 hours
⚠️ Safety & Precautions
- ⚠️ Never open the coolant bottle when hot; severe burns risk.
- ⚠️ Disconnect the negative battery cable to prevent the electric fan from turning on unexpectedly.
- ⚠️ Support the truck securely if you raise it; never rely on a jack alone.
- ⚠️ Clean spills immediately; coolant is slippery and toxic to pets.
🔧 Required Tools
You'll need the following tools for this repair:
- Safety glasses
- Nitrile gloves
- Wheel chocks
- Drain pan (at least 15-quart)
- Funnel
- Shop towels
- Plastic razor blade scraper
- 3/8" drive ratchet
- 3/8" drive extension set
- 8mm socket
- 10mm socket
- 13mm socket
- Flathead screwdriver
- Hose clamp pliers
- 1/2" drive breaker bar
- Torque wrench (inch-pound)
- Torque wrench (foot-pound)
🔩 Required Parts
HowToo sells all the parts you need for this repair:
- Water pump - Qty: 1
- Water pump gasket/O-ring - Qty: 1
- Engine coolant (Ford-approved Orange coolant) - Qty: 2-3 gallons
- Distilled water - Qty: 1-2 gallons
- Serpentine belt - Qty: 1
- Hose clamps - Qty: 2-4
📋 Before You Begin
- Park on level ground, set the parking brake, and install wheel chocks.
- Let the engine cool completely (cool upper radiator hose to the touch).
- Disconnect the negative battery cable using a 10mm socket.
- Place a drain pan under the radiator area and have shop towels ready.
🔨 Step-by-Step Instructions
Follow these steps in order:
Step 1: Remove the intake duct (for working room)
- Loosen the clamps using an 8mm socket or flathead screwdriver.
- Unclip/remove the duct and set it aside.
Step 2: Drain the coolant
- Remove the coolant degas bottle cap slowly (only when fully cool).
- Position the drain pan (at least 15-quart) under the radiator area.
- Open the radiator drain (petcock) and drain coolant into the pan. Use a flathead screwdriver if your drain style accepts it.
- Tip: Keep the stream controlled with a funnel.
Step 3: Remove the electric fan/shroud assembly
- Unplug the fan connector (press the tab, then pull).
- Remove the fan/shroud fasteners using an 8mm socket.
- Lift the fan/shroud straight up and out carefully.
- Tip: Go slow—radiators bend easily.
Step 4: Loosen the water pump pulley bolts (before belt removal)
- With the belt still on, break loose the water pump pulley bolts using a 10mm socket.
- Do not remove them yet—just crack them loose.
Step 5: Remove the serpentine belt
- Place a 1/2" drive breaker bar into the belt tensioner and rotate to relieve tension. (The tensioner is a spring-loaded pulley that keeps belt tension.)
- Slip the belt off and set it aside.
Step 6: Remove the water pump pulley
- Remove the loosened pulley bolts using a 10mm socket.
- Remove the pulley and set it aside.
Step 7: Disconnect hoses from the water pump
- Use hose clamp pliers to compress the clamps and slide them back on the hose.
- Twist the hoses gently to break them free, then pull them off.
- Catch remaining coolant with the drain pan and shop towels.
Step 8: Remove the water pump
- Remove the water pump mounting bolts using a 10mm socket (use a 3/8" drive extension set as needed).
- Pull the water pump straight off the front cover.
Step 9: Clean the sealing surface
- Use a plastic razor blade scraper to remove old gasket material.
- Wipe clean with shop towels until the surface is smooth and dry.
- Tip: Do not gouge the aluminum surface.
Step 10: Install the new water pump and gasket
- Install the new gasket/O-ring onto the new pump (match its groove/shape).
- Position the pump and start all bolts by hand using a 10mm socket (do not cross-thread).
- Tighten evenly in a crisscross pattern.
- Torque to 18 Nm (13 ft-lbs) using a torque wrench (foot-pound).
Step 11: Reinstall pulley and belt
- Install the pulley and start the bolts by hand using a 10mm socket.
- Torque to 25 Nm (18 ft-lbs) using a torque wrench (foot-pound).
- Route the serpentine belt back on the pulleys and release tension using the 1/2" drive breaker bar.
- Tip: Double-check belt ribs are seated.
Step 12: Reinstall fan/shroud and intake duct
- Lower the fan/shroud into place and reinstall fasteners using an 8mm socket.
- Plug the fan connector back in firmly.
- Reinstall the intake duct and tighten clamps using an 8mm socket or flathead screwdriver.
Step 13: Refill coolant
- Mix coolant to a 50/50 ratio (unless you bought pre-mixed) using Ford-approved Orange coolant and distilled water.
- Refill through the degas bottle using a funnel until it reaches the MAX mark.
✅ After Repair
- Reconnect the negative battery cable using a 10mm socket.
- Start the engine and set the heater to HOT with the fan on medium.
- Let it idle and watch for leaks around the pump and hose connections.
- As the engine warms up, the coolant level may drop—top off as needed.
- After a full heat-soak and cool-down cycle, recheck level and top off to the MAX line.
- Check the temperature gauge stays normal during a short test drive.
💰 DIY vs Shop Cost
Shop Cost: $650-$1,100 (parts + labor)
DIY Cost: $140-$320 (parts only)
You Save: $510-$780 by doing it yourself!
Shop labor rates vary but typically run $100-$150/hour. This repair takes a shop approximately 3-5 hours.
🎯 Ready to get started?
HowToo makes it easy: same-day/2-day shipping on every part, plus all the tools and specialty tools you need! Check out the parts and tools sections below to add everything to your cart.