








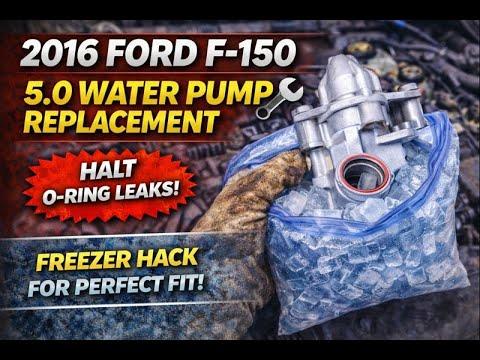



How to Replace the Water Pump on a 2016 Ford F-150 3.5L EcoBoost
Step-by-step instructions with tools, parts, safety tips, and leak checks for 2011, 2012, 2013, 2014, 2015, 2016
How to Replace the Water Pump on a 2016 Ford F-150 3.5L EcoBoost
Step-by-step instructions with tools, parts, safety tips, and leak checks for 2011, 2012, 2013, 2014, 2015, 2016


🔧 Water Pump - Replacement
Your F-150 uses a 3.5L EcoBoost water pump that is driven from the timing area, so this is a major repair. Coolant loss, leaks at the pump weep hole, or coolant in the oil all point to a failing pump and this job is typically much more involved than a standard external pump.
Difficulty Level: Advanced | Estimated Time: 8-12 hours
⚠️ Safety & Precautions
- Let the engine cool completely before opening the cooling system.
- Coolant is toxic. Keep it off skin, paint, and drive surfaces.
- This repair involves the timing cover area. Keep dirt and debris out of the engine.
- Disconnect the negative battery cable before starting.
- Support the engine if you remove any mounts or brackets that carry engine weight.
- If coolant has mixed with engine oil, do not run the engine until oil and filter are changed.
🔧 Required Tools
You'll need the following tools for this repair:
- 8mm socket
- 10mm socket
- 13mm socket
- 15mm socket
- 18mm socket
- 1/4-inch ratchet
- 3/8-inch ratchet
- 1/2-inch breaker bar
- Torque wrench
- Serpentine belt tool (specialty)
- Coolant drain pan
- Floor jack (rated 3-ton minimum)
- Jack stands
- Wheel chocks
- Drain pan
- Scraper
- Plastic trim tool
- Pliers
- Pick tool
- Clean rags
- Safety glasses
- Nitrile gloves
🔩 Required Parts
HowToo sells all the parts you need for this repair:
- Water pump - Qty: 1
- Water pump gasket/seal - Qty: 1
- Engine coolant - Qty: 2-3 gallons
- Thermostat housing gasket - Qty: 1
- Accessory drive belt - Qty: 1
- Fresh engine oil - Qty: 1 change if coolant contamination is found
- Oil filter - Qty: 1 if coolant contamination is found
📋 Before You Begin
- Park on level ground and set the parking brake.
- Let the engine cool fully.
- Disconnect the negative battery cable.
- Raise the front of the truck and support it with jack stands if you need lower access.
- Drain the cooling system into a clean pan if you want to inspect coolant condition.
- Keep bolt lengths organized.
🔨 Step-by-Step Instructions
Follow these steps in order:
Step 1: Drain the coolant
- Use a coolant drain pan to catch the coolant.
- Open the radiator drain if equipped, or remove the lower radiator hose carefully.
- Drain enough coolant to get the system below the water pump level.
Step 2: Remove intake and front accessories
- Use 8mm socket and 10mm socket to remove the air intake parts blocking access.
- Use a Serpentine belt tool (specialty) to release tension and remove the drive belt.
- Remove any brackets, covers, or splash shields blocking the front of the engine with the correct sockets.
Step 3: Remove the front engine components for access
- Use 10mm socket, 13mm socket, and 15mm socket to remove accessory brackets and related fasteners.
- If needed for access, remove the fan shroud and fan assembly with the proper sockets and a 1/2-inch breaker bar.
- Keep all fasteners in order by location.
Step 4: Remove the water pump drive area components
- Use 10mm socket and 13mm socket to remove the timing cover access pieces and pump-related brackets.
- Carefully remove any hoses attached to the pump or nearby housing with pliers.
- Do not pry on sealing surfaces.
Step 5: Remove the water pump
- Use 10mm socket to remove the water pump bolts.
- Pull the pump straight out once the bolts are removed.
- Inspect the old pump for shaft play, seal failure, and coolant tracking.
Step 6: Clean the mating surface
- Use a scraper and clean rags to clean the engine sealing surface.
- Do not gouge the aluminum surface.
- Wipe the area clean and dry.
Step 7: Install the new water pump
- Install the new water pump gasket/seal on the pump.
- Set the new pump in place by hand.
- Use 10mm socket to install the bolts finger tight first.
- Tighten the water pump bolts evenly in a crisscross pattern. Torque to 10 Nm (89 ft-lbs) if using inch-pounds? Verify final torque at service spec for your exact pump bolt set before final tightening.
Step 8: Reassemble the front of the engine
- Reinstall removed brackets, covers, hoses, and the fan assembly using the same sockets.
- Install the accessory drive belt with the Serpentine belt tool (specialty).
- Reinstall intake parts and splash shields.
Step 9: Refill and bleed the cooling system
- Refill with the correct engine coolant.
- Use the degas bottle and fill slowly to reduce air pockets.
- Start the engine and let it reach operating temperature with the heater on hot.
- Top off coolant as the level drops.
Step 10: Check for leaks
- Inspect the pump area, hoses, and drain points while the engine is running.
- Shut the engine off and recheck the coolant level after it cools.
- If coolant entered the oil, perform an immediate oil and filter change.
✅ After Repair
- Test drive and watch the temperature gauge.
- Recheck coolant level after one full heat cycle.
- Inspect the oil for a milky color over the next few drives.
- Listen for belt noise or coolant seepage from the front cover area.
💰 DIY vs Shop Cost
Shop Cost: $1,400-$2,400 (parts + labor)
DIY Cost: $180-$450 (parts only)
You Save: $950-$1,950 by doing it yourself!
Shop labor rates vary but typically run $100-$150/hour. This repair takes a shop approximately 8-12 hours.
🎯 Ready to get started?
HowToo makes it easy: same-day/2-day shipping on every part, plus all the tools and specialty tools you need! Check out the parts and tools sections below to add everything to your cart.